
Yes, you can retrofit a sprinkler zone to drip irrigation by capping the sprinkler head, screwing on a 1/2‑inch female‑thread adapter with Teflon tape, and attaching 1/2‑inch polyethylene or 1/4‑inch micro‑tubing. Install a pressure regulator and fine‑mesh filter to drop the system from the typical 30‑50 PSI sprinkler range to the 15‑30 PSI drip range, and use barbed fittings to connect emitters. Verify flow by flushing at 0.5 m/s and checking GPH limits; the next sections will walk you through sizing, layout, and troubleshooting.
Can I Connect Drip Irrigation to My Sprinkler System?
If you turn off the sprinkler controller and cap any unused risers, you can convert a standard sprinkler head into a drip‑irrigation outlet by installing a 1/2‑inch female‑thread adapter on the riser, then attaching the appropriate polyethylene or micro‑tubing. The conversion process begins with removing the head, exposing the MPT, then capping unused risers with a PVC plug and Teflon tape. Install a conversion fitting (FPT inlet) and connect 1/2‑inch polyethylene or 1/4‑inch micro tubing. Benefits of conversion include targeted water delivery, reduced runoff, and lower water use. Pros and cons of conversion are clear: you gain precision and savings, but you must manage pressure reduction, additional fittings, and periodic emitter maintenance. Test for leaks, adjust controller timing, and verify emitter flow before re‑burial. Properly use a 5‑gallon bucket to catch excess water during testing. Selecting the appropriate drip emitter ensures uniform distribution across the planting area. Understanding pressure zones helps prevent uneven watering when combining systems. Fire sprinkler activation thresholds are typically set around 155 °F (68 °C) for standard sprinklers, providing a reference point for safe temperature limits in fire protection design.
How Does Sprinkler Pressure Differ From Drip Irrigation Requirements?
Pressure is the key differentiator between sprinkler and drip systems: sprinklers need 30‑50 PSI to generate a spray pattern, while drip irrigation operates efficiently at 15‑30 PSI, often throttled to 12 PSI for tape emitters. You must match pressure compatibility to avoid misting or dry spots. Sprinklers use GPM‑scaled flow; a 5 % pressure shift can alter GPM dramatically, whereas drip emitters report GPH and tolerate a 5 % pressure change with a 10 % flow‑rate variation. High‑pressure zones (>240 GPH) require splitting to keep drip flow within limits. Elevation changes add 1 PSI per 2.31 ft, affecting both systems. Filters protect low‑pressure drip lines, while sprinklers lose 30‑40 % of water to evaporation and wind. Align regulators, filters, and pipe diameters to maintain precise flow‑rate differences and ideal efficiency. Some sprinkler valves incorporate built‑in pressure regulators to simplify system design. Properly sizing the pump based on hydraulic demand ensures both systems operate within their optimal pressure ranges. Understanding the system’s elevation profile helps prevent under‑ or over‑pressurization across the network.

Maintains optimum 25 psi pressure and water flow to Drip lines and emitter devices

Ideal for installations requiring lower flows such as solid set, drip line, soaker hose and other low pressure agriculture, residential and commercial irrigation. This PRLG (Pressure Regulator Landscape Grade) maintains a constant outlet pressure of 25 PSI (1.72 bar) with a flow range between 0.5 - 7 GPM (114 - 1590 L/hr).

25 PSI preset pressure regulators (hose thread) are used to reduce and regulate the incoming pressure of a household’s water entering a drip irrigation or micro sprinkler system to the appropriate operating pressure of 25 PSI,Pressure Compensation Range: 30-100 PSI.
Which Conversion Fittings & Adapters Are Required for Drip Irrigation?
Matching the pressure range you just examined, you’ll need specific conversion fittings to attach drip emitters to existing sprinkler risers. The primary types of conversion fittings include 1/2‑in. FPT adapters with 1/4‑in. barbs, universal pop‑up adapters, and reducing couplers such as P3412TRC that convert 3/4‑in. risers to 1/2‑in. threads. Riser thread requirements dictate that most drip kits expect a 1/2‑in. threaded bottom inlet; if your system uses ¾‑in. risers, install a reducing coupler before the 1/2‑in. adapter. Attach a pressure regulator (30 PSI or 25 PSI) and fine‑mesh filter directly to the adapter, then connect 1/4‑in. drip tubing or a 0.700 O.D. swivel tee. Cap any unused risers with appropriate caps to prevent leaks. Schedule 40 PVC is generally not approved for sprinkler systems due to its pressure limitations and code restrictions. Ensure that the ¾‑inch garden hose thread matches the riser size for a secure connection. Selecting the correct garden hose thread size helps maintain a leak‑free, efficient watering setup.

Add Drip irrigation to any riser-mounted high-pressure sprinkler system
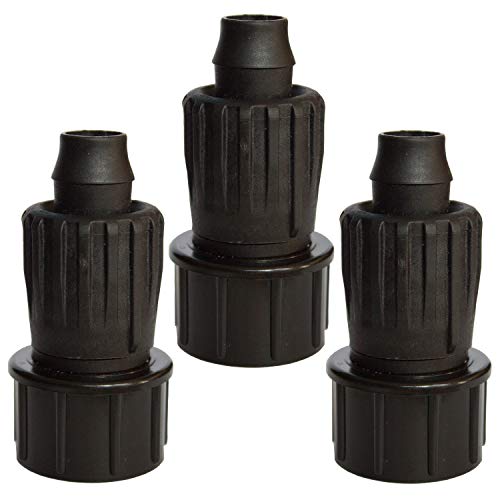
Easy To Use: Easily connect 1/2" drip irrigation tubing to any standard 3/4" faucet, hose bibb or garden hose. Just insert and twist, no special tools needed. Each swivel irrigation fitting includes a pre-installed rubber washer to provide a water-tight seal.

【UPGRADED LOCKING STABILITY】 Engineered with an advanced thread lock nut system that tightly clamps the distribution line. This dual-action mechanism ensures your 1/2 inch drip irrigation tubing remains firmly attached to the water source, avoiding high-pressure blowouts or slippage during temperature fluctuations.
What Are the Step‑by‑Step Installation Instructions?
Before you start, shut off the zone’s valve, remove the selected spray head, and expose the riser so you can work without contaminating the line. Identify a single spray head per zone, cap the others, and dig to the riser if buried. Apply Teflon tape, then screw the 1/2‑inch conversion adapter onto the riser’s male thread, using a reducing coupler for 3/4‑inch risers. Attach a 1/2‑inch polyethylene hose to the adapter outlet, unroll the main drip line, and stake it without pinching. Cap the line end, then couple 1/4‑inch distribution tubing with barbed fittings, cut to length, and cap each branch. Punch holes in the main line, insert emitters sized for plant demand, and secure with double‑barbed connectors. This schematic approach maximizes water conservation benefits and simplifies future system maintenance needs. Use a quarter inch drip line for built‑in emitters when covering small planting areas. Ensure the controller wiring follows the proper safety guidelines to prevent electrical hazards. The system’s low‑voltage supply can be powered by a solar panel to reduce energy consumption. Proper zone pressure balancing helps prevent uneven watering across the landscape.

【1/2 inch Drip Irrigation Hose Connectors】Convert 3/4" garden faucet to 1/2" tube, to attach 1/2" drip tubing to standard outdoor faucet or hose.

Easy & Simple Installation: Connect 1/2" drip irrigation tubing to any standard 3/4" garden hose, outdoor faucet, hose bib, or timer. Simply push the tubing onto the fitting and twist the swivel nut to tighten—no special tools required. Each adapter includes a pre-installed rubber washer for a secure, leak-resistant connection. Not for use with drip tape.

How to Flush, Leak‑Test, and Set Valve Pressure for Drip Irrigation?
Now that the conversion adapter and drip tubing are in place, you’ll need to flush the system, leak‑test each emitter, and set the correct valve pressure to guarantee reliable operation. First, pressurize the mains to at least 1.0 ft/sec, then open flush points at the dripline ends in groups of fewer than ten. Maintain a 1 ft/sec velocity for two minutes or until water runs clear, then repeat for sub‑mains and laterals. After flushing, run a full‑volume cycle, walk the zone, and inspect every emitter for leaks or clogs; replace any defective unit with an identical flow‑rate part. Finally, verify system pressure sequencing by confirming that back‑flush valves, pressure differential switches, and controllers hold the operating pressure, and meet filter maintenance requirements before each pressure test. Ensure that the minimum flow velocity of 0.5 m/s is achieved during flushing to effectively remove sediment. Proper sizing of the system also depends on calculating the required gallons per minute based on sprinkler head flow rates and coverage area. Understanding water distribution principles helps maximize efficiency and reduce waste. The irrigation zones must be balanced to maintain consistent pressure throughout the network.
How Should I Choose Tubing Length and Emitter Layout?
A 200‑foot run of 1/2‑inch mainline feeding a 30‑foot 1/4‑inch dripline can deliver 200 GPH while staying within the 30‑foot limit for the smaller tubing, so you’ll need to size each segment to its longest permissible length and its required flow. Begin tubing diameter selection by matching total GPH to pipe capacity: 1/4‑inch for ≤30 GPH, 1/2‑inch for up to 200 GPH, 3/4‑inch for 300‑480 GPH, and 1‑inch for >480 GPH. Calculate allowable run length from water entry, keeping drip tube ≤200 ft and mainline + laterals ≤400 ft. Apply an emitter placement strategy based on spacing tables—6‑inch for 0.5 GPH on 1/4‑inch, 9‑24‑inch for 0.5 GPH on 1/2‑inch, 12‑18‑inch for 1.0 GPH. Align emitter spacing with plant density and soil type, then verify pressure loss before finalizing layout. Friction loss must be checked for each pipe size to ensure the system operates within acceptable pressure limits. Understanding zone grouping helps balance water distribution across varied plant types and sun exposure. Properly accounting for soil infiltration ensures each zone receives the right amount of water without runoff. The effectiveness of the system also depends on accurate water pressure management to maintain consistent flow throughout all zones.
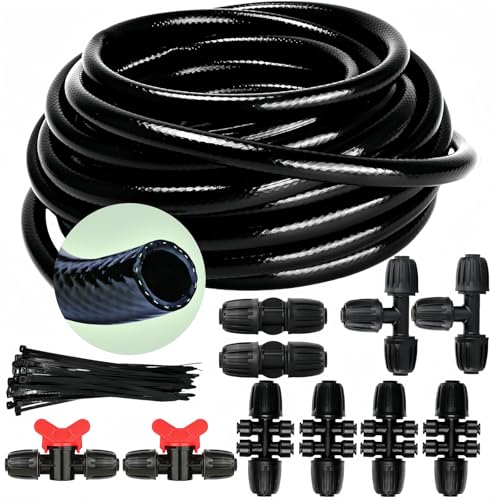
1/2 INCH IRRIGATION TUBING : This 1/2 inch drip irrigation tube is designed as the main supply line connected to low-flow drip irrigation systems. It serves as a feeder branching off from larger pipes or tubes to deliver water to various drip irrigation components. Compatible with other irrigation accessories, it ensures efficient watering for your plants.

Dimensions: 1/2 in. inner diameter (ID) x 20 ft. length

CUSTOMIZED FIT & PRECISE DIMENSIONS: Harness the power of our high-performance 1/2 inch irrigation tubing to craft your own tailored watering system, featuring an 0.5-inch inner diameter and 0.63in outer diameter that makes it the ultimate main line for any garden, flower bed, or greenhouse. It offers seamless integration with most universal fittings, while we recommend using connectors specifically designed for flexible irrigation tubing – a quick check of your existing fitting sizes before purchase ensures a flawless, leak-free setup every time
What Are the Most Common Troubleshooting Issues and How Do I Fix Them Quickly?
Sizing each tubing segment to its maximum permissible length and flow rate sets the stage for troubleshooting; once the layout is correct, you’ll encounter four primary issues: clogging, leaks, low pressure, and inadequate run times. For clogging, run a high‑pressure burst through each emitter, replace the last emitter first, and install a media‑based filter as part of proper component selection; schedule frequent system inspection to catch mineral buildup. Leaks demand thread‑type matching, washer replacement, and hot‑water softening of poly tubing before coupler attachment. Low pressure calls for friction‑loss calculations, regulator adjustment, and pump‑line suction checks; verify each zone’s pressure‑compensating valve. Inadequate run times require emitter‑output data, soil‑type coefficients, and pre‑irrigation on slopes; adjust controller timing per precipitation‑rate charts. Understanding valve body operation helps prevent many of these problems. Regularly test for uneven watering to catch early valve failures.

Prevents clogging of downstream Drip irrigation components
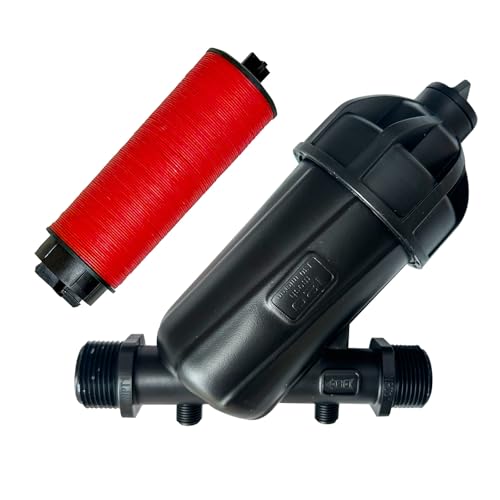
Useful Y-filter controls debris. Deep bed filter, effectively filter impurities, protects and prevents clogging of downstream Drip irrigation components

For removing debris from and minimizing clogging in drip and sprinkler systems
When Should I Hire a Professional Instead of Doing It Myself?
If you lack the technical expertise to handle plumbing, pressure regulation, and electrical components, you should hire a professional rather than attempt DIY repairs. Complex sprinkler networks require precise pressure calculations; a 5‑psi deviation can trigger water hammer, costing up to $1,200 in pipe replacement. Professionals read local codes, secure permits, and install commercial‑grade valves that guarantee system life by 30 %. They also schedule seasonal start‑up to avoid freeze damage, which statistically reduces emergency repairs by 45 %. When you supervise DIY installations, you must still allocate time for managing ongoing maintenance, including valve sequencing and backflow testing. In contrast, a licensed technician provides warranty‑backed labor, certifies compliance, and delivers long‑term cost savings that outweigh the initial service fee.


