You start by connecting the main water line to a back‑flow preventer, then run PVC pipe to each zone’s solenoid‑controlled valve. When the controller activates a zone, the solenoid opens the diaphragm valve, letting pressurized water flow through poly tubing to the sprinkler heads, which oscillate at preset angles. Choose valve size and material based on flow rate, install tight connections, and wire the solenoids to a common feed with a manual override. Map your landscape into zones, set run times, and fine‑tune schedules for efficiency—more details await if you keep going.
How Water Moves Through Your Sprinkler System
One’s water journey begins at the city meter or utility supply, where it enters the mainline PVC pipe. From there, the pipe carries water to the backflow preventer and any master valve, preserving flow properties and pressure regulation until a zone activates. When the controller signals a solenoid, the electromagnet lifts the plunger, allowing water from the bonnet chamber to reach the diaphragm. Higher inlet pressure pushes the diaphragm upward, opening the valve and sending water into zone‑specific PVC or poly tubing. The tubing delivers water to lateral lines, which feed sprinkler heads. As pressure builds, heads spray or rotate, then shut off when pressure drops at the cycle’s end. This precise sequence maintains consistent flow and pressure throughout the system. The rotary detent mechanism in the directional control ensures precise oscillation angles. Properly sized pressure regulator helps maintain uniform water distribution across all zones. Understanding the role of the solenoid is essential for troubleshooting valve operation. Selecting a compatible solenoid involves checking its voltage rating to match the controller’s power supply.
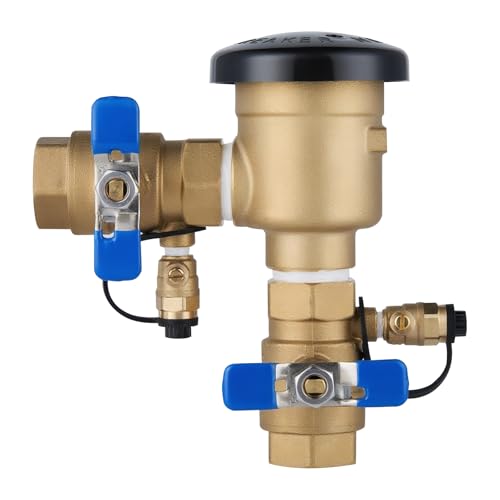
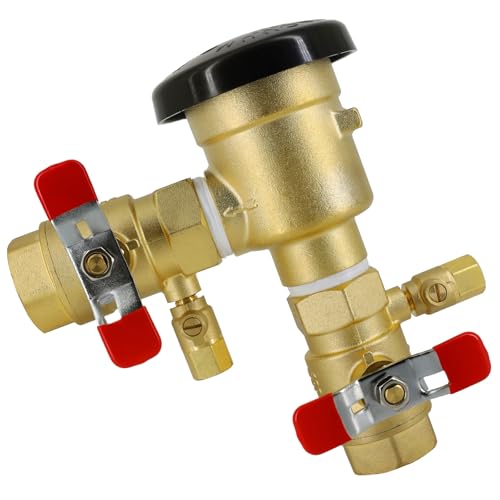
Choose Valves and Install Backflow Protection
Choosing the right valves and installing proper backflow protection is essential for a reliable irrigation system. First, assess flow rate and pick a valve size—3/4‑inch for 8‑10 gpm, 1‑inch for over 15 gpm. Then make a valve material selection: plastic composite for most residential zones, brass or metal for heavy‑duty sites. Choose a valve installation location that matches the valve type: globe valves go inline in buried boxes, angle valves fit bent runs, and anti‑siphon valves sit above ground. Install a double‑check assembly or pressure vacuum breaker on the pressure side before the valve, unless you use an anti‑siphon valve, which already incorporates backflow protection. Verify local code requirements, secure the valve box is at least 10 inches in diameter, and keep connections tight—slip, threaded, or barbed—to prevent leaks. This systematic approach guarantees consistent water delivery and safeguards against contamination. Backflow preventer devices are typically installed near the water main or at the point where the irrigation line connects to the household supply. Proper backflow protection also helps meet municipal health standards. anti‑siphon valve devices are required when the irrigation system is connected to a potable water supply to prevent contaminated water from flowing backward into the public water system.
Premium Thickened Brass for Lasting Durability:Crafted from high-strength thickened brass, the 3/4" 720A Pressure Vacuum Breaker Assembly delivers exceptional corrosion resistance. Rated for operating pressures up to 400 PSI, it ensures reliable protection for water systems in both commercial and residential settings. Its solid construction guarantees consistent performance and extended service life, offering a trustworthy solution for essential water safety management.
Compatibility – 3/4" 720A pressure vacuum breaker fits most residential and commercial irrigation systems, garden sprinklers, hose bibs, and outdoor water lines.MAX 400PSI

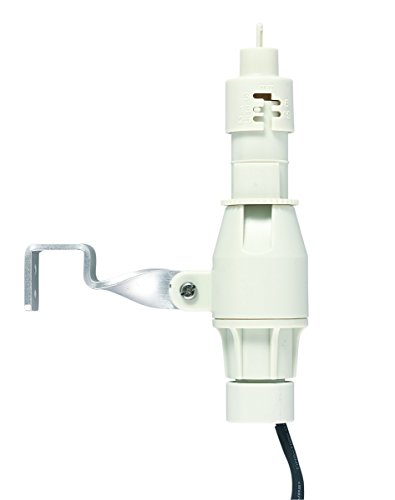
#1 commercial-grade irrigation spray head brand in the world
Install Pipes, Connect Valves, and Wire Solenoids
Start by turning off the water and relieving pressure. Cut the main line with a pipe cutter, then clean and deburr each end. Apply pipe cement or thread‑seal tape, depending on material, and tighten adapters or compression rings. Allow the cement to cure before proceeding. Attach each solenoid valve to its zone line, aligning the flow arrow with water direction and using the same sealing method as the main line. Secure manifolds for easy swaps in multi‑valve setups. For wiring, strip each solenoid wire half aninch and splice to the common feed with wire nuts, ensuring a reliable secondary power supply connection. Install a manual control override switch near the controller for emergency shut‑off. Verify all joints are leak‑free before restoring water pressure. Solenoid failure causes system malfunction. Low‑voltage power is typically used to operate the solenoids, reducing energy consumption and allowing easy integration with battery backup or solar options. A faulty solenoid can produce irregular watering and click noises, indicating the need for voltage checks and cleaning. Not all zones require a solenoid, as some systems use manual or mechanical valves depending on design.

Manifold to poly pipe adapter - Male manifold threaded fitting with large sealing surface for O-rings connects to 3/4" HDPE poly pipe using spiral barb design for easy insertion and secure grip

Voltage: DC 12V. Thread Size : 3/4" G. Working Temperature : 32-212°F ,Working Pressure : 0.01~0.8Mpa

Constructed of industrial grade brass, this valve is corrosion resistant, more conducive for welding, optimal for higher temperature projects, and can be used with gasoline, diesel fuel, kerosene oil, natural gas, air etc. Due to the chemical composition of brass, this valve should NOT be used with projects involving drinking water or other water projects.
Program Zones and Schedules for Water‑Saving Results
When you program zones and schedules, begin by mapping each landscape area to a specific zone based on its water‑use characteristics, then assign those zones to the controller’s programs (A, B, C) with appropriate frequencies. First, calculate the one‑inch base run time for each zone, then set that value at 100 % of the summer water budget. Next, adjust watering frequency per program: Program A for high‑need turf, Program B for moderate gardens, Program C for low‑need shrubs. Use the controller’s day‑interval dial to select every‑other‑day or twice‑weekly cycles, and set start times between 5 a.m. and 10 a.m. to reduce evaporation. Finally, optimize sprinkler head layout within each zone, ensuring overlap without overspray, and revisit the schedule after rain events or seasonal changes. Automated watering also helps conserve water by delivering precise amounts based on soil moisture readings. Understanding timer types can further enhance efficiency and reliability. Consider local frost dates when planning early‑season start times to avoid damage.
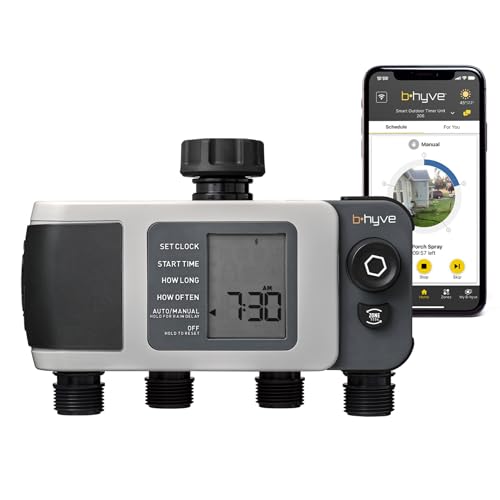
Automated Smart Watering: The Orbit 4-Port Smart Hose Watering Timer delivers effortless auto watering through an intelligent watering timer system

Intelligent Irrigation Control: The Orbit Smart Sprinkler Controller manages watering with a powerful smart sprinkler that supports a completely automatic watering system

WI-FI CAPABLE WITH SMART UPGRADE OPTION: Add the optional WAND module (sold separately) to enable Hydrawise smart control for remote access, real-time alerts, and advanced weather-based automation.
Troubleshoot Common Sprinkler System Issues
Ever notice a sprinkler that never rises or sprays unevenly? First, inspect each head for clogs; sand, dirt, or mineral deposits block flow, creating brown spots. Use a small brush or nozzle‑cleaning tool, and replace severely blocked nozzles. Next, check for broken or misaligned heads caused by mower passes or foot traffic—unscrew the damaged unit and install a matching replacement, then run a test cycle to confirm proper pop‑up. Examine the lawn for straight‑line wet areas that signal underground pipe leaks, and tighten any loose valve fittings; replace persistently leaking valves. Verify main supply valves are fully open and assess pressure regulators for low‑pressure symptoms. Finally, if schedules erratic, consider detecting lawn system controllers and inspect wiring for loose connections or blown fuses. Cracked seals can also cause leaks and should be inspected regularly. Debris buildup can further restrict water flow and should be cleared during routine maintenance. Schedule a bi‑annual inspection to catch issues early and maintain water conservation.

Effortlessly Remove Turf and Access Sprinkler Caps: The KUT-IT 2-in-1 tool is designed to clear grass and soil around sprinkler heads while allowing for quick cap removal without digging.

2.75" Sprinkler Head grass Trimmer: Engineered as a high-performance sprinkler head grass cutter, this 2.75" stainless steel sprinkler sod cutter delivers clean, accurate trimming around sprinkler heads without damaging surrounding turf.
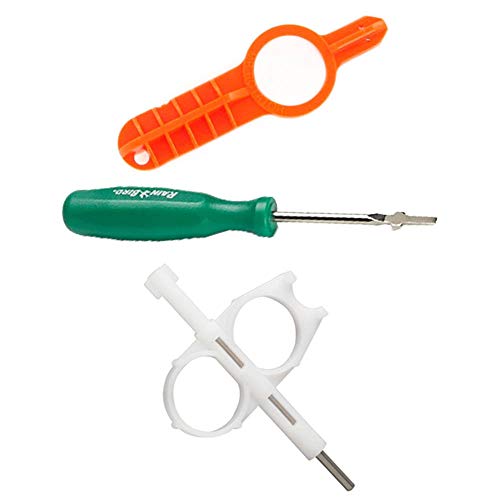
Hunter Key
Maintain Your Sprinkler System Year‑Round
If you keep a regular schedule, your sprinkler system will stay efficient and avoid costly repairs. Begin each month on the first Saturday with regular sprinkler system inspections: check every head for damage, clogging, or misalignment, verify even spray, and test pressure. While inspecting, monitor for potential leaks and note any irregular flow. In spring, turn on the water supply, look for freeze damage, and adjust zones for new growth. Summer work includes zone‑by‑zone testing, clearing blockages, cleaning nozzles, and installing a rain sensor. In fall, shut off water, blow out lines, drain backflow preventers, and protect exposed pipes. Schedule a professional service once a year, test backflow prevention annually, and update controller settings based on weather patterns. Remember to blow out the system before winter to prevent frozen‑pipe damage. When temperatures dip below freezing point, consider disabling irrigation to avoid pipe bursts. Knowing the freezing threshold helps you anticipate when water may solidify in pipes.
For automatically detecting rainfall or low temperature conditions

Automatically shuts off and restarts sprinkler system when it rains, saving both water and money

Wireless Rain-Click can command a controller to shut off right when it starts to rain


