You send a 24 VAC pulse to the solenoid, which pulls the plunger and opens the pilot port. The pressure‑balanced diaphragm lifts, equalizing pressure between the inlet and the upper chamber, and water rushes through the flow‑metered outlet. When the signal stops, the spring snaps the plunger back, resealing the pilot port; the diaphragm is forced down by the upper‑chamber pressure, shutting the valve in 1‑3 seconds. This cycle repeats for each zone, delivering precise flow while conserving water, and the next sections show how to size, install, and troubleshoot these valves for ideal performance.
What a Sprinkler Valve Does (and Why It Matters)
When you activate a sprinkler system, the valve translates the control‑box signal into a precise water‑flow change for a specific zone. The valve’s design features—solenoid‑driven plunger, diaphragm seat, and pilot‑flow filter—coordinate to shift pressure differentials within milliseconds. Electricity energizes the solenoid, lifting the plunger and venting the bonnet chamber; the resulting pressure drop lets inlet water push the diaphragm off its seat, opening the outlet. When power cuts, the plunger drops, the pilot flow refills the bonnet, and the higher top‑side pressure forces the diaphragm back, sealing the flow. This valve response time determines how accurately you can schedule zone‑specific irrigation, preventing over- or under‑watering and conserving water while maintaining plant health. The forward flow design allows water to rise from under the valve seat, improving performance in low‑flow situations. The compact cylindrical housing often includes a transparent cover that reveals the internal diaphragm for easy inspection. Some valves incorporate a built‑in pressure regulator to maintain consistent flow despite fluctuating line pressure. Properly sized main and ensure that each valve receives adequate water pressure for optimal operation.
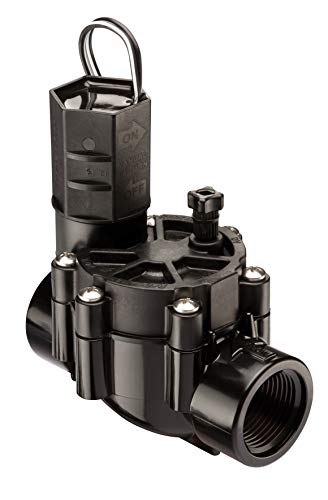
Residential / light commercial grade 1" female threaded inlet and outlet valve
For controlling the flow of water in sprinkler or drip irrigation zones; 24 VAC solenoid includes manual actuation with a twist of the solenoid
BUILT-IN FLOW CONTROL FOR ZONE PRECISION: Control water flow to each irrigation zone and prevent overwatering. Helps improve system efficiency, reduce misting, and support healthier landscapes.
Valve Anatomy – Key Parts & Roles
The valve’s anatomy breaks down into three core sections—top, interior, and base—each serving a distinct function while sharing identical internal mechanics regardless of whether the body is a screw‑top or jar‑top design. The top component accessibility lets you remove screws or unscrew the collar to expose the solenoid, plunger seal, and bleed screw, while the interior houses the diaphragm, spring, and pilot‑flow filter that regulate pressure. The base remains fixed, anchoring the bonnet chamber and providing a sturdy mount for the inlet and outlet ports; it rarely fails unless struck by external forces. Internal wear patterns appear on the rubber diaphragm seal and spring coils, indicating how often the valve cycles. Understanding these parts helps you diagnose issues and maintain ideal performance. A master valve prevents constant pressurization when the system is idle, protecting components from wear. Some zones may use a manual valve instead of a solenoid, allowing direct control without electronic actuation. Compatibility between a solenoid and a sprinkler model depends on matching voltage and pressure specifications.

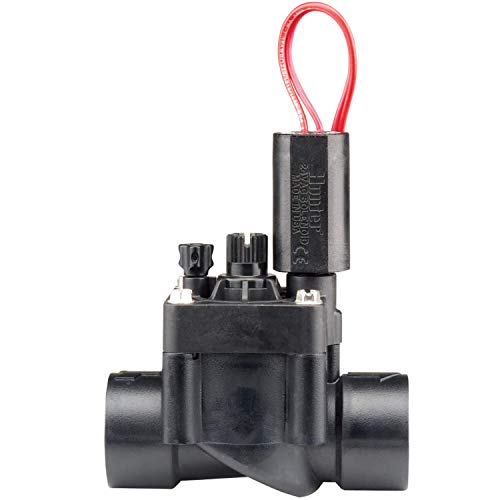
Captive hex plunger feature

24VAC Standard Voltage for Irrigation Systems: Designed for 24VAC sprinkler and irrigation control systems, delivering stable and responsive valve operation. Ideal replacement solenoid for residential and commercial irrigation valves

PREVENT WATER BACKFLOW - Our automatic anti-siphon valve with an atmospheric vacuum breaker protects your irrigation system and culinary system from water contamination.
Closed‑Valve Cycle – When the Valve Is Off
Knowing the diaphragm’s seat and the spring‑loaded plunger lets you see why the valve stays shut once the controller cuts power. When the 24 VAC signal ends, the solenoid’s electromagnetic field collapses instantly, and the return spring drives the plunger down, sealing the pilot port. Water pressure then rebuilds in the upper chamber through the bleed hole, pushing the diaphragm back onto its seat within one to three seconds. The upper‑chamber pressure equals or exceeds inlet pressure, and the larger surface area on top creates a net downward force that overcomes any upward load. This self‑flushing mechanism clears debris while the spring‑driven closure provides reliable water pressure management and fail‑close safety without electrical power. The pilot flow filter ensures that only clean water reaches the diaphragm chamber. Regular inspection can catch low pressure early, preventing uneven watering and potential valve damage. Deteriorated sprinkler wire can cause intermittent valve operation, especially when rodent damage compromises the connection. Irregular watering is also a common sign of a failing solenoid, indicating that the valve may not be opening or closing correctly.
Opening Cycle – 24 VAC Starts Flow
Once the controller applies the 24 VAC signal, the solenoid coil draws its 0.30 A inrush current and quickly establishes a magnetic field that pulls the plunger upward. The 38 Ω solenoid coil resistance restricts the inrush to 0.30 A, then settles to a 0.23 A holding current that maintains magnetic force. As the plunger retracts, the diaphragm lifts off its seat, creating a clear passage for water. Pressure equalizes across the diaphragm, and flow initiates within seconds. The holding current effects keep the plunger in the retracted position for the programmed zone duration, preventing the diaphragm from reseating. Continuous 24 VAC thereby sustains the open state until power is removed. Manual valve operation can be used as a backup if the solenoid fails. Modern systems often incorporate low‑voltage power supplies to improve energy efficiency and safety. Regular inspection can reveal water quality issues that accelerate valve wear. Properly sealing the pipe joints prevents leakage that could compromise system performance.
Closing Cycle – Valve Shuts Off After Power
When the controller cuts the 24 VAC signal, the solenoid’s magnetic field collapses instantly, allowing the return spring to drive the plunger back down and reseal the pilot port. You then observe plunger positioning shift from the lifted, flow‑allowing state to the sealed position at the bottom of the solenoid housing. The spring’s force, now unopposed, pushes the diaphragm against its seat, creating a pressure differential: pressure above the diaphragm rises above the pressure below, forcing the diaphragm to reseat and block flow. Simultaneously, water bleeds into the upper chamber through the bleed hole, rebuilding pressure until the pilot port is fully closed. The valve completes its shutdown within 1–3 seconds, conserving energy and preventing further water discharge. This process relies on the pressure differential across the diaphragm to ensure a reliable seal. A common cause of leaks after shutdown is a faulty valve that fails to reseat properly. Most sprinkler solenoids are polarity‑agnostic, so they work regardless of wiring direction. Properly sealing the valve housing can also protect against moisture intrusion that may degrade components over time.
Sprinkler Valve Troubleshooting Issues & Fast Fixes
Need you notice a valve isn’t responding or is leaking, start by confirming the controller’s schedule, water supply status, and voltage at the solenoid before moving to mechanical inspection. If the valve stays closed, verify the control valve is open counter‑clockwise and that the solenoid receives at least 24 V; replace a faulty solenoid or clear a clogged exhaust. For leaks, perform diaphragm troubleshooting: remove the diaphragm, inspect for tears or debris, and replace if damaged. When the bonnet cracks or the seat erodes, schedule valve bonnet repair or full valve replacement. Stuck mechanisms often hide rocks or dirt in the stem; extract debris with a screwdriver, clean, and lubricate. Test pressure, adjust flow control, and guarantee the solenoid plunger seats correctly to stop continuous flow. Check wiring resistance to ensure it falls within the 20‑60 ohms range before replacing the valve. Regularly inspect for corroded seals to prevent early leakage. Conduct a seasonal system inspection after heavy storms to catch any new clogs or pressure changes. Metal detection can be employed to locate buried valve bodies when visual access is limited.

Replacement solenoid for Rain Bird APAS, ASVF, ECV, CP, CPF model valves

Check Before Installing: If your old solenoid has ribs or a collar above the threads, that's a separate adapter - reuse it by threading it back onto your valve before installing this solenoid

For replacing solenoids which open and close 24V automatic irrigation valves
Choosing & Maintaining Sprinkler Valves for Efficient Irrigation
If a valve isn’t responding or is leaking, first verify the controller schedule, water supply, and solenoid voltage before moving to mechanical checks; then focus on selecting the right valve size, type, and material to keep flow steady and pressure stable. Match the valve diameter to the pipe—3/4‑inch for 8‑10 GPM, 1‑inch for >15 GPM—allowing a slight oversize to reduce resistance. Choose a valve rated above the system’s maximum pressure and account for pressure loss across the body. For underground lines, prefer angle or inline valves; use anti‑siphon valves above ground where backflow prevention is required. Opt for brass or stainless steel for valve corrosion resistance; PVC works in low‑pressure, clean water setups. Install self‑cleaning valve filters or 200‑mesh screens upstream to trap debris, and add a strainer if the source is a well or stream. Verify 24 VAC compatibility and consider a pressure‑reducing valve if input exceeds 60 PSI. Understanding head loss helps ensure the pump can maintain adequate pressure throughout the system. Properly evaluating elevation changes is essential for determining whether a pump is needed to overcome gravity‑induced pressure drops.

For controlling the flow of water in sprinkler or drip irrigation zones; 24 VAC solenoid includes manual actuation with a twist of the solenoid
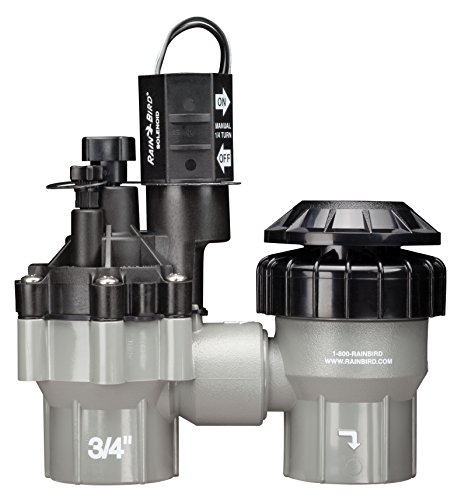
Professional grade 3/4" anti-siphon valve with flow control; compatible with any standard sprinkler timer

Complete Flow Control: 3/4 inch inline ball valves (2 Pack) are the perfect way to regulate the water flow of your aquatic, hydroponic, or drip irrigation systems with a simple turn of the knob. Slip your tubing onto the barbed ends of this shut-off valve coupling to control, disperse, slow, divert or completely stop water flow.
Sprinkler Valve Benefits for Water Conservation
Because modern sprinkler valves integrate automatic shut‑off, pressure regulation, and flow‑metering, they can slash water use by 30‑50 % versus surface irrigation while keeping delivery uniform. You’ll see that the valve’s sensor‑driven shut‑off cuts consumption by up to 51 % during peak demand, while pressure regulators maintain steady flow, preventing misting and runoff. Flow‑metering delivers 1/2‑3/4 inches per cycle, matching calibrated rates to soil type. Coupled with soil moisture monitoring, the system adjusts delivery in real time, eliminating overwatering and supporting landscape conservation. Integrated check valves and master‑valve leak detection preserve uniformity at 80‑85 % and reduce waste, translating into thousands of gallons saved and lower utility costs. Modern systems also employ soil moisture sensors that fine‑tune irrigation schedules based on real‑time ground conditions.
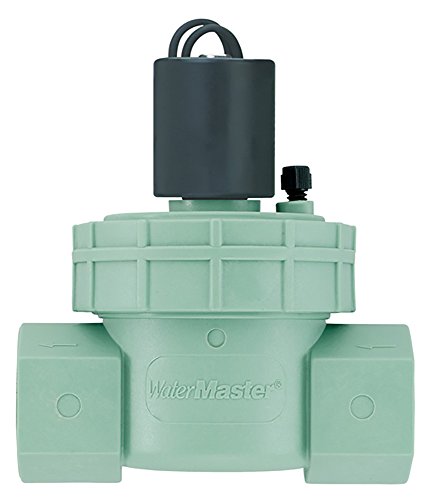
For controlling the flow of water in sprinkler or drip irrigation zones; 25 VAC solenoid includes manual actuation with a twist of the solenoid

Residential / light commercial grade 3/4" female threaded inlet and outlet valve

For repairing the valve and anti-siphon seals in manual anti-siphon valves


