Measure your lawn’s area, then divide by roughly 130 sq ft—the typical coverage per sprinkler head. Adjust that number for terrain: boost head density 20‑30 % in full‑sun spots, reduce it 10‑25 % in shade, and tighten spacing on slopes to keep pressure uniform. Keep heads no more than 15 ft apart and aim for 90 % of the spray radius in windy conditions. Match the head flow to your zone’s GPM and PSI, then fine‑tune the layout for ideal water use and cost efficiency. Continue for deeper design details.
Determine Ideal Heads for Sprinkler Zone Design
When you size a sprinkler zone, start by matching the total gallons‑per‑minute (GPM) demand of the heads to the system’s available flow. First, list each head’s GPM from the performance chart, then sum them and guarantee the total stays within the home’s GPM capacity after subtracting 20‑25 psi for dynamic losses. Group like heads together—spray, rotary, or flood—to keep pressure uniform and avoid cross‑type interference. Apply spacing allowances that respect each head’s throw distance; spray heads stay 5‑15 ft apart, while rotaries may stretch to 35 ft if pressure exceeds 36 psi. Finally, factor nozzle adjustment considerations: choose adjustable nozzles for irregular zones, and fine‑tune flow to balance overlap, conserve water, and sustain even coverage. Use a friction loss chart to estimate additional pressure drop caused by pipe length and fittings. Incorporate a flow‑rate calculation to verify that the summed GPM does not exceed the main supply’s capacity. Remember that a typical sprinkler zone can effectively cover up to 600 sq ft while maintaining proper spray patterns. Modern systems often employ staggered activation to improve water distribution and fire suppression efficiency.

ADJUSTABLE ARC & SPRAY DISTANCE: Includes a preinstalled 3.0 GPM nozzle with an arc that adjusts from 40° to 360°, ideal for both full and part circle coverage. Delivers a spray distance of approximately 22 to 52 feet, with optional nozzles (sold separately) allowing further customization.

DURABLE, LEAK-RESISTANT CONSTRUCTION: Heavy-duty body and cap provide reliable, long-term performance in both residential and commercial irrigation systems. Ribbed body design adds stability in loose soil and improves grip during installation.
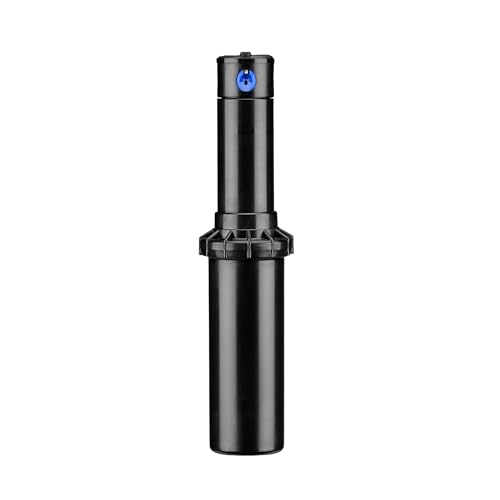
ADJUSTABLE 40° TO 360° ARC WITH EASY SETUP: Hunter PGP sprinkler head offers a fully adjustable arc for precise watering; headed and slotted setscrew allows quick radius adjustments with a Hunter wrench or flat-blade screwdriver sold separately.
Calculate Head Count From Yard Size and Shape
After you’ve matched head flow to the system’s GPM capacity, the next step is to translate yard dimensions into a concrete head count. Measure your rectangle, square, or trapezoid, calculate its square footage (length × width or ½ × (side A + side B) × height), then divide by the coverage area of a single head—π × radius², using a 25‑30 ft throw (≈ 400‑800 ft²). Adjust for spray pattern variations; a narrower pattern may need closer placement, while a wide pattern permits larger gaps. Position heads so each spray reaches the adjacent one, achieving ideal head spacing and eliminating dry spots. Account for corners, slopes, and plant beds by adding extra heads where the geometry disrupts uniform overlap. This method yields a precise, sustainable count for each zone. The Sprinkler Zone Calculator quickly verifies that the calculated head count stays within the system’s capacity. Properly accounting for soil infiltration rate ensures water is absorbed efficiently and reduces runoff. Understanding plant water needs helps fine‑tune head placement for optimal irrigation. Following an optimal layout strategy maximizes uniform coverage while conserving water.
Calculate Head Requirements Using Pressure & GPM
If you know the system’s pressure and total GPM, you can pinpoint how many heads each zone needs by balancing per‑head flow against the pressure each sprinkler requires. First, measure GPM with a bucket test: fill a 5‑gallon container, record seconds, then compute 5 ÷ seconds × 60. Use the pressure formula P = (Q ÷ K)² to verify water pressure requirements, where K is the sprinkler’s factor. Divide the total GPM by the per‑head flow (2‑5 GPM for lawns) to estimate head count. Adjust valve settings to meet the target PSI, accounting for friction (≈5 PSI per head) and elevation loss (5 PSI per 10 ft). Finally, space the heads evenly—sprinkler head spacing should reflect the calculated flow and pressure to guarantee uniform, sustainable coverage. Consider the system head loss when sizing the pump to ensure adequate flow across the entire irrigation layout. Regularly inspect for clogged nozzles to maintain optimal pressure and prevent uneven watering.

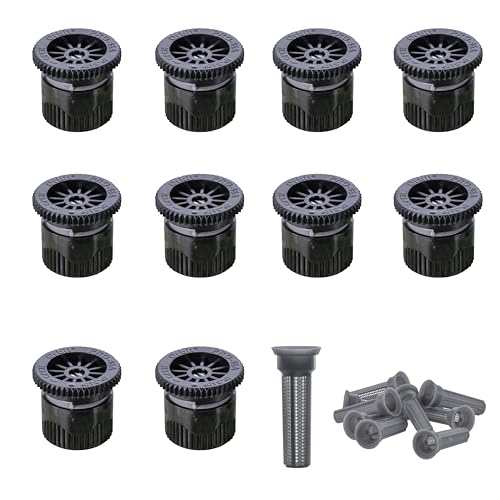
For watering areas with up to 15 ft. of spacing between sprinkler heads

6 in. 1800 Series pop-up spray head with Rain Bird Flow Optimizer Technology and Seal-A-Matic Check Valve
Apply the 15‑Foot Radius Rule for Coverage
Because the 15‑foot radius rule guarantees head‑to‑head coverage, you’ll place each sprinkler no more than 15 feet apart, creating overlapping arcs that assure uniform water distribution across the zone. Apply the rule by mapping a 15‑foot compass arc from every sprinkler; the intersecting arcs form the ideal head distribution. In light‑hazard areas, keep spacing at 15 feet or less, and adjust to 90 % of the spray radius when wind exceeds 8 mph. Maintain walls are no more than 7.5 feet away and corners within 11.5 feet, preserving uniform water coverage while respecting NFPA 13 limits. This systematic layout maximizes protection, minimizes waste, and supports sustainable fire‑safety design. The maximum coverage per sprinkler for ordinary hazards is 130 sq ft. The NFPA 13 standard defines the maximum allowable ceiling height for sprinkler installations. Properly sized sprinkler heads ensure efficient water use and consistent coverage. Selecting the appropriate sprinkler head type based on plant watering needs and soil conditions further enhances irrigation efficiency.

PRECISION ADJUSTABLE ARC, 0° TO 360°: Set exact spray angles for any landscape layout, from tight corners to full circle zones, with simple top adjustment
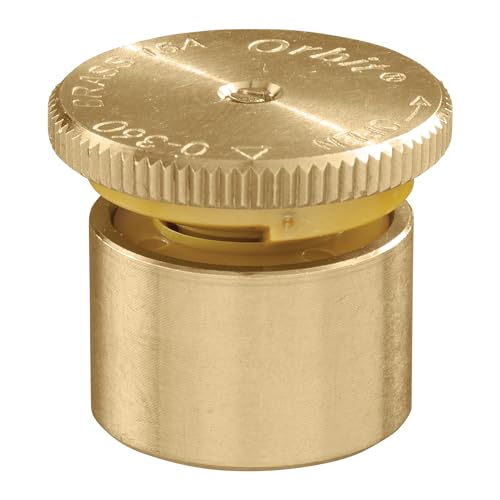
UNIVERSAL COMPATIBILITY: Designed to fit all major brands of pop-up spray heads, making it easy to replace existing nozzles and maintain your irrigation system. Delivers up to a 15-foot spray distance for efficient landscape watering (distance may vary based on PSI and other factors).
For new installation or replacement of spray nozzles on pop-up sprinkler bodies
Match Sprinkler Type to Zone Capacity
A well‑matched sprinkler type guarantees each zone operates within its flow capacity, preventing pressure loss and water waste. When you evaluate sprinkler design considerations, start with the zone’s total GPM and compare it to the head’s draw. A 35 PSI system delivering 10 GPM can only support three Rain Bird rotor heads (3.0 nozzle, 3.11 GPM each) before pressure drops. For high‑precipitation, compact lawns, fixed spray heads—5‑10 per zone, 15‑ft radius—fit the budget while conserving water. Large, open turf benefits from rotor heads with 25‑30 ft radius, 2.5 GPM per nozzle at 45 PSI, maintaining uniform coverage. Rotary nozzles excel on slopes or irregular beds, offering low‑rate, even application. Apply site‑specific adjustments, such as pressure regulators for 60 PSI lines, to keep flow within limits and sustain efficient irrigation. Measure flow using a bucket for one minute to verify actual GPM. Selecting the proper nozzle size ensures optimal flow speed and system performance. Properly insulating the main valve helps prevent accidental activation during winter months. Low water pressure can also cause heads to fail to pop up fully, requiring inspection of the supply line and valve operation.

Water-lubricated, durable gear-driven rotor designed for reliable operation and long life
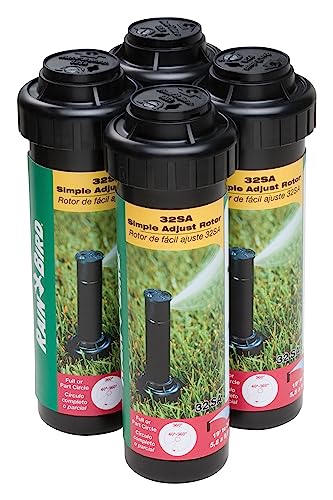
Economical 4-pack of water-lubricated, durable gear-driven rotors designed for reliable operation and long life
🌼PERFORMANCE – RELIABILITY - VALUE. RAINBIRD Y54007 POP-UP SPRINKLER with industry-leading Rain Curtain Nozzle Technology delivers a uniform spray pattern throughout to ensure that your lawn is watered evenly and consistently over the entire radius! Our rain curtain nozzles include 8 low-angle nozzles and 8 standard angle nozzles.
Adjust Head Count for Sun, Shade, Slopes, Plants
Matching sprinkler type to zone capacity sets the baseline flow, now you fine‑tune head count to the micro‑climates within that zone. In full‑sun patches you boost head density 20‑30 % and space heads 8‑12 ft, using larger‑throw nozzles and deflector knobs to offset rapid evaporation. Shade zones need fewer heads, 12‑15 ft apart, with a 10‑25 % radius reduction and fixed‑arc patterns to meet plant health requirements without overwatering. On steep slopes place low‑angle trajectory nozzles near the crest, spacing heads tighter vertically to preserve pressure and cut water volume adjustments by 20‑40 %. Mid‑slopes benefit from 45°‑tilted heads and a modest 10‑15 % increase in density, while base slopes require fewer heads, slight outward tilt, and up to 25 % radius reduction to prevent pooling and support sustainable plant health. Even coverage is achieved by testing the system during the day to observe performance. Properly balancing flow rate and pressure across a zone is critical for uniform water distribution. Understanding nozzle dynamics helps fine‑tune spray patterns for optimal efficiency. Selecting a nozzle with an appropriate flow rating ensures the system operates within the optimal PSI range.
Assess Budget Impact of Adding Zones vs. Reducing Heads
Most homeowners find that weighing the upfront cost of new valves and piping against the ongoing savings from fewer heads yields a clear financial picture. When you add a zone, you’ll spend $120‑$200 per valve and pipe, plus labor, but you gain the ability to run low‑pressure heads that cut water usage metrics by up to 30 %. Reducing heads saves $20‑$95 per unit and eliminates misalignment waste—often 900 gallons per head each month. The budget trade‑offs hinge on long‑term water bill reductions versus the one‑time valve expense. In high‑rate areas, a well‑designed zone can lower runoff fines and turf‑repair costs, making the initial outlay worthwhile. Balance the per‑head addition cost against the cumulative savings from optimized water distribution. Proper scheduling and low‑flow heads can further reduce water consumption and lower your bill. Modern systems often include moisture sensors that shut off sprinklers when soil moisture is sufficient, preventing unnecessary water use. Understanding the inch‑per‑hour delivery rate helps you fine‑tune runtimes for each zone.
Run a Final Checklist Before Installation
Balancing the upfront valve expense with long‑term water savings naturally leads to a thorough pre‑install audit. You’ll first verify contractor qualifications, then confirm system documentation—plans, as‑built drawings, maintenance checklists, and warranty stickers—are on hand. Scan local codes and permit requirements, double‑checking during installation to avoid costly re‑work. Inspect every component: backflow assembly for cracks, valves for leaks, heads for correct height and alignment, and guarantee nozzles, pipes, and fittings are free of wear. Test each zone manually for 2‑5 minutes, confirming 100 % coverage, proper pressure, and minimum 4‑inch clearance from hardscape. Pressurize lines slowly, flush zones, and listen for leaks or squeaks. Finally, fine‑tune spray patterns, update controller schedules, and verify no overspray onto sidewalks.


