You can swap sprinkler heads if the thread size, nozzle rating, and spray pattern match your existing system. First, verify the inlet thread (NPT, BSPT, or ACME) and guarantee the new head’s GPM capacity aligns with your water pressure and pipe diameter. Then, check that the nozzle’s arc and radius match the intended coverage and that head‑to‑head overlap remains consistent. Avoid mixing head types within a zone, as mismatched precipitation rates cause gaps or overspray. Follow the step‑by‑step replacement process and test the spray before finalizing; the next sections will walk you through precise adjustments and common pitfalls.
Quick Compatibility Check for Your Sprinkler Heads
Start by confirming the exact model of the existing head—look for the stamped nozzle information or SIN number on the cap, then cross‑reference that identifier with the manufacturer’s replacement chart. Verify the nozzle selection matches the intended spray pattern mapping; a fan‑pattern head requires a specific or size to achieve the prescribed coverage radius. Consult Hunter or Rain Bird charts to align K‑factor, flow rate, and pressure with the zone’s design requirements. Observe neighboring heads to infer the correct nozzle type and guarantee head‑to‑head overlap, avoiding pattern‑to‑pattern gaps. Test a mock‑up with a hose to confirm flow consistency before final installation. Record temperature rating, finish, and thread dimensions to prevent mismatches and ensure compliance with NFPA 25. Check inlet size before proceeding. Additionally, visual inspection of the head’s color code can quickly indicate its flow rating and intended application. Ensure the spray radius is compatible with the area’s layout to maintain proper coverage. The main line delivers water from the source to each zone, providing the necessary pressure for all heads.

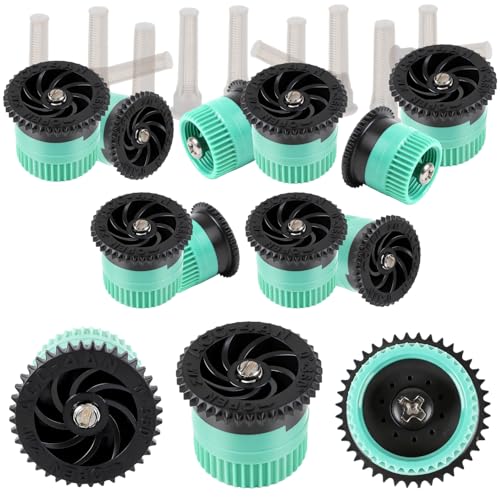
What You’ll Receive: You will get 10 high-quality 12-van adjustable arc nozzles. This generous pack provides plenty of replacements for your lawn or garden needs
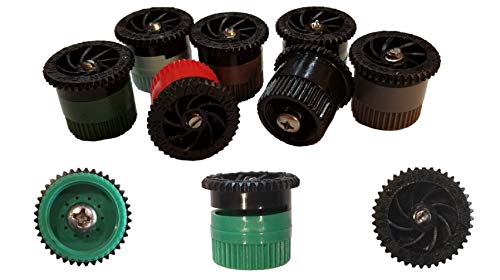
What You Will Get: This set includes 10 pack 4 VAN sprinkler heads replacement in total. This generous quantity is perfect for all your replacement needs and daily use. Each sprinkler head is compatible with most pop-up sprinkler bodies and features a debris-filtering screen to help prevent clogs, ensuring reliable and long-lasting spray performance
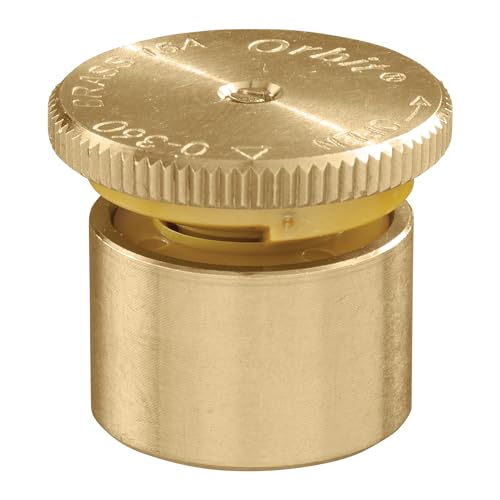
Spray nozzle with adjustable 0 to 360° pattern; spray distance from 2.9' -18.7'
How to Match Thread Sizes and Flow Rates for Sprinkler Head Compatibility
How can you guarantee a sprinkler head will fit and deliver the right flow? First, identify the inlet size by measuring the bottom case opening where it threads to the swing joint. Match that dimension to the pipe’s thread type—NPT, BSPT, or ACME—using the manufacturer’s data sheet. For ½″ or ¾″ fire‑sprinkler fittings, verify the 14‑tpi count, but remember NPT and BSPT remain incompatible despite identical pitch. When selecting compatible swing joints, confirm the joint’s thread profile aligns with the head’s case; Rain Bird typically uses ACME, Toro NPT. Specify required thread seal: apply pipe dope or PTFE tape for tapered NPT/BSPT, and an O‑ring for ACME. Finally, cross‑check flow rate ratings against the head’s GPM capacity to ascertain hydraulic compatibility. A common standard for garden hose fittings is the ¾‑inch GHT thread, which helps ensure compatibility across many irrigation components. Understanding the tapered vs. straight thread design is essential for proper sealing and pressure handling. Choosing the correct thread ensures a leak‑free connection.

Shrub Sprinkler Head Adapter Pack: This shrub adapter comes in a convenient pack of 10 so you will always have enough and can easily adapt any 1/2-inch riser. Each 1/2" female NPT x nozzle thread adapter easily connects a 1/2-inch sprinkler nozzle to a 1/2-inch head riser
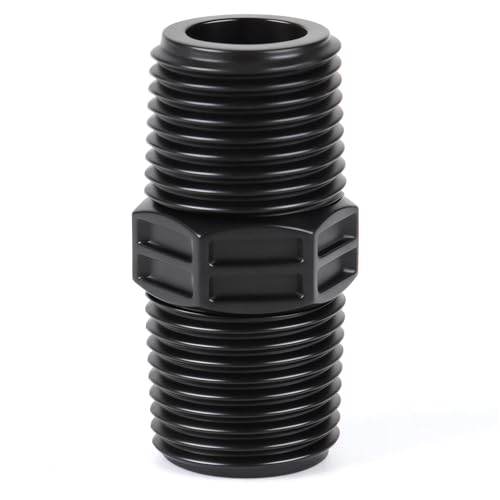
1/2" Male Pipe Thread (MNPT) Adapter Pack: This package includes 10 pieces of 1/2" double male pipe thread risers. Each male to male hose adapter features male National Pipe Taper (NPT) threads designed to connect seamlessly with female NPT threaded pipes, ensuring a reliable and leak-resistant seal

【PACKAGE INCLUDES】Includes 12 pieces in 3 common sizes: 7x 2" double male, 2x 6" double male, and 3x 2" double female fittings. The perfect versatile set for any sprinkler head height adjustment or irrigation repair.
Common Mistakes That Break Sprinkler Head Compatibility
Even after you’ve confirmed thread type, size, and flow rate, many installers still sabotage compatibility by mixing head types within a single zone. You may combine spray, rotor, and drip heads, creating mismatched precipitation rates that produce dry spots or over‑watering. Ignoring head‑to‑head spacing leads to overlapping arcs or gaps, raising water waste and fungal risk. Swapping brands or nozzle sizes without matching fan width or IPH shifts pressure balance, causing supply line damage and uneven flow. Installing high‑efficiency nozzles without extending run time triples cycle length and stresses pumps. Finally, neglecting physical alignment or replacing cracked heads with the wrong model misdirects spray onto driveways, wasting water and increasing maintenance costs. Tightening the adjustment screw on a spray‑type head can reduce water distance and help restore proper coverage. Properly calibrating pressure ensures each head delivers its intended precipitation rate efficiently. Understanding soil infiltration rates helps you match sprinkler output to the land’s absorption capacity, preventing runoff and water waste. Selecting the correct nozzle count based on pressure and flow guarantees uniform distribution across the coverage area.

For watering landscape areas which need high uniformity across the spray pattern

ADJUSTABLE ARC & SPRAY DISTANCE: Includes a preinstalled 3.0 GPM nozzle with an arc that adjusts from 40° to 360°, ideal for both full and part circle coverage. Delivers a spray distance of approximately 22 to 52 feet, with optional nozzles (sold separately) allowing further customization.

ADJUSTABLE SPRAY PATTERN FROM 0–360°: Quickly set the arc to match any area — from narrow strips to full circles. No tools needed, just twist and go.
Step‑by‑Step Guide to Swapping Fixed, Adjustable, and Rotary Sprinkler Heads
Before you begin swapping heads, shut off the zone’s water supply, identify the existing head type by its spray pattern and pop‑up height, and gather the necessary tools—shovel, pliers, and a replacement head with the correct thread size. Dig carefully around the body, expose the riser, and unscrew the nozzle or head using pliers, preserving thread integrity. Match the new head’s thread, select the appropriate fixed, adjustable, or rotary model based on coverage radius, and verify that the nozzle flow aligns with zone pressure (30‑50 PSI). Screw the replacement clockwise until snug, then give a quarter‑turn with pliers for Sprinklerler arc adjustment head the head, and backfill gently to maintain proper sprinkler head positioning and stability. Turn the water back on, observe pop‑up, and confirm uniform spray before finalizing. Check pressure compatibility before installing the new head. Properly assessing soil type helps ensure the chosen head delivers water efficiently to plant roots. Adjusting the sprinkler depth can further optimize water penetration and reduce runoff.

PRECISION ARC CONTROL FROM 0° TO 360°: Get pinpoint accuracy for any zone shape or edge. Whether you're watering a narrow walkway or full lawn circle, fine-tuned arc settings ensure no water is wasted.
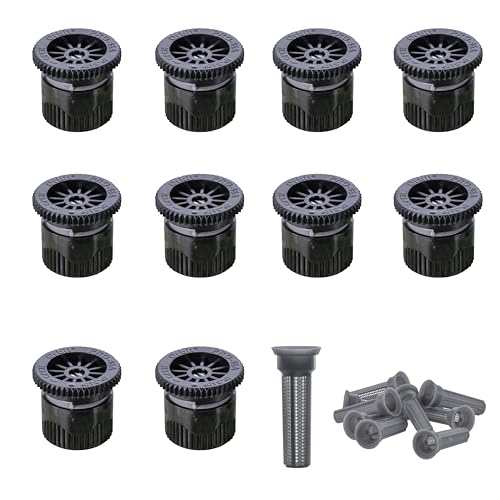
For new installation or replacement of spray nozzles on pop-up sprinkler bodies

Adjustable Nozzle: with adjustable patterns from 0 to 360 degrees, slightly twist the textured center collar, you can increase or decrease the pattern; Ideally, for example, at a pressure of 2.1 bar, the maximum spraying radius of a 4van nozzle is about 3.94 ft/ 1.2 m, 6van nozzle is about 5.91 ft/ 1.8 m, 8van nozzle is about 7.87 ft/ 2.4 m, and the spraying radius of a 10van nozzle is about 9.84 ft/ 3 meters
Adjusting Nozzle Flow for Precise Coverage
When you fine‑tune a sprinkler head, you adjust the nozzle flow to match the desired coverage radius and arc, ensuring the precipitation rate aligns with the zone’s pressure. Start by turning the arc screw clockwise to set the right edge and counter‑clockwise for the left edge, watching the indicator dots align with the target spray pattern refinement. Use the radius screw to shrink or extend the throw; clockwise reduces distance, counter‑clockwise expands it. Observe the live spray while water runs, making micro‑adjustments with a flat‑headed screwdriver or deflector knob. For rotary or multi‑stream heads, verify that the rotating stream maintains uniform irrigation water application across the zone. Finally, confirm head‑to‑head overlap and consistent precipitation rates before sealing the adjustment. Nozzles are marked with throw pattern and distance. Maintaining steady pressure throughout the system helps minimize turbulence and ensures a uniform flow. Selecting the appropriate nozzle size is essential for matching flow rate to system pressure. Proper sprinkler flow control also reduces water waste and improves overall irrigation efficiency.
UNIVERSAL COMPATIBILITY: Designed to fit all major brands of pop-up spray heads, making it easy to replace existing nozzles and maintain your irrigation system. Delivers up to a 15-foot spray distance for efficient landscape watering (distance may vary based on PSI and other factors).

What you will get: you will receive 10 pieces variable arc nozzles, enough for your replacements or share with friends and neighbors.

DURABLE, LEAK-RESISTANT CONSTRUCTION: Heavy-duty body and cap provide reliable, long-term performance in both residential and commercial irrigation systems. Ribbed body design adds stability in loose soil and improves grip during installation.
Final Compatibility Checklist for Your Sprinkler Heads
If you verify threading, spray pattern, brand, pressure, and model specifications before installation, you’ll ascertain each sprinkler head integrates seamlessly into the system. Start by confirming thread size matches the zone—pop‑up, fixed, or rotary heads must share the exact inlet thread to avoid leaks. Cross‑check spray pattern: full‑circle heads replace only full‑circle patterns, while half‑ and quarter‑circles need identical coverage arcs. Stick to a single manufacturer; Hunter and Toro parts are not cross‑compatible, and mixing brands disrupts precipitation uniformity. Verify pressure limits—fixed heads stay within 15 psi, rotary heads handle higher pressures. Record the sprinkler identification number (SIN), orifice size, and deflector type. Finally, review matching head wear patterns and assess precipitation uniformity across the zone to establish consistent watering. Flow rate compatibility is essential to maintain even distribution and prevent over- or under‑watering in mixed‑head systems. Proper zone segmentation based on plant type and sun exposure further optimizes water use. Understanding zone capacity helps prevent exceeding flow limits that could reduce spray performance.


