Map your lawn in a digital planner, then overlay a square or triangular grid that mirrors its shape. Place quarter‑pattern heads at corners and along the perimeter, spacing each at half its throw radius (about 50 % of nozzle diameter) and keep a 4‑inch buffer from walls. Choose spray heads for small zones, rotary or pop‑up rotors for larger or sloped areas, and match flow rates to your soil’s infiltration capacity. Fine‑tune zones and valve balances for uniform pressure, and you’ll see how a few heads can give you 100 % overlap while conserving water.
Plan an Efficient Sprinkler Layout for Your Yard
When you map out your yard, start by placing quarter‑pattern heads at each corner and then follow the perimeter, ensuring each sprinkler’s spray reaches the nearest neighbor. You’ll notice the head‑to‑head coverage creates a seamless blanket of moisture, allowing a 2‑4‑foot overlap that cushions pressure dips and eliminates dry patches. Choose a square or triangle pattern that mirrors your lawn’s geometry; square grids excel on rectangular plots, while triangles conserve water in wedge‑shaped zones. Align spacing with nozzle performance charts—large heads 15‑45 ft apart, small heads 8‑17 ft—to meet waterflow requirements without waste. As you lay out underground pipe routing, keep runs short, use consistent diameter, and group heads by zone to preserve pressure, minimize friction, and sustain a resilient, low‑maintenance irrigation system. Improper sprinkler placement can cause uneven watering and dry patches. Properly sizing the system based on the soil infiltration rate helps prevent runoff and ensures efficient water use. Understanding flow rate calculations is essential for balancing water distribution across zones. Keep each zone’s total flow within the sprinkler zone capacity to maintain proper pressure and spray patterns.
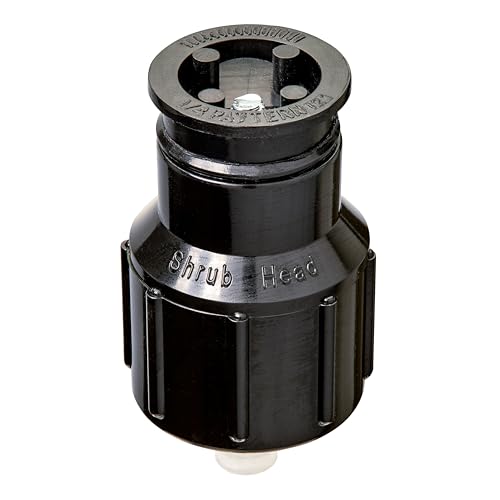
For watering trees, shrubs, perennials, or annuals of various heights

Approved for sale/meets pressure regulation legislation requirements in: CA, CO, HI, VT, MA, ME, NY, OR, RI, WA, and Washington DC

Approved for sale/meets pressure regulation legislation requirements in: CA, CO, HI, VT, MA, ME, NY, OR, RI, WA, and Washington DC
Map Your Lawn for an Overlap‑Free Sprinkler Layout
A well‑mapped lawn is the foundation of an overlap‑free sprinkler system, so start by tracing your garden’s exact perimeter with a digital planner like Orbit or Gardena. Import the outline into the tool, then overlay the sprinkler spacing optimization grid; the software will suggest head locations that respect the radius of each nozzle while preserving head obstruction avoidance. Measure the yard’s width and length, noting any trees, flower beds, or structures that could block spray. Adjust the auto‑generated layout, moving heads a few inches away from obstacles and ensuring each line runs parallel and no more than one‑third radius apart. Record every station, head type, and zone in a chart, so future tweaks stay sustainable and technically sound. Measure water pressure before finalizing head placement to guarantee optimal performance. Proper flow rate selection ensures each nozzle delivers its rated gallons‑per‑minute output across the entire zone. Pump capacity must be evaluated when the system spans multiple elevation levels or when local water supply pressure is insufficient. Pressure loss over longer hose runs can reduce spray efficiency, so keep hose lengths within the recommended limits for your pressure rating.

⭐【Comprehensive Sprinkler Tool Set】Our practical sprinkler tool set includes everything you need: 1 rotor screwdriver tool and 1 rotor hold up tool with bubble level tool for easy sprinkler replacement and adjustment. Easily lift and support pop up irrigation sprinkler heads, enhancing your lawn maintenance routine. These tools are perfect for anyone needing reliable, daily irrigation assistance

[Complete Irrigation Adjustment Kit]This 5 pack sprinkler tool set includes a Spray Head Pull Up Tool, Hold Up Tool, Rotor Tool, Rotator Tool and Sprinkler Key, compatible with Rain Bird and Hunter systems. Perfect for sprinkler maintenance, repair, and adjustment

DURABLE, LEAK-RESISTANT CONSTRUCTION: Heavy-duty body and cap provide reliable, long-term performance in both residential and commercial irrigation systems. Ribbed body design adds stability in loose soil and improves grip during installation.
Calculate Head Spacing for a Precise Sprinkler Layout
If you base head‑to‑head spacing on 50 % of the nozzle’s throw diameter, you’ll keep the spray pattern uniform while staying within the maximum 15‑foot limit for most residential zones. Measure the nozzle throw, halve it, and use that distance as your baseline grid. Adjust for wall proximity: keep the distance from any wall at half the head‑to‑head spacing, never less than four inches, and respect the six‑foot minimum between heads. Verify that the nozzle flow rate aligns with the calculated spacing, ensuring the spray trajectory angle covers the intended radius without overspray. Apply occupancy rules—light‑hazard areas may stretch to 15 feet, ordinary to 130 sq ft per head—while staying within the 1‑foot variance. This precise spacing balances efficiency, water conservation, and aesthetic uniformity. The projected area on the floor is essentially circular, which supports using a rectangular coverage model for layout calculations. Consider the soil infiltration rate when finalizing spacing to prevent runoff and promote deep watering.

For installation and maintenance of spray head sprinklers, nozzles, and risers

Waters your lawn automatically the whole season

ULTIMATE FLEXIBILITY FOR ANY GARDEN SHAPE – Place sprinklers exactly where you need them- Perfect for lawns, flower beds, raised gardens, and more.
Select Sprinkler Types for Your Layout
Choosing the right sprinkler type hinges on your lawn’s size, soil, and pressure supply, so start by matching each head’s strengths to those conditions. For small‑to‑medium zones, spray irrigation heads give even mist at 20‑30 PSI, but keep them within 15 ft to curb drift. If you have a larger area or sloped, slow‑draining soil, rotary heads like Hunter PGP with interchangeable nozzles deliver targeted streams and reduce runoff. Pop‑up rotors from Toro RapidSet or Rain Bird 5000 provide expansive, low‑volume coverage—up to 90 ft with Orbit Impact—while maintaining pressure regulation. Oscillating units suit rectangular patches and tolerate variable PSI, though wind can scatter spray. Review sprinkler head options and compare reliable sprinkler brands to evaluate, focusing on efficiency, durability, and water‑saving potential. The Lawn Tractor Sprinkler can cover up to 14,000 sq ft when paired with a 200 ft hose, making it ideal for extensive lawns. Consider the water‑efficiency rating when choosing a system to maximize conservation and lower utility costs. Incorporating a drip irrigation zone for flower beds can further reduce water waste. Using sprinkler automation in a greenhouse allows year‑round crops to receive consistent moisture without manual effort.

ADJUSTABLE ARC & SPRAY DISTANCE: Includes a preinstalled 3.0 GPM nozzle with an arc that adjusts from 40° to 360°, ideal for both full and part circle coverage. Delivers a spray distance of approximately 22 to 52 feet, with optional nozzles (sold separately) allowing further customization.

SUPERIOR YARD WATERING - The Saturn III gear-drive rotor offers precise and efficient water distribution for your yard sprinklers

HEAVY-DUTY STEEL SHAFT – 5/8" powder-coated structural steel resists bending and rust
Design Layout Patterns (Square, Triangle, Diamond) for Minimal Dry Spots
When you map out a sprinkler system, the pattern you pick—square, triangle (diamond), or a hybrid—directly determines how evenly water reaches every inch of your lawn and how many heads you’ll need. A square grid offers straightforward planning: place heads on perpendicular lines, start with quarter‑pattern sprinklers at corners, then add half‑circle edge heads. This yields reliable head‑to‑head coverage but may need more heads for uniform water distribution. The triangle, or diamond, layout uses diagonal spacing, letting each spray intersect the next at 100 % overlap. This geometric layout optimization reduces head count while minimizing dry spots, especially on wedge‑shaped lawns. Choose the pattern that matches your terrain’s shape, then fine‑tune spacing to keep every blade hydrated and waste minimal. Properly balancing water pressure and flow rates is essential for consistent coverage across all zones, especially when implementing a zone‑based design. Optimal sprinkler placement maximizes water use efficiency and reduces overall water consumption. Modern systems often incorporate moisture sensors to adjust watering schedules based on real‑time soil conditions.
Create Valve Zones for a Balanced Sprinkler Layout
By mapping your yard on scaled grid paper, you can carve distinct valve zones that match the landscape’s micro‑climates and irrigation needs, ensuring each area receives the right amount of water without waste. Sketch the property, mark lawns, flower beds, and shady patches, then group sprinklers by plant type. Place a valve near each zone’s center, using a T‑fitting and PVC primer for a secure connection, and limit the manifold to three‑to‑five valves to keep pressure steady. Run 1‑inch Class 200 PVC in parallel trenches at least six inches deep, routing branches to avoid head‑to‑head interference. Optimize zone layout for head‑to‑head coverage, separating rotors from sprays and drip lines, so each micro‑climate receives precise, sustainable watering. Insufficient water flow often necessitates watering one area at a time. Some sprinkler valves incorporate built‑in pressure regulators to maintain consistent pressure across zones. Understanding how the solenoid coil activates the valve can help troubleshoot irregular opening and closing. Not all zones require a solenoid valve.

【Material】Heavy Duty 3 Inch PVC Ball Valve made of high-quality PVC, high-impact strength, resistant to frost and corrosion, long service life.

High Quality Pvc Ball Valve: The PVC ball valve is made of high-grade PVC material, which has a durable structure, high impact strength, and corrosion resistance, and can be used outdoors for a long time
Field‑Test GPM & PSI to Validate Your Sprinkler Layout
If you run a quick bucket test and attach a pressure gauge, you’ll instantly see whether your layout meets the design’s flow‑and‑pressure targets. Fill a five‑gallon bucket under full flow, time the fill, and compute GPM (5 ÷ seconds × 60). Use the lowest reliable reading; a 19‑second fill gives about 15.8 GPM, so you might design zones at 10‑12 GPM for safety. Next, attach a gauge to an outdoor faucet, shut off household water, and record PSI at several points. Take the lowest value, aiming for 30‑50 PSI (35 PSI for pop‑ups, 20‑25 PSI for drip). Subtract friction loss from static pressure, adjust for elevation (±4.33 PSI per 10 ft), and then estimate required gallons per minute for each zone. Finally, monitor water pressure fluctuations throughout the day to maintain the system within sustainable limits. The bucket test should also include a pressure gauge to verify that the system meets the required PSI. Regularly inspect for clogged nozzles to prevent pressure loss. Choosing the correct nozzle type, such as a 0‑degree jet for stubborn stains, can dramatically improve cleaning efficiency. Most residential hoses operate effectively between 40 and 80 psi, which aligns with typical household water pressure of 50‑60 psi.
Polish Your Sprinkink Layout Layout: Trim Corn and Add Bypass Valves
Usually you start by trimming the corners so each sprinkler’s spray reaches the next head, ensuring 100 % head‑to‑head overlap and eliminating dry patches. Align the corner heads toward the pipe run, using a geometric grid that respects head to head direction and maintains consistent water distribution patterns across irregular edges. Keep spacing at radius distance, but allow a 1/3‑radius buffer across width for wider zones. Install bypass valves on the main line before each zone valve; this isolates sections for maintenance without shutting the whole system. Position the bypass near the water source to buffer pressure fluctuations and enable backflow testing. By integrating precise corner trimming with strategically placed bypass valves, you achieve uniform irrigation, reduce waste, and uphold sustainable landscape health. Using a surveyors string to lay out a consistent geometric grid helps avoid over‑ or under‑watering in irregularly shaped areas. Burying sprinkler lines at a depth of 6 to 12 inches protects them from frost damage and foot traffic.


