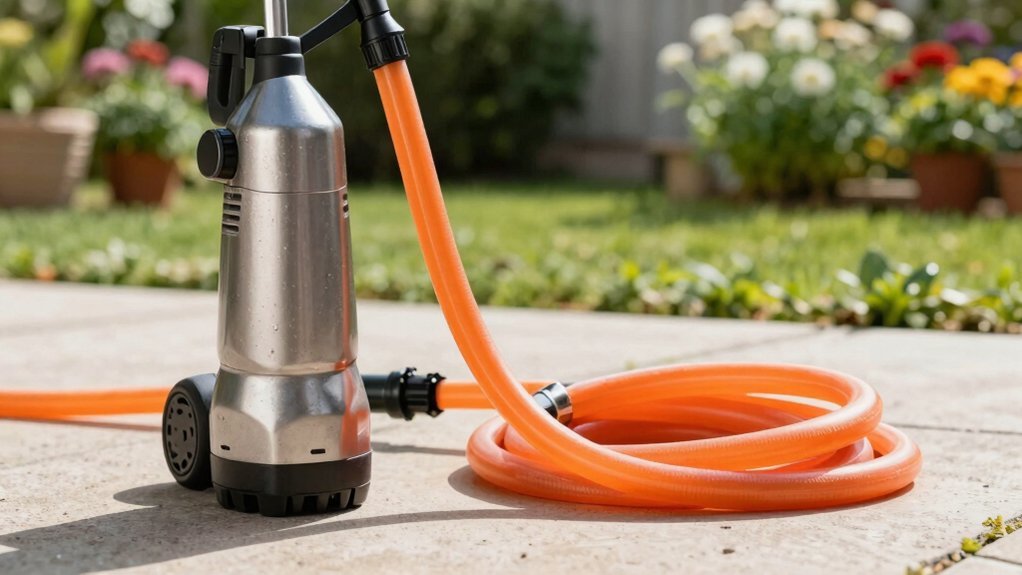
First, verify your can is a Classic or Deluxe model (look for the tulip or sunflower logo and 1.120‑in O.D. threads). Warm the spout with hot water, then lift the old nozzle with a flat‑head screwdriver and a ½‑inch male adapter. Remove it, clean the filter core and spout with a toothbrush and vinegar solution, and dry everything. Slip a 2.5‑inch screw‑on nozzle onto the adapter, coat the threads with a thin hot‑glue layer, and tighten. Test the spray, and if you keep going you’ll uncover more tips for a perfect, leak‑free fit.
Choose the Correct Nozzle for Your 2‑Gallon Classic Can
When you’re picking a nozzle for your 2‑gallon Classic can, start by confirming the model—look for Novelty Manufacturing’s #30301 or any Classic‑line label. First, perform nozzle identification: check the can’s side for the tulip or sunflower logo to know if it’s an older or newer version, then verify the threading (O.D. 1.120 in, I.D. .970 in). Next, assess nozzle sizing: the replacement must be 2.5 inches in diameter and screw‑on. Verify the white‑plastic construction matches the original for a seamless fit. Finally, cross‑reference the SKU with retailer listings to confirm compatibility with both Classic and Deluxe lines before you order. This guarantees a proper match and avoids mismatched parts. Consider that sprinkler heads often break down quickly due to UV exposure, so selecting a durable nozzle can extend the can’s lifespan. The vintage design of these nozzles also provides a consistent water flow that many modern gardeners appreciate for delicate seedlings. Choosing the right nozzle helps maintain even water distribution across your garden beds. Proper soil moisture monitoring can further optimize irrigation efficiency.

100% recycled polymer: guilt free from environmental concerns, the tank is made from 100% recycled polymer, better for the environment and less in the landfill

Capacity: 2 Gallons / Size: 17.5 in. width x 12.5 in. Height x 8.5 in. Depth.

Large 2-gallon capacity with measurement markings for precise control.
Gather Tools for a Hassle‑Free Nozzle Swap
After confirming the correct nozzle size and thread type, gather the tools that’ll make the swap quick and clean. First, grab a flathead screwdriver to lift the nozzle stem and needle‑nose pliers for a firm grip. Keep a sprinkler wrench handy to loosen tight fittings and a small shovel if you need to expose the sprinkler base. Pack a clean rag, a burr removal tool, and a fresh filter insert to guarantee smooth water flow adjustments. Add any needed adapters—like a 1/2‑inch male adapter or bushing—to match nozzle sizing options. Finally, bring a hot‑glue gun for sealing and a measuring tape to verify throw distance. With these items within reach, you’ll avoid delays and keep the replacement process seamless. Regularly test sprinklers to ensure nozzle performance is optimal. Inspect the nozzle for worn O‑rings before installation to prevent leaks. Properly cleaning the furnace nozzle can prevent fuel buildup and improve system efficiency. Choosing the right pressure washer nozzle can dramatically improve cleaning efficiency. nozzle spray pattern determines how effectively debris is removed.

✅ All in One Comprehensive Kit: This complete set includes 5 rotor nozzle trees, 1 rotor hold up tool, and 1 specialized adjustment screwdriver. You won't need to hunt for extra parts or tools; Everything required for immediate maintenance is right here, ready to service your irrigation zones

Dimensions: 0.75 x 4.5 x 8 inches

Handy tool makes working on pop-up sprinklers easy
Remove the Old Nozzle Without Breaking the Plastic
If you gently warm the can’s spout with very hot (not boiling) water, the plastic softens enough to let you pry off the old nozzle without cracking it. First, pour the water into the can, swirl, and let it sit for 30 seconds. Then, use a flat‑head screwdriver to lift the nozzle just enough to expose the threaded base. Apply the threaded adapter removal: slide a ½‑inch male adapter over the spout threads, press gently, and pull the old nozzle away. If the nozzle sticks, switch to the slip cap and bushing technique—place a ½‑inch bushing on the spout, slide a 2‑inch slip cap over it, and use the cap to lever the nozzle off. Keep the motion steady, avoid excessive force, and you’ll remove the nozzle intact. Check for clogged nozzles before starting to ensure smooth removal. A persistent cold pull can also help clear any residual debris that might cause the nozzle to jam. Warm water helps soften plastic for easier removal. Understanding ground temperature effects can prevent unexpected cold water shocks during spring watering.
Inspect & Clean the Filter and Stem Before Reinstalling
Now that the old nozzle is off, inspect the filter and stem for any damage or wear before you put anything back. First, look for twisting, tears, or rust on the filter core and check the handle, spout, and seams for cracks or leaks. Examine the guide rod opening for dust or debris. Next, rinse the filter under running water, then soak it in a vinegar based cleaning solution (1 part white vinegar to 2 parts warm water) for a few minutes to dissolve mineral deposits. Use an old toothbrush and a pipe cleaner to scrub the core, spout base, and rose holes. Rinse thoroughly, then air‑dry the parts face‑down and wipe any crevices with a soft cloth. Apply moisture prevention practices by ensuring everything is completely dry before reassembly. Finally, perform a quick spray test to confirm that the nozzle is fully clear and the spray pattern is consistent, adjusting if necessary. If you notice persistent clogging, consider using a pin to gently clear any remaining blockage.
Install the New Nozzle and Secure the Threads
You’ll start by fitting the male adapter onto the spout’s factory threads, coating those threads with a thin layer of hot glue for a secure seal, then pressing the adapter in so it slides snugly over the 3/4‑inch threads. Next, drill 3/16‑inch holes through the adapter’s side walls, then press hot glue into each hole to lock the adapter and maximize watertightness. Screw a 1/2‑inch bushing onto the adapter, ensuring a tight, removable fit. Slide the slip‑cap over the bushing; it should sit firmly without glue. Stretch a rubber bike‑tube over the joint, creating a friction seal that holds the nozzle in place. Finally, test for leaks by running water, confirming secure attachments and a watertight connection. Using a plastic pipe extension can also help reach farther into the garden without extra strain. Garden hose threads are standardized to ensure compatibility across different fittings. Understanding the tapered NPT design helps avoid mismatched connections in high‑pressure applications.
Add a Slip‑Cap or Adapter to Boost Flow Control
Slip‑cap or adapter upgrades let you fine‑tune water flow and seal the can’s outlet in one quick step. First, choose a slip cap configuration that matches your PVC pipe size—1/2″, 3/4″, 1″, or larger. Clean the pipe, apply primer, then spread PVC glue evenly. Push the cap fully onto the pipe, give a quarter‑turn twist, and hold for 30 seconds to set the bond. If you need a different outlet, grab a threaded adapter fitting. Apply primer and glue to the adapter’s compression ring, insert it into the slip‑cap side, and twist until snug. For drip‑line conversion, use a green compression ring with an internal barb to secure tubing. Verify the seal, then test flow and adjust by tightening or loosening the adapter as needed. Proper hose diameter ensures optimal flow rate for your watering can. Selecting a hose with a 5/8 inch diameter can significantly improve water delivery for larger garden beds. Longer hose lengths can increase friction loss, so consider a shorter hose for higher pressure when watering compact garden areas.

Universal RV Sewer Hose Termination Adapter – Designed for drain fittings connecting to a sewer hose or cap. One nub end supports a 3-inch twist-on connector with bayonet hooks while the female slip hub end accepts 3-inch ABS pipes that require gluing.

Durable PVC Material: Made from high-quality PVC, our 3/4 inch end caps feature a glossy finish that resists yellowing and withstands impacts, ensuring long-lasting durability.

Durable PVC Material: Made from high-quality PVC, our 3/4 inch end caps feature a glossy finish that resists yellowing and withstands impacts, ensuring long-lasting durability.
Fix Mis‑Fitting Nozzles With Simple DIY Hacks
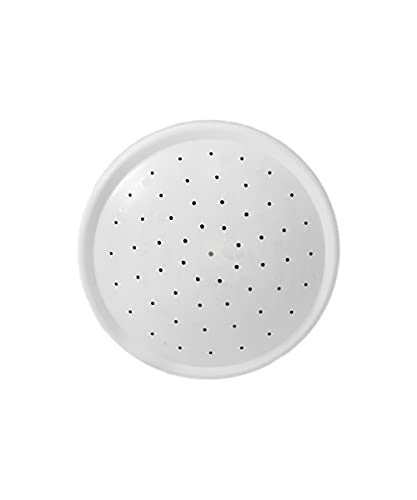
A mis‑fitting nozzle can be corrected in minutes with a few simple DIY steps. First, measure the can’s spout threads; they’re about 3/4 inch. Slip a male adapter over the threads, then coat the threads with hot glue for a tight seal. Next, drill a 3/16‑inch hole through the sides of the adapter and fill it with hot glue to lock the adapter in place. For slip‑cap customization, drill roughly twenty 1/16‑inch holes evenly across the cap, clean burrs, and seal any excess holes with hot glue to prevent dribbling. Finally, attach a bushing to the adapter, slide the drilled cap onto the bushing, and reinforce with hot glue. This selective nozzle replacement gives you nozzle customization flexibility while restoring a firm, leak‑free fit. Choose the appropriate spray pattern to match your watering needs. Turbo nozzles provide a fine mist that conserves water and is ideal for delicate plants. Using a caulking nozzle can further improve flow control and durability.

Package Contents: 4 x Bottle Mouth Conversion Connector Head

【Package included】You will receive 5 pack 3/4 inch to 1-way 1/4 inch drip irrigation hose adapters and 5 Pcs rubber gasket Prevent water leakage.
High-quality screw-on replacement spout for 2-gallon watering cans
Seal the Fit With Hot Glue or Tape for a Leak‑Free Connection
After fitting the adapter and drilling the cap, seal the joint immediately to stop any drips. First, wipe the area clean and let it dry; any residue defeats seal failure prevention. For hot‑glue sealing, heat the glue can, squeeze a thin bead onto the joint, and press the edges together. Hold for a minute until the glue sets; it will cure fully in 24 hours, providing sealing for long‑term use. If you prefer tape, cut a strip of waterproof adhesive tape, press the crack edges tightly, then wrap the tape around the joint on both inside and outside. Smooth out bubbles with your fingers, ensuring full coverage. Both methods give a quick, leak‑free connection. Melted glue creates a custom waterproof gasket that enhances the seal. Choosing a hose with a high pressure rating further reduces the risk of leaks under heavy water flow.
Test the Spray Pattern and Adjust Drilled Holes as Needed
If you run the sprinkler zone for the prescribed 15 minutes while the catch‑can array is set up, you’ll quickly see which heads are over‑ or under‑watering. First, place 5‑7 empty cans in a grid, spacing fixed‑spray cans 5‑8 ft apart and rotor cans 10‑20 ft apart. Add a can 1.5–2 ft from each head and another at the spray edge. Run the zone for 15 minutes, then measure water depth in each can with a ruler. Compare depths; large gaps mean the spray pattern is uneven. Use the data to calibrate water flow: drill or enlarge holes on under‑performing nozzles, and shrink holes on over‑watering heads. Re‑test until the pattern is uniform, then lock in the adjustments to optimize spray pattern. Catch can test ensures accurate irrigation timing.
Maintain Your Nozzle for UV Protection and Long‑Term Durability
Three simple steps keep your nozzle UV‑proof and lasting: store it out of direct sunlight, rinse and dry it after each use, and apply a protective coating. First, choose a secure storage solution—keep the nozzle in a cool, dry cabinet or shed, away from windows and roof leaks. Second, after each watering session, rinse the nozzle with clean water, scrub any residue with a soft brush, then invert it and air‑dry completely; use a soft cloth for hard‑to‑reach spots. Third, once dry, spray a thin layer of uv‑resistant coatings or a rust‑preventive spray on the exterior, avoiding the interior. Reapply the coating seasonally, wiping off old residue before the next use. This routine prevents brittleness, discoloration, and cracks, extending performance and lifespan. Soft‑bristle brushes are suitable for cleaning brass or stainless‑steel nozzles without causing damage.

Crystal Clear and No Yellowing: Ultraviolet UV epoxy resin cures crystal clear, high gloss, anti-scratch, anti-stain, yellowing resistance. And the self leveling and self degassing characteristics help cured more smoothly and make your handicrafts more perfect

Seals out water, air, and moisture: Gorilla waterproof sealant provides a flexible rubberized coating that seals out water, air, and moisture to stop and prevent leaks

Compatiable with Whisker | Square Whisker sunglass frame