Shake the can for at least 60 seconds, then invert it for two minutes to suspend heavy particles. Spray WD‑40 or warm water through the tip to dissolve dried paint, and tap the can on a metal surface to free any stuck agitator balls. If the spray still sputters, blow compressed air through the nozzle or use a 0.7 mm needle to scrape the jet gently. Re‑shake, test on scrap, and you’ll see a clear, uniform pattern—more tricks await if you keep going.
Is Your Spray‑Paint Nozzle Clogged? Quick Checklist
If you suspect a clogged spray‑paint nozzle, run through this quick checklist: first, press the actuator; if no paint emerges or you hear only propellant, note a blockage. Check for sputtering, stringy output, or intermittent flow—signs the jet orifice is partially obstructed. Inspect the nozzle tip for dried pigment and verify the internal stem isn’t filled with thick residue. Look at the dip tube; a black rim dot indicates misalignment. Examine storage conditions: extreme heat, cold, or long idle periods dry the paint, so always store paint properly. Before testing, prime the can by shaking it for at least 60 seconds; insufficient mixing leaves pigment settled, causing clogs. If these checks reveal issues, proceed to cleaning. For thorough removal of dried paint, soak the nozzle in warm soapy water, then clear blockages with a fine needle before rinsing and drying. Using compressed air can also help blow out stubborn particles after soaking. Consider the nozzle flow rate when selecting a replacement to match the paint’s viscosity and intended application.
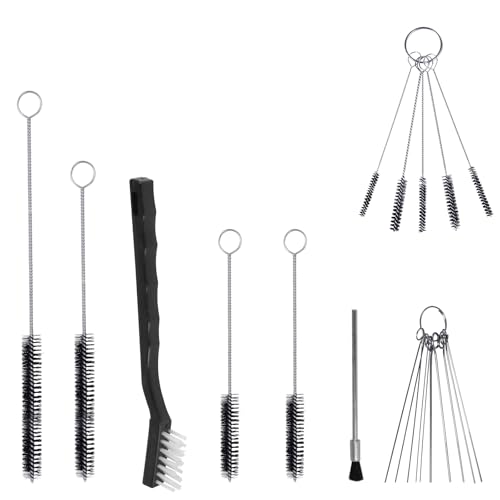
★ This handy spray guns cleaning kit is all you need to keep your spray guns clean and in excellent working condition!

[COMPLETE]: Full set with 22 pieces for cleaning and maintenance of any air spray paint gun to ensure excellent working condition.

1. Made of high quality Nylon brush
Shake‑It‑Right to Prevent a Clogged Spray‑Paint Nozzle
Often the key to a smooth spray is shaking the can correctly before and during use. Begin by in the can upside‑down for two minutes once the agitator balls start rattling; this essential mixing technique suspends heavy zinc particles and prevents separation of paint and propellant. While you spray, keep the can moving continuously to maintain paint consistency and keep the liquefied gas mixed with the liquid. If the can feels cold, immerse it briefly in warm water, then give it a sharp tap on a metal surface to free any stuck balls before resuming the shake. This quick tap‑and‑shake routine preserves flow uniformity, reduces viscosity, and stops clogs before they start. The nozzle’s design converts static pressure into kinetic energy, illustrating that pressure drops as velocity increases. In a diverging nozzle, the expanding area causes the flow to accelerate, a principle known as supersonic expansion. Selecting the proper nozzle type improves spray uniformity and minimizes material waste.

⚠️𝐈𝐌𝐏𝐎𝐑𝐓𝐀𝐍𝐓 𝐍𝐎𝐓𝐄: 𝐃𝐎 𝐍𝐎𝐓 𝐨𝐩𝐞𝐫𝐚𝐭𝐞 𝐚𝐭 𝐇𝐈𝐆𝐇 𝐒𝐏𝐄𝐄𝐃. 𝐋𝐎𝐖 𝐒𝐏𝐄𝐄𝐃 𝐩𝐫𝐨𝐯𝐢𝐝𝐞𝐬 𝐛𝐞𝐭𝐭𝐞𝐫 𝐩𝐚𝐢𝐧𝐭 𝐦𝐢𝐱𝐢𝐧𝐠.
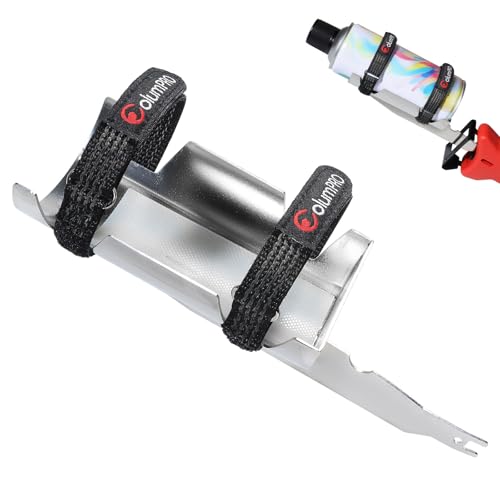
Arm-Saving Design – Mix Paint 3X Faster Replaces exhausting manual shaking by utilizing the reciprocating saw’s high-frequency motion. Mixes paint evenly in seconds while reducing arm fatigue—ideal for frequent users, painters, and arthritis sufferers.

<b>CAUTION: Best mixing results are achieved at LOW SPEED. Avoid high speed for this application!</b>
Use the WD‑40 Method to Flush a Clogged Spray‑Paint Nozzle
A few quick sprays of WD‑40 through the removed nozzle will dissolve most dried‑paint clogs. First, pull the nozzle straight off the stem—no twisting—to avoid damage. Wipe the exterior with a cloth, then align the tip exactly with the WD‑40 can stem. Press firmly and trigger a 1‑2‑second burst; the solvent will flush internal passages. If the first spray isn’t enough, repeat until paint clears. Reattach the nozzle immediately, shake the can, and test on a scrap surface. After use, press the nozzle upside down on the can to expel residue, then store it upright for proper nozzle storage. Regular nozzle lubrication maintenance with WD‑40 keeps future clogs at bay. Cleaning the nozzle before storage helps prevent propellant waste and ensures consistent spray performance. Properly store the nozzle after cleaning extends its lifespan and maintains optimal flow. Using WD‑40 on sprinkler heads can cause residue buildup that may affect system reliability. A clogged nozzle can also be caused by insufficient temperature preventing proper filament flow.

1 carton

Cleans grease, grime and dirt

WD-40 Specialist Contact Cleaner is ideal for removing oil, dirt, flux residue, and condensation from sensitive electrical equipment. This quick drying, residue-free formula is safe on metal and plastic
Warm‑Water Soak to Unclog a Spray‑Paint Nozzle
Warm water—at least 70 °F—softens water‑based or acrylic paint inside a spray‑paint nozzle, making it easy to loosen and remove. Fill a container with water at that temperature and submerge the nozzle for a temperature dependent solvent soak. For recent use, a short soak of 3‑5 minutes usually suffices; for dried buildup, extend the soaking duration to 10‑15 minutes or overnight. After soaking, tap the nozzle gently to dislodge softened paint, then blow compressed air through it to clear residual particles. If paint remains, repeat the soak, then use a 0.7 mm needle to scrape the jet without damaging the orifice. Test the spray on scrap material before reassembly to confirm full clearance. Apply WD40 to the top of the can can help loosen stubborn paint before soaking.
Clear the Nozzle Valve After Every Spray to Prevent Clogs
After soaking loosens paint, the quickest way to keep the nozzle from clogging is to clear the valve right after each spray. Turn the can upside‑down and press the trigger until only air sputters, typically twenty seconds. This pushes residual paint out of the tube and nozzle, preventing buildup. Immediately wipe the jet with a lint‑free cloth or cotton swab to remove any dried film. For removable tips, snap them off and give them a quick spray‑out, then store the nozzle in a sealed container with a small amount of lacquer thinner or isopropyl alcohol—this is the proper storage of nozzle to keep it from drying. Consistently practicing clearing nozzle after each use dramatically reduces clogs and maintains a consistent spray pattern. The nozzle’s spring and ball mechanism must stay intact during cleaning to ensure proper function. Understanding spray pattern dynamics helps you choose the right nozzle for optimal coverage and efficiency. Selecting the correct nozzle type for the task ensures efficient fluid control and prevents unnecessary wear. Choosing the appropriate nozzle based on material compatibility can further extend the life of your spray can.
Chemically Clean a Clogged Nozzle With Mineral Spirits or Acetone
A few minutes of soaking in mineral spirits or acetone will dissolve most paint clogs, letting you restore the nozzle’s flow quickly. Remove the nozzle, submerge it fully, and let it sit—mineral spirits need 1–2 hours for oil‑based paint, while acetone clears lighter residues in about 2 minutes. Gently probe the or hole with a toothpick, then rinse under warm,apy water to flush out loosened particles. Inspect the tip; if it’s clear, you can proceed with reusing cleaned nozzle without delay. Dry the nozzle with a lint‑free cloth, then wipe the spray can exterior with a light mineral‑spirit coat to prevent future buildup. Finally, follow local solvent disposal guidelines: collect spent solvent in a sealed container and take it to a hazardous‑waste facility. When the downstream pressure drops suddenly, it may indicate choked flow in the nozzle. Incorrect fuel type can also cause nozzle incompatibility, leading to fitting issues.

PROFESSIONAL-GRADE OIL PAINT THINNER: Our odorless mineral spirits is made from high-quality, pure, odorless mineral oil, free of aromatic solvents. This premium formula effectively thins oil paints, colorants, and varnishes, ensuring a smooth mix without affecting color or finish

Cleans up interior jobs

The finest paint thinner available
If Cleaning Fails: When and How to Replace the Nozzle
If the nozzle still clogs after soaking, probing, and rinsing, it’s time to replace it. You’ll notice persistent blockages, irregular spray patterns, or leaks during routine checks—signs that cleaning has failed and the orifice is beyond repair. Follow the replacement guidelines: verify a spare nozzle sprays correctly, twist off the old tip, pry out any internal inserts, and attach a compatible new nozzle. Test flow immediately. Update your maintenance schedule to include quarterly inspections, filtration upgrades, and post‑use wiping. Store used nozzles in paint thinner, shake cans for 60 seconds before spraying, and lightly widen the rear slit with a razor to reduce future clogs. This systematic approach restores performance and prevents recurring failures. Dust buildup can also contribute to persistent blockages despite cleaning. Selecting the right sprink pattern ensures optimal coverage for each gardening task. A clogged nozzle can cause thin string‑like streams that reduce watering efficiency. Regularly checking the spray pattern helps detect early signs of clogging before they affect performance.

Package Included: You will receive 10pcs Female Spray Can Nozzle. 10 kind different of spray paint nozzles of different sizes and shapes can depict various spray patterns and coverage ranges, meeting your various daily creative needs.

Package Included: You will receive 10pcs Female Spray Can Nozzle. 10 kind different of spray paint nozzles of different sizes and shapes can depict various spray patterns and coverage ranges, meeting your various daily creative needs.
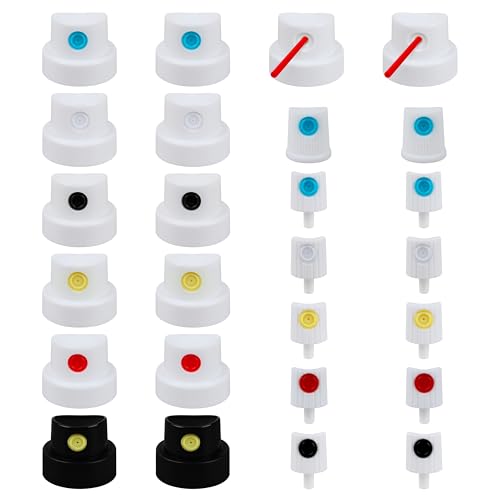
Versatile Spray Painter Set: This 26-piece kit includes adapters and spray tips to create spray patterns from