You’ll turn your sprinklers on when soil temperature hits 55‑65 °F and the volumetric moisture drops below 15 %, using calibrated probes at 6‑12 in depth. The controller cross‑checks temperature and moisture each cycle, and rain forecasts can pause watering to avoid runoff. Early‑morning runs (4‑6 a.m.) match the low‑evapotranspiration window, while high‑heat days (>90 °F) trigger deeper, less frequent cycles. Adjust seasonal timers and back‑flow checks, and you’ll see how each trigger fine‑tunes the schedule.
Identify the Temperature and Soil Thresholds for Spring Start
When you’re getting ready for spring, the key is to watch both air and soil temperatures. You start by installing a calibrated soil temperature monitoring probe at 6‑ to 12‑inch depth, linked to the controller’s logic module. Set the lower activation limit to 55 °F (13 °C) and the upper limit to 65 °F (18 °C); the controller only permits irrigation when the current reading falls within this band. Simultaneously, configure moisture sensor triggers to a 15‑% volumetric water content threshold. The system cross‑checks both inputs each cycle; if soil temperature meets the range and moisture is below the trigger, the valve opens. If either condition fails, the controller delays the start, preserving water and preventing premature watering. This systematic approach guarantees precise spring activation. Proper pump sizing also depends on elevation changes to maintain adequate pressure across the system. Adjusting the runtime to 15–30 minutes per zone helps achieve deep root watering while conserving water and preventing runoff. Selecting the appropriate sprinkler head spacing ensures uniform distribution across varying soil types.
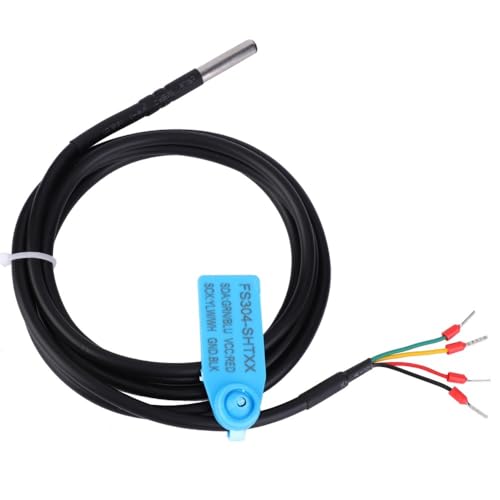
Advanced Sensing Components: Utilizes globally advanced technology for high accuracy, reliability, and long-term stability

『DIGITAL』 - The temperature and humidity sensor probe a cable sensor from the digital temperature and humidity series.

DUAL PROBES VS. A SINGLE PROBE—WHY IT MATTERS. Typical single-probe meters read mainly from one small point in the soil, so a wet pocket or dry patch can strongly influence the result. EVO10 uses two separated stainless-steel probes to measure across a wider root-zone area, helping provide more stable and representative soil moisture readings.
How Sprinkler System Timing Uses Temperature Trends
If you align sprinkler schedules with the day’s temperature curve, the system can exploit cooler periods to minimize evaporation and maximize soil uptake. You monitor daytime temperature swings and set the controller to trigger runs when forecasts dip below the peak evapotranspiration window (typically 4‑6 a.m.). Sensors feed real‑time data, so when temperatures exceed 90 °F the program switches to deep, infrequent cycles of 2‑4 days, extending zone runtimes (spray zones 10‑20 min, rotor zones 25‑35 min). Early‑morning activation reduces drift and wind loss, while avoiding night watering prevents fungal risk. This systematic approach curtails water waste and supports irrigation crisis prevention throughout spring, summer, and fall. Freezing temperatures can cause pipe bursts and sensor failures if sprinklers run unchecked. Proper soil moisture monitoring helps fine‑tune these schedules for optimal plant health. Local ordinances often define a sprinkler ban period that must be observed to avoid penalties.
Weather Forecasts That Influence Sprinkler System Timing
A handful of key forecast variables—rainfall, temperature, humidity, wind, and evapotranspiration—directly shape your sprinkler schedule. You feed rain forecasts into your controller; when predicted precipitation exceeds a threshold, the system pauses watering to avoid runoff and root rot. Temperature forecasts drive frequency and duration adjustments, with heat‑wave spikes extending cycles to offset higher evaporation. Humidity levels modulate ET calculations: low humidity triggers longer runs, while high humidity trims cycles. Wind speed considerations enter the algorithm to compensate for spray drift and accelerated drying; strong gusts raise applied water volume. Dew point monitoring refines morning start times, preventing unnecessary watering when atmospheric moisture nears saturation. By integrating these data streams, your system executes a systematic, zone‑specific schedule that aligns with real‑time weather dynamics. Proper pressure regulation ensures even water distribution across all zones. Understanding local water restrictions helps you avoid legal penalties while optimizing irrigation efficiency. Knowing the exact location of the main water valve simplifies emergency shut‑offs and routine maintenance.

DITCH THE DIAL – Upgrade to smart irrigation with the free Rachio app for precise, easy control.

Intelligent Irrigation Control: The Orbit Smart Sprinkler Controller manages watering with a powerful smart sprinkler that supports a completely automatic watering system

THE PROFESSIONAL UPGRADE FOR YOUR YARD - Upgrade your old controller to Yardian Pro to keep your plants lush while going green. Our ET-based smart watering system uses hyper-local weather data to automate your watering, saving you up to 50% on water bills.
Soil‑Moisture Checks for Accurate Sprinkler System Timing
Weather forecasts set the baseline, but real‑time soil moisture data fine‑tune the schedule. You install soil moisture sensor placement at 6, 12, and 24 inches depth, matching the root zone and dominant soil type—deeper in sand, shallower in clay or loam. After installation, perform soil moisture sensor calibration by saturating the surrounding soil with at least 5 gallons, waiting 24 hours without disturbance, then measuring field capacity 48 hours later. The controller averages weighted readings across depths, compares them to programmed “dry‑to‑wet” thresholds, and bypasses scheduled irrigation when moisture meets or exceeds target levels. This systematic, real‑time feedback prevents overwatering, aligns watering with actual plant needs, and optimizes water use efficiency. Properly sizing the system requires calculating the total water demand using sprinkler head flow rates, coverage area, and pressure. Incorporating zone‑based design helps tailor irrigation to varying plant needs and soil conditions across the landscape. Modern controllers can also integrate weather‑based adjustments to further reduce waste.

Kindly NOTE: This soil tester can not be applied to test pH value of any other liquid. If the soil is too dry the indicator will not move, and water it before testing.

✅ 1Dial & 1 LCD Screen - Replace/install all 3 batteries each time. Put button to %RH/°F to - Turn On, and put to LIGHT to - Turn Off. Read the LCD results in 3-5 mins. (Not Water Moisture Meter, so, please don't test liquid)

【4 in 1 function】This is a 4-in-1 multifunctional soil tester.Our soil tester fastly to measure soil moisture, pH, temperature and sunlight to help you take better care of flowers and plants.You can know when you need to water your soil by measuring moisture and pH & Temperature value of the soil and sunlight level of plants with it.
Step‑by‑Step Startup Procedure for Your Sprinkler System
Before you turn on the system, shut off the main water supply, verify that all backflow‑preventer valves are closed, and confirm the valve positions—this secures a safe, pressure‑controlled startup. Locate the main shut‑off, in the basement, crawlspace, or underground box, and ascertain it’s off. Close test ports and drain valves on the backflow device with a screwdriver, then close the entrance‑side ball valve. Gradually open the main supply, opening the lower ball valve first, listening for air escape and water fill. After pressure equalizes, set the controller to manual and run each zone for two minutes, watching for leaks, clogs, and coverage. Adjust head arcs and radii while zones operate, clean the controller, and program for spring watering. This systematic approach achieves proper irrigation levels and maximizes turf health benefits. Turn the petcocks perpendicular to the water flow to ensure proper valve alignment. Understanding the role of the solenoid coil helps diagnose why a valve may not open on command. Ensure you consult the polarity‑agnostic specifications for any DC‑powered solenoids to verify correct wiring. Use a magnetic tracer to quickly locate hidden solenoids when the wiring is not visible.

【Choose Certified Products】ONDAQUA holds the UPC Certification issued by IAPMO, and our products are also compliant with the ASSE 1020-2020 standard

【765 1" & 1-1/4" Repair Kit】All parts work for Febco 765 EBV 1" & 1-1/4" Backflow Preventer and Vacuum Breaker. Maximum working pressure: 150 psi. Perfectly replace for Febco OEM 905-212, 905-052 & 300-089. Replacement part for Febco 765-1 Repair Kit. ( NOT for 1/2" & 3/4" Models)

BACKFLOW PREVENTION: The Febco Bronze Pressure Vacuum Breaker Backflow Preventer Assembly provides the ultimate mechanical protection of potable water against cross-connection contamination hazards. It is used to protect against health hazard and non-hazard back-siphonage of toxic or non-toxic liquids and meets the specifications of the USC FCCCHR Manual.
Inspect Backflow Preventer and Winter Damage Before Activation
Once the frost has melted, you should inspect the backflow preventer for winter‑induced damage before turning the system on. Begin by clearing mulch, dirt, and leaves to expose the unit. Examine the main body for cracks, splits, or bent metal, and scrutinize corners and pipe connections for subtle hairline fractures. Check rubber seals for brittleness and bulges that indicate ice pressure. Perform a leak prevention test by activating the test cock and watching for drips around the assembly. Verify water pressure remains stable and that ball valves sit at a 45‑degree angle to avoid freezing. Document any defects as part of your seasonal maintenance, then repair or replace components before activation. Ensure compliance with local code by confirming the installed device meets the required backflow preventer standards. Familiarize yourself with the typical placement of a double‑check valve near the water main to aid in inspection. Understanding cross‑connection risk helps prioritize timely inspection and maintenance.
Schedule the Fall Shutdown at the Right Moment for Your Sprinkler System
When night‑ begin to dip consistently below 32 °F and first‑frost alerts appear, you should schedule the fall shutdown to avoid freeze‑induced damage. Use proper sprinkler winterization timing by tracking weather based winterization triggers such as frost advisories, leaf drop, and reduced mowing frequency. In Massachusetts and Southern New Hampshire, target late September to mid‑October; in Salt Lake City, aim for late September or early October; in Seattle, schedule mid‑October to early November. Verify the window with local forecasts to prevent early shutdown, which could dehydrate lawns, and avoid delayed shutdown, which risks pipe cracking and broken heads. Follow the winterization procedure: close the main valve, shut off backflow devices, open manual drains, air‑compress above‑ground lines, and recap all points to secure the system. Freezing temperatures can cause water in the lines to expand, leading to cracked pipes and broken sprinkler heads. Proper insulation of exposed pipes can prevent water expansion during sub‑zero conditions.
Seasonal Timer Tweaks to Keep Your Sprinkler System Efficient
If you set the seasonal adjustment dial to a percentage below 100 %, the controller automatically scales each station’s programmed run time, letting you fine‑tune water use without rewriting individual zone schedules. To implement efficient seasonal adjustments, first confirm each zone’s baseline minutes at 100 % during summer. Then turn the dial to “SEASONAL ADJUST%,” use the UP/DOWN arrows in 10‑point steps, and return to “AUTO.” Apply the guideline chart: March 80 %, April 60 %, October 60 %, November 80 %, December 90 %, and winter 10‑20 % for 2‑minute bursts on 20‑minute zones. Pair these tweaks with rain sensors and soak/cycle settings to meet zone specific watering requirements while preventing runoff. Review and fine‑tune every few weeks to maintain system efficiency. Using a seasonal adjust dial can save thousands of gallons per year.

Accessory For Voyager Ii

[Professional 3 Piece Sprinkler Tool Kit]Includes 1 sprinkler key, 1 rotor adjustment tool and 1 rotator tool—designed for irrigation installation, adjustment and system tuning

⭐【Comprehensive Sprinkler Tool Set】Our practical sprinkler tool set includes everything you need: 1 rotor screwdriver tool and 1 rotor hold up tool with bubble level tool for easy sprinkler replacement and adjustment. Easily lift and support pop up irrigation sprinkler heads, enhancing your lawn maintenance routine. These tools are perfect for anyone needing reliable, daily irrigation assistance


