You connect a 110 V transformer that steps the voltage down to 24 V AC, which safely powers the timer circuitry and each valve’s solenoid coil. The timer sends a 24 V pulse to energize a coil, pulling the valve open; a brief inrush current follows by a lower holding current. You set the clock, choose AM/PM, pick Program A/B/C, and assign start times, then program run times for each active zone while skipping unused ones. Switch to AUTO mode, adjust runtimes for rotors, sprays, or drip, and use smart features like rain sensors, delays, and manual overrides. If you keep going, you’ll discover deeper troubleshooting tips and optimization tricks.
How a Sprinkler Timer Powers Your Lawn
When you plug an irrigation controller into a standard 110‑volt outlet, the built‑in transformer steps the voltage down to a safe 24 volts, allowing the timer’s electronic circuitry to send precise activation signals to each valve. You must select a transformer sized for the total valve load; undersized units cause voltage sag, while oversized ones waste energy. Proper transformer sizing guarantees electrical overloads that could trip circuit breakers or damage the timer’s internal components do not occur. The controller’s circuitry draws the 24‑volt current through gauge‑appropriate wiring, delivering it to each zone on schedule. As the timer processes programmed start times, it energizes the correct valve coil, opening the sprinkler head for the preset duration. Consistent power confirms reliable zone activation and protects the system from intermittent failures. Low‑voltage AC power is commonly used to improve safety and reduce energy consumption. Proper zone balancing ensures uniform water distribution across the landscape. Reducing flow turbulence in the piping can also lower noise and improve overall system efficiency.
What the 24‑Volt Signal Does to Your Valves
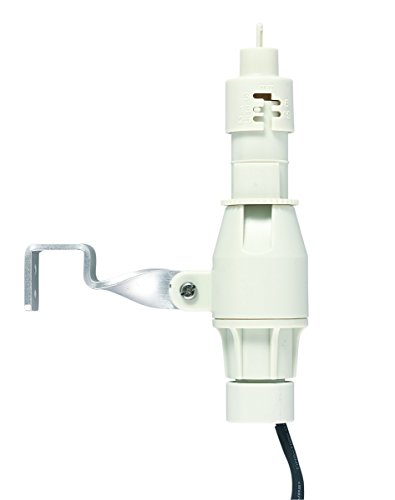
If the timer applies a 24‑volt AC pulse to a zone wire, the solenoid coil inside the valve sees a 38‑ohm load and draws an inrush current of about 0.30 A (7.2 VA) for a brief moment before settling to a holding current of 0.23 A (5.5 VA). The activation line voltage travels through the common wire, which acts as the return path, completing the circuit for each valve. When the pulse arrives, the coil’s magnetic field pulls the plunger, opening the valve. Because the coil’s resistance is fixed, solenoid power efficiency depends on maintaining the 24 VAC supply and minimizing voltage drop across connections. Properly tightened terminals and a reliable common bus guarantee consistent activation, prevent false leaks, and keep each zone’s timing accurate. The 24‑volt AC signal also powers the sprinkler cable’s red wire, delivering the necessary voltage to the valve. Understanding the valve spring mechanism helps prevent premature wear and ensures reliable closing when power is removed. The main water supply delivers the necessary flow to the system, allowing each valve to regulate water distribution to its zone. A quick visual check of the control valve box can reveal the cylindrical coil location for faster troubleshooting.
Set the Clock and Choose AM/PM Correctly
After the valve coil receives its 24‑V AC pulse, the timer’s internal clock determines when that pulse is sent. Turn the dial to SET CLOCK, then use the plus/minus buttons to adjust hour, minute, and AM/PM. Press ENTER to lock the time; the display will show the updated reading, such as 8:27 PM. Verify the AM/PM indicator before confirming—mistaking AM for PM shifts watering by twelve hours. Next, rotate to SET DATE, adjust year, month, and day with the same buttons, and press ENTER after each field. Accurate date settings enable seasonal adjustments and odd/even day programs. Finally, cycle through time and date screens to double‑check entries, then return to AUTO to finalize the clock configuration. Orbit timers often allow multiple start times for flexible watering schedules. If the timer fails to respond, check for dead battery and replace it if necessary. Regular maintenance can extend the device’s lifespan, but after 5‑10 years the risk of failure increases. Consider installing a corrosion‑resistant cover to protect the timer from harsh weather conditions.

AC/DC 24V Input: Powered by a standard AC/DC 24V input, making it compatible with household and light industrial control systems

【24V DC/AC Input Voltage , 200-250V Output Voltage】24V DC/AC control input for safe operation with 200-250V AC power output for load switching

WATER YOUR YARD WITH EASE - Our Easy Set Logic sprinkler timer is the perfect choice for your yard, controlling up to 12 zones/stations for efficient irrigation.
Choose Program A or B and Assign Start Times
Select Program A or B (or C) first, then dial to the START TIMES screen to assign up to four activation times for that program; use the plus/minus buttons to set each time, such as 6:00 AM. The controller sorts entries automatically, so you can input them in any order. Assign multiple start times when you need to split watering—e.g., a 10‑minute run at 5:45 AM, a 30‑minute soak, then another run at 6:15 AM—to reduce runoff. Keep start times distinct across Programs A, B, and C to avoid overlaps with other zones or household water use. If a program only requires a single daily run, set slots 2‑4 to OFF. After programming, rotate the dial back to RUN; the timer saves changes without extra steps. The total run time of 79 minutes ensures the schedule does not interfere with other water usage. Remember to locate the main water valve before making any adjustments to prevent accidental flooding. Sprinkler control boxes are typically housed in a metal or plastic enclosure near the main water valve.

【Easy Programming Program】Through the Sprinkler Timer to program, you can set the Start Time, Watering Duration is 1min-3h59min, Watering Frequency from 1h to 12h or 1 day to 7 days, so you can customize your watering time, and can be more accurate.

Experience the Revolution - The valves have been fully upgraded, reducing flow resistance by 40%. The screen structure has also been improved, achieving an IP65 waterproof rating. It has passed 20,000-cycle lab testing, making the product more durable.

Easy to Program: With the Sprinkler Timer program, you can set the start time, watering duration (1min - 3H and 59mins), and watering frequency (6H / 8H / 12H or 1 day - 7 days). By programming, watering can be carried out automatically and accurately on a schedule.
Program Run Times for Each Zone (Skip Unused Zones)
A program’s run‑time schedule is built by assigning each zone a minute value for every start time, and any zone set to zero minutes is automatically skipped, letting you concentrate water only where it’s needed without creating overlapping cycles. You enter 6‑minute runs for sunny lawns, 4‑minute runs for shady lawns, and 8‑10‑minute bursts for spray zones, while rotor and MP rotorator zones receive 15‑20 minutes. Use the programming monitor display to verify each zone’s minutes and adjust with zone adjustment percentages when seasonal changes demand a uniform scale. Set unused zones to zero; the controller ignores them, preventing extra start times and stacking. Divide total weekly minutes by watering days, then split the result across the programmed start times, ensuring each cycle runs efficiently and without conflict. Start Time 1 can be set to 2:00 PM using the “+” and “–” buttons in 15‑minute increments. To achieve one inch of water, calculate the required runtime based on the sprinkler’s flow rate and lawn area. Proper zone sizing also depends on water pressure and pipe diameter to maintain adequate spray patterns. Adjusting runtime for soil type helps achieve deep root watering while conserving water.
Pick Watering Days – Daily, Alternate‑Day, or Custom
When you’ve set each zone’s run‑time, the next step is choosing the days the controller will water. Daily watering activates every day, which can boost water efficiency for new sod but raises overwatering prevention concerns and may violate local ordinances. Alternate‑day mode splits the week into odd or even dates; select the set with arrow keys and watch the water‑drop icon appear above Sunday. This approach satisfies many municipal restrictions while limiting excess moisture. Custom day selection lets you toggle specific weekdays—Monday, Wednesday, Saturday, etc.—using plus/minus buttons; a circle‑slash icon marks non‑watering days. Assign custom schedules to Programs A, B, or C to match zoning rules and plant needs, ensuring precise control and ideal water efficiency. Rotate the center dial back to the Run position to activate the programmed schedule. Remember to check the sprinkler ban end dates for your region to stay compliant. Understanding local water statutes helps avoid penalties and promotes responsible irrigation. Residents should also be aware of the Perth watering ban schedule to plan their irrigation accordingly.
Switch to AUTO Mode to Activate the Full Schedule
Once you’ve programmed the run times, start times, and watering days, flip the selector switch to “Auto” and align the silver indicator with the current time; then turn the black wheel counter‑clockwise until the current day sits under the “14” marker. Press down any pins for non‑watering days to skip them. Next, verify auto mode activation by checking that the LCD alternates between the current time and the next scheduled start. Confirm timer display status shows the correct program (A, B, or C) and that all dials remain locked in their programmed positions. The system now governs each zone according to the stored schedule, automatically turning valves on and off without further manual intervention. The swing panel provides easy access to wiring terminals when adjustments are needed. Check the main valve before making any changes to ensure the system is safely depressurized. Proper grounding helps prevent electrical hazards during installation. Regular valve inspection can catch early signs of wear before they cause uneven watering.
Adjust Sprinkler‑Timer Durations for Rotors, Sprays, and Drip
Two‑to‑four‑minute runs are typical for rotor heads, five‑to‑fifteen minutes for spray heads, and one‑to‑four hours for drip zones; each range reflects the head’s precipitation rate, pressure sensitivity, and intended coverage. Set rotor stations at 20‑40 minutes, then tweak based on pressure and throw distance; a full‑cycle test confirms uniform spray. For spray heads, apply proper spray head adjustments: turn the screw clockwise to lower flow, counter‑clockwise to raise it, and keep the run time between 5‑15 minutes under normal pressure. Drip zones need 1‑4 hours because emitters deliver 0.5‑2 gal/hr; focus on soil absorption, not surface wetting. Finally, apply seasonal duration modifications by scaling each program’s minutes with the system’s seasonal adjust button for efficiency. Adjust the nozzle retention screw right limit to fine‑tune the rotor’s spray pattern.

Effortless Watering Automation: The Orbit Mechanical Water Timer helps manage lawn and garden irrigation with a reliable mechanical water timer design and hose faucet timer control

【Easy to Program】Rotate the dial and press the buttons to set clock, how often (watering frequency), how long (watering duration), start time, auto, and off. Watering Frequency from 1Min to 23h59Min or 1 to 7 days, each Watering Duration is 1min-23h59min. The sprinkler timer can customize your watering time to meet your flexible watering needs.

Smart Automatic Watering Control: The Orbit Programmable Digital Hose Watering Timer transforms a faucet into an automatic watering system using a reliable single outlet hose timer
Use Sprinkler‑Timer Smart Features: Rain Sensor, Delay, Manual Override
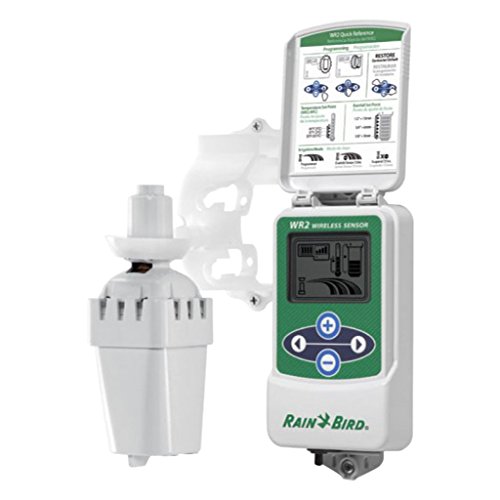
Three key smart features—rain sensor, rain delay, and manual override—let you fine‑tune irrigation with real‑time weather data and on‑demand control. Install the sensor in an open, unobstructed spot; its UV‑resistant housing and wireless battery last two years, and it halts cycles within minutes of detecting moisture or freezing temperatures. Use rain delay via the app or timer to suspend watering for 1‑30 days, automatically extending duration later if drought persists. Manual override bypasses any schedule, letting you start, pause, or stop zones instantly for maintenance or unexpected needs. The controller logs flow‑meter data, delivering precise usage reporting and integrating smart weather tracking to adjust schedules, ensuring efficient water use. Rainpoint’s durable brass inlet resists heat and sun, protecting the system during scorching summer days.
For automatically detecting rainfall or low temperature conditions

INSTANT RAIN AND FREEZE SHUTOFF: Quick Response technology stops your sprinkler system the moment rain begins or temperatures fall to 37°F, preventing water waste and protecting your lawn from freeze damage.
Wireless rain sensor shuts off irrigation when it rains - Freeze sensor shuts off irrigation when temperature drops below set point - Saves up to 35% on water usage
Troubleshoot Common Issues – No Water, Short Runs, Valve Failures
Smart features keep your schedule tight, but when the system stops delivering water, the problem isn’t the sensor—it’s usually a supply, power, or valve issue. First, confirm water reaches the main line; a closed valve or broken pipe will block flow. Then verify the controller’s power, checking the transformer output and all wire connections for loose terminals or broken bundles. If zones run briefly, review AM/PM start‑stop settings, reset the clock after outages, and test each zone manually to isolate timing errors. For valve failures, measure voltage at the solenoid, check resistance with a multimeter, and inspect wiring for shorts or weather damage. Finally, examine heads for faulty sprinkler heads or clogged sprinkler nozzles, as these can mimic larger system faults. Check the voltage at the control panel for the non‑working zone to ensure it falls within the expected 20‑30 V range.

Better Compatibility: Compatible with DRKCP/CPF diaphragm repair kit, this 4 pack valve diaphragm replacement kit is compatible with Rain Bird CP, CPF, DV, DAS, ASVF and other series valves, providing a perfect fit

Replacement sprinkler valve/controller diaphragm kit

COMPATIBILITY WITH MULTIPLE BRANDS: This 279834 gas dryer coil kit works with dryers from Whirlpool, Kenmore, Maytag, Amana, Roper, KitchenAid, Crosley, Norge, Estate, Speed Queen, Admiral, Magic Chef, Inglis, Jenn-Air, Hoover, and International . Built to match M-style gas valves used in many models including Kenmore 80 , 500 ,600, 700 ,800 series and Elite He3/ He4/ HE5 gas dryer. These replacement gas coils restore drying performance across a wide range of standard gas-powered home dryers.


