You’ll find a sprinkler zone works best with 3‑5 heads at about 30 psi, because each head adds flow demand and pressure loss. Check your water‑meter’s GPM rating—5 GPM for a 5/8″ line, 7 GPM for 3/4″, 12 GPM for 1″—and keep the total head flow under that limit. Space heads 12‑15 ft apart, stay at least 6 ft from walls, and respect hazard‑based spacing rules. If you exceed these limits you’ll see weak arcs, dry edges, and runoff; the next sections show how to fine‑tune pressure, flow, and layout for ideal, sustainable performance.
How PSI Limits Sprinkler Zone Head Count
Three to five sprinkler heads per zone is typical when the system runs at 30 psi, the sweet spot for even coverage. You’ll notice that staying within the ideal psi range—30 to 50 psi—keeps each head popping to its design height and prevents dribbling. When pressure climbs toward the maximum pressure threshold, the flow per head rises, letting you add more units without sacrificing uniform spray. Yet you must watch the balance: too much pressure can strain valves, while too little creates dry patches and clogs. By measuring psi before installation, you align head count with water‑delivery capacity, ensuring a sustainable layout that conserves water, maintains aesthetic uniformity, and respects the system’s technical limits. Properly sizing a zone also requires calculating the total gallons per minute needed based on head flow rates and coverage area. Understanding zone layout helps you match plant water needs with the appropriate irrigation zones. Some sprinkler valves incorporate built‑in pressure regulators to maintain consistent flow across varying system pressures.
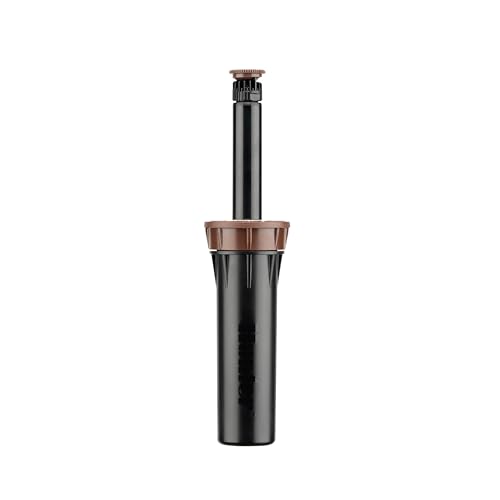
BUILT FOR LAWN & GARDEN IRRIGATION: Perfect for replacing old sprinkler bodies or expanding your system, ideal for yards, garden beds, and home irrigation zones, NOZZLE SOLD SEPARATELY.
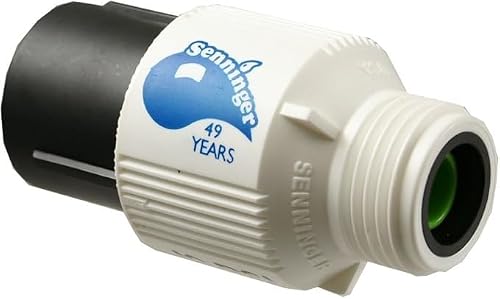
100% pressure tested, to ensure quality and performance

BUILT FOR LAWN & GARDEN IRRIGATION: Ideal for taller grass, slopes, and areas requiring deeper pop-up height, great for yards, garden beds, and perimeter zones, NOZZLE SOLD SEPARATELY.
How Pressure Determines the Number of Heads per Zone
Keeping the zone’s psi within the 30‑50 range sets the stage for a pressure‑driven head count, because the water pressure directly caps how many sprinklers can fire simultaneously without sacrificing coverage. You start by determining minimum pressure requirements for each nozzle; a 3.0‑nozzle rotor needs about 35 psi to deliver 3.11 GPM. Next, you evaluate dynamic pressure losses—subtract roughly 20‑25 psi from static pressure, then account for additional 10‑15 psi loss from meters, backflow preventors, and pipe friction. The resulting dynamic pressure tells you how many heads can run without falling below their minimum thresholds. Sum each head’s GPM demand and compare it to the available flow; if the total exceeds the supply, trim the head count or upgrade the pressure source. This disciplined approach guarantees uniform coverage, conserves water, and upholds sustainable design. Pipe size is a key factor in determining friction loss. Understanding the solenoid operation helps diagnose why a valve may not open when commanded. Properly sized low‑voltage power supplies ensure reliable valve actuation and can be backed by battery or solar options for added resilience. Typical PSI ranges illustrate how elevation changes affect pressure availability across a landscape.
How Much Water Do You Need? GPM Limits for Each Lawn Size
When you size an irrigation system, you first break down the lawn into zones and match each zone’s water demand to the flow capacity of your water meter. A 5/8″ meter caps at about 5 GPM, a 3/4″ at 7 GPM, and a 1″ at 12 GPM; design within 80‑90 % of those limits to protect against hammer and waste. For a 2,000‑sq‑ft lawn, use four rotor heads (2.5 GPM each) totaling 10 GPM, staying under a 12 GPM system. Small, shaped areas can use high‑precipitation spray heads, while larger open turf needs rotors with 25‑30‑ft radii. Apply water conservation techniques—adjust run times, install rain sensors, and select drought tolerant landscaping—to keep usage low while maintaining healthy growth. Understanding flow rate limits helps prevent over‑pressurizing the system. Choosing the appropriate nozzle shape can significantly affect delivery speed, making nozzle size a key factor in overall efficiency. Properly calculating nozzle inches ensures the spray pattern matches the zone’s coverage needs.

ADJUSTABLE ARC & SPRAY DISTANCE: Includes a preinstalled 3.0 GPM nozzle with an arc that adjusts from 40° to 360°, ideal for both full and part circle coverage. Delivers a spray distance of approximately 22 to 52 feet, with optional nozzles (sold separately) allowing further customization.

2.5 NOZZLE PRE-INSTALLED FOR EASY SETUP: Comes ready with a factory-installed 2.5 nozzle offering a flow rate of 1.7 to 3.2 GPM. Ideal for residential systems needing consistent higher-range coverage.

Designed and built to provide year after year high performance and low maintenance, K-Rain rotors deliver outstanding coverage on any terrain
Hazard‑Based Spacing Rules for Sprinkler Zones
If you’re designing a sprinkler system, the spacing between heads must follow NFPA 13 hazard classifications, because each class limits the maximum protection area per sprinkler. Light‑hazard zones allow up to 15 ft between heads, ordinary‑hazard the same, while extra‑hazard zones drop to 12 ft for certain systems. Keep a minimum 6‑ft gap between standard spray sprinklers and no more than half the allowable spacing from walls—typically 7.5 ft. Apply the three‑times rule for obstructions, ensuring clearances three times the largest dimension or at least 24 in. These limits drive sprinkler density requirements, so you can balance water use with fire protection. By respecting hazard‑based spacing, you gain zone configuration flexibility while maintaining technical rigor, aesthetic uniformity, and sustainable resource management. Additionally, the four‑times rule applies to extended coverage and residential sprinklers, requiring a minimum distance of four times the largest obstruction dimension. Ceiling height limits also affect sprinkler performance, as higher ceilings may require increased water pressure or additional heads to meet design density. Proper sprinkler‑to‑wall distance helps prevent wall damage while ensuring effective fire suppression. A well‑designed system can also boost curb appeal, which is a key factor in property value enhancement.
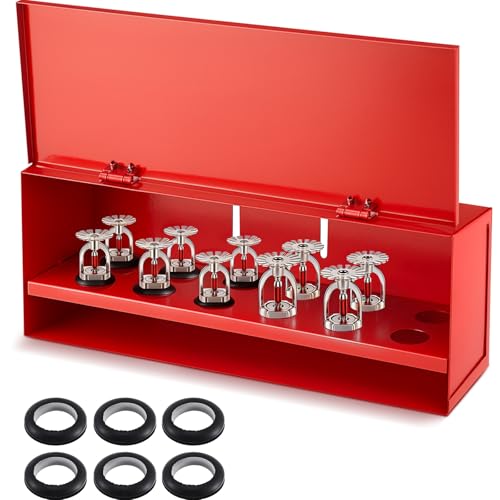
High-capacity Storage Scheme: the cabinet provides organized storage for up to 12 fire sprinkler heads; This substantial capacity ensures that an adequate number of replacement heads are readily available on-site for maintenance or emergency situations; The structured design helps prevent loss or damage to these critical components, contributing to efficient inventory management and system reliability

Ensure your building is compliant with a Spare Head Fire Sprinkler Cabinet. Every building should have spare fire sprinkler heads in case of emergency! For fire sprinkler systems adhering to NFPA 13 and NFPA 25 guidelines, you should have a supply of at least 6 spare fire sprinkler heads for a system with 300 or fewer sprinklers. This fire protection box allows for storage of up to 6 spare heads, able to fit 1/2 in. NPT fire sprinkler heads, or, using the “knockouts,” 3/4 in. NPT heads.

Approved for sale/meets pressure regulation legislation requirements in: CA, CO, HI, VT, MA, ME, NY, OR, RI, WA, and Washington DC
Designing Zone Layouts for Small, Medium, and Large Lawns
Designing zone layouts for small, medium, and large lawns starts with segmenting the area into zones that match the sprinkler head type, water pressure, and flow capacity. For a townhome front or back yard, allocate 2–3 zones using fixed‑spray heads; a single zone can hold 5–10 heads with a 15‑foot radius, enabling precise soil moisture optimization. On a 1/4‑acre medium lawn, split the space into 5–7 zones of 5–6 rotor heads or 8–10 spray heads, respecting 30–50 PSI limits and running a vegetation impact assessment to balance sun exposure and plant types. Large properties exceed an acre, so you design 10+ zones, favoring rotors for wide stretches and keeping each zone under the 10 gpm flow ceiling to preserve uniform moisture distribution and sustainable water use. Properly accounting for spray radius ensures overlapping coverage and minimizes dry spots. Understanding the valve operation helps prevent pressure loss across zones. Burying sprinkler lines at a depth of 6–12 inches protects them from frost damage and foot traffic.
When Is a Zone Too Big? Signs of Over‑Crowding and Dry Patches
A zone becomes too big when the demand on each sprinkler head exceeds the system’s flow and pressure limits, causing clogged heads, weak spray patterns, and visible dry patches at the outer edges. You’ll notice uneven water distribution: the center receives awatering center while the perimeter stays parched. Pressure drops manifest as weak arcs, and clogged heads spew mist instead of a full cone. Dry patches appear as brown spots where flow is insufficient for the head count. If you count more than ten heads in a residential zone, the GPM budget is likely exceeded, leading to runoff and evaporation waste. Reducing head density restores balance, conserves water, and protects your landscape from costly repairs. Modern systems often incorporate moisture sensors to fine‑tune watering schedules and prevent over‑irrigation. Properly installed rain‑activated sensors can automatically shut off irrigation during rain, further protecting against over‑watering. Sensor‑driven throttling helps maintain optimal pressure across the entire zone.
Checklist: Verify Pressure, Flow, and Spacing for Every Zone
When a zone grows beyond its capacity, the first step is to confirm that pressure, flow, and spacing all meet the system’s design limits. Check static pressure at the hose bib; subtract 20‑25 psi for pipe length and fittings to get dynamic pressure. Guarantee the resulting pressure stays near 30 psi for spray heads and 35 psi for pop‑up sprinklers, accounting for elevation changes that cause pressure drops of 0.433 psi per foot. Verify flow by adding each head’s GPM demand— a 3‑rotor zone at 35 psi needs about 9 GPM, well within a 1‑inch pipe’s 15 GPM capacity. Finally, confirm head‑to‑head spacing respects hazard‑level coverage and that spacing adjustments compensate for any pressure drops caused by terrain or elevation. This checklist keeps zones efficient, sustainable, and aesthetically uniform. Properly sizing the pump based on the calculated total flow and required pressure ensures reliable operation across the entire irrigation layout, especially when using high‑efficiency heads that reduce water usage while maintaining coverage. Understanding flow dynamics helps fine‑tune these parameters for optimal performance.


