Turn off the interior shut‑off valve, open the outdoor faucet to purge water, then detach the hose and elevate one end so gravity drains the rest. Stretch the hose on a gentle slope or use a “sling‑over‑branch” method for complete removal, and blow out any remaining moisture with a compressed‑air gun. Insulate the bib and faucet with foam sleeves or a sock‑style cover, and choose an NSF‑certified, BPA‑free soaker hose that stays flexible in sub‑zero temps. Check for worn washers and install a backflow preventer to protect your system; the next steps will show you how to fine‑tune winter watering efficiently.
Winterize Your Garden Hose: Disconnect and Drain Before the First Freeze
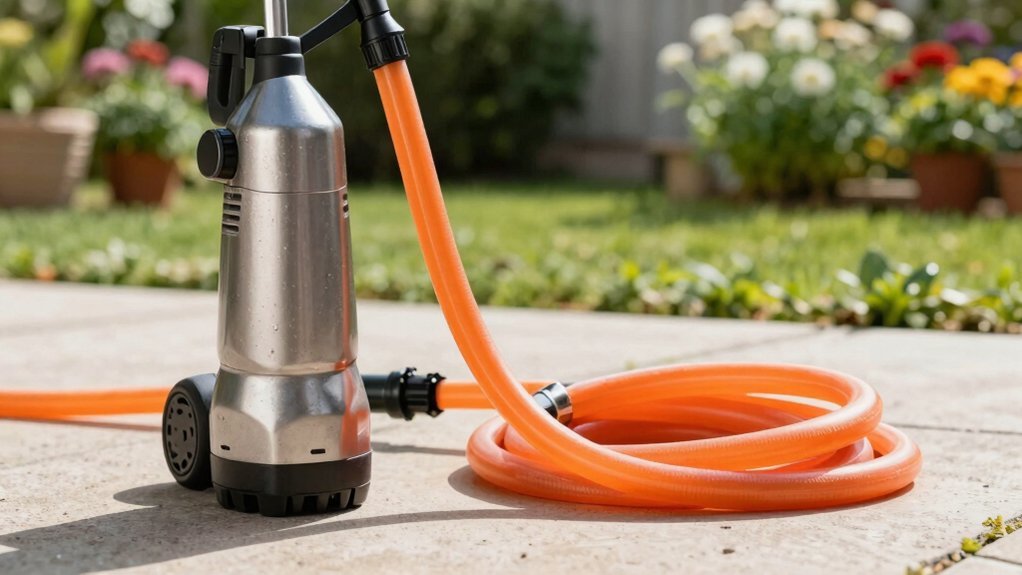
Before the first freeze hits, you must winterize your garden hose by disconnecting it and draining every drop. Locate the interior shut‑off valve in the basement or utility room, turn it off, then open the outdoor faucet fully to purge residual water. Detach hose protectors and pull the hose cleanly from the bib, using pliers if the connection is frozen. Elevate one end, drape the hose over a fence post, and let gravity pull the last droplets out; remove nozzles and timers first. Insulate hose bib connections with foam sleeves, then leave the bib open all winter to avoid pressure buildup. Coil the empty hose in a dry, sheltered spot, keeping it above freezing to preserve integrity and guarantee longevity. Drain the remaining water by opening the hose bib valve as far as possible and leaving it open throughout winter. Properly blowing out the system with compressed air can further prevent freeze damage. Low temperatures cause water to expand as it freezes, which can crack hoses and damage fittings. Understanding ground temperature helps predict how quickly water in the hose will cool during winter.
Stretch and Position the Hose on a Slope for Complete Water Removal
When you stretch the hose along a gentle yard slope, gravity does the heavy lifting, pulling water toward the lowest point without any shaking. You start by uncoiling the hose fully, then elevate the faucet end while letting the distal end descend the slope, maintaining a continuous downhill gradient of about one inch per foot. Use a level to verify the slope, then employ the sling over branch method: sling the hose over a low branch, pull the hose downward, and let the branch lift fresh sections uphill, creating successive gravity assisted drainage stages. This technique eliminates low spots that trap water, reduces the need for manual shaking, and guarantees rapid, complete moisture removal before storage. Leaving the spigot open allows water to drain out and prevents damage from expanding water. Check the main water valve to ensure the system is fully isolated before beginning the drainage process. Safety valve disengagement should be performed before any hose removal to avoid sudden pressure release. Proper winterization prevents frozen pipe damage that can cause costly repairs.
Blow Out Moisture With a Compressed‑Air Gun
After the hose has drained its water by gravity, you can finish the winterization by blasting any remaining moisture out of the pipe network with a compressed‑air gun. Attach the quick‑connect to the compressor, then fit the bushing and hose adapter to shift from the garden hose to the iron‑pipe threading. Set the regulator below 50 psi and install a venturi nozzle to guarantee controlled air velocity while delivering efficient air volume. Begin at the farthest outdoor faucet, directing the airflow outward so water is pushed toward the lowest point. Make multiple passes if needed, watching for steady streams exiting each outlet. The safety‑rated nozzle protects fixtures, and the portable three‑piece kit keeps the process swift, clean, and aesthetically seamless. Ensure the hose adapter is securely tightened to prevent air leaks. Properly matching the compressor’s CFM rating to the system size maximizes efficiency and prevents damage. Use a hose with a high pressure rating to avoid bursts during the blow‑out. Selecting the correct garden hose thread size helps maintain a leak‑free connection throughout the blow‑out process.
Insulate Outdoor Faucets: Materials and Easy Installation Tips
How can you keep your outdoor faucet from turning into an ice block this winter? Start with a foam insulation cover: a hard‑shell Styrofoam sleeve that snaps onto the spigot, protecting against physical damage and moderate cold. For harsher freezes, wrap the faucet with flexible insulation tape or a sock‑style cover, securing layers with duct or packing tape. DIY faucet protection is even simpler—fill a plastic bag with old rags or a towel, slip it over the faucet, then tape it shut. Add a layer of bubble wrap or a sliced pool noodle for extra bulk. Choose weatherproof polyester or vinyl soft covers with long ties for a snug, reusable seal. This easy insulation installation keeps water flow ready and prevents costly burst pipes. Drain the hoses before insulating to remove any remaining water. Freezing temperature thresholds should be monitored to avoid sprinkler damage. Water can reach up to 140 °F in extreme heat, so proper insulation also protects against unexpected temperature spikes. Proper winterization also includes draining the sprinkler lines to prevent freeze damage.
Choose NSF‑Certified, BPA‑Free Soaker Hoses for Winter Durability
Insulating your faucet is only the first step; the next move is picking a hose that won’t crack or leach chemicals when winter freezes. When you meet insulation requirements, choose an NSF‑certified, BPA‑free soaker hose that satisfies temperature considerations down to 20 °F. NSF/ANSI 61 and 372 guarantee lead‑free, non‑leaching polyurethane, while BPA‑free construction eliminates hormone‑disrupting risks for plants, pets, and even drinking water. The hose’s all‑weather, UV‑resistant blend stays flexible in sub‑zero weather, preventing brittle cracks that could burst under frost pressure. Its 1/2‑inch diameter delivers uniform root‑zone soaking, and lead‑free brass fittings guarantee reliable connections. Drain fully before a freeze, store in a shed, and you’ll preserve both garden health and structural integrity throughout winter. Lead‑free certification ensures the hose meets strict safety standards for potable water. Properly installing a backflow preventer near the water main protects the house plumbing from frozen hose back‑flow. Cross‑connection hazards can cause contaminated water to flow back into the supply line.
Install Shut‑Off Nozzles to Control Flow and Prevent Over‑Pressurization
A shut‑off nozzle is the key to managing water flow and protecting your hose from over‑pressurization during winter. Choose a nozzle material selection that favors brass valves and heavy‑duty metal bodies; the 180° rotating head and 3/4‑inch GHT interface give you versatile, precise control. Before you attach it, turn off the faucet and verify the rubber gasket sits snugly in the female thread. Hand‑tighten the connection clockwise, avoiding pliers to keep threads intact and guarantee leak free connections. Use the flow‑control knob to dial back pressure, and test briefly by opening the supply just enough to watch for drips. This setup maintains efficient delivery while preventing strain on the hose in cold conditions. Press replacement female end into the hose to ensure a secure, leak‑free fit. Inspect O‑rings regularly to catch wear before it causes leaks. Typical residential hoses operate between 40 and 80 psi which aligns with standard household water pressure levels. The hose’s diameter determines how much water can pass through, influencing flow rate during winter watering.
Inspect Hose for Leaks, Bent Ends, and Worn Washers
When winter temperatures drop, even a small leak or a bent hose end can cripple your watering system, so you’ll want to inspect every connector, washer, and joint before the first freeze. Begin by turning off the supply and disconnecting the hose; use needle‑nose pliers to pull out each washer and look for dry, cracked, or grooved material—signs of aging that demand replacement. Identifying leaks starts at the spigot and nozzle connections; tighten any loose collar and test with a brief water burst. Bent ends prevent proper sealing; cut off deformed fittings with a sharp blade, then attach a matching replacement using evenly tightened clamps. Replace all washers annually to guarantee a watertight seal and to keep premature wear at bay. Ensure the new o‑ring is seated correctly before re‑pressurizing the line. High water pressure can exacerbate small cracks, so consider installing a pressure regulator to protect the hose. Properly securing the connector with a twist‑on clamp helps prevent leaks during freeze‑thaw cycles.
Install a Hose Reel Cart for Seasonal Storage
Hooking a hose reel cart onto your seasonal routine streamlines winter storage while protecting the hose from kinks and ground wear. Choose a cart with a solid steel frame and pneumatic tires; the low center of gravity prevents tipping on gravel or ruts. Secure the cart in a sheltered spot—outdoor hose reel placement should avoid direct snow accumulation while allowing easy access for spring deployment. Load up to 250 ft of 5/8‑inch hose onto the built‑in guides, then wind with the easy‑turn handle for tidy, kink‑free coils. Rust‑resistant, powder‑coated steel end the cart functional in cold weather, yet indoor storage is advisable in extreme climates. This setup delivers organized hose reel cart storage, enhances safety, and extends hose lifespan.
Add a Timer for Controlled Winter Watering
Ever wondered how a simple timer can turn winter watering from a guessing game into a precise, low‑risk routine? Choose a digital or smart timer to match your garden’s complexity. Smart timer features let you set multi‑program schedules, rain‑delay logic, and zone‑specific durations, while a mechanical timer offers battery‑free simplicity. Connect timers to water sources by attaching a hose timer directly to the outdoor faucet, then run a 24‑volt transformer from a 110‑volt outlet to power valve activation safely. Program each zone—A, B, C—considering head type and winter flow rates. Enable rain‑sensor integration to pause cycles when moisture spikes. Weather‑proof housing and indoor storage protect electronics, ensuring reliable, low‑energy operation throughout the cold season. Consistent watering prevents stress and wilting in winter, making a timer essential.
Check Frost Alerts Before You Water in Winter
A quick glance at your local frost alerts can save your garden from costly damage, because knowing whether temperatures will dip below 36 °F (2 °C) for frost or 32 °F (0 °C) for a hard freeze lets you time watering precisely. When alerts forecast frost, schedule a 24‑48‑hour pre‑emptive soak early in the day; moist soil stores roughly four times more heat than dry ground, creating a thermal buffer for root systems. If warnings indicate a hard freeze, defer watering until the soil thaws, as water can freeze in plant cells and cause rupture. Use the alerts to align ideal timing with plant protection, avoiding irrigation when ground is already frozen or when temperatures sit below 40 °F. This disciplined approach preserves foliage, curtails fungal risk, and maintains a resilient winter garden.