Install your sprinkler valve at least six inches above the highest downstream head, aiming for a 6‑12‑inch clearance to satisfy California Title 23 CCR §493.2.2 and NFPA 13. This height prevents siphon backflow, keeps the valve accessible, and avoids obstruction by lawn growth or debris. Guarantee the valve sits above any standing water and that the box provides at least six inches of clearance above the head. Proper placement also simplifies winterizing and future maintenance, and the next sections will cover sizing, box dimensions, and adjustment tips.
What Is the Correct Sprinkler Head Height?
When you install a pop‑up sprinkler, the head should sit just above the soil surface—no more than 0.25 inches for bare ground and 0.5–0.75 inches for sod lawns. Adequate ground clearance protects mower blades and eliminates tripping hazards, while proper sprinkler adjustment maintains spray pattern integrity. Choose a 3‑inch pop‑up for typical mowed lawns; a 4‑inch model suits new sod or excavated areas where extra shaft length prevents grass interference. For rotor heads, 4‑inch is standard, with 5‑ or 6‑inch options for taller vegetation. Install staged risers cut to the exact height before attaching the head, then flush the system. If the head protrudes beyond the specified range, lower it by trimming the riser or re‑digging the pipe, or replace it with a shorter specialty head. This guarantees durability, safety, and consistent irrigation performance. Shorter sprinklers are less tolerant of lawn growth and thatch. Adjusting head height according to soil type helps maintain even water distribution and prevents runoff. Proper spacing of heads based on spray radius ensures uniform coverage and water conservation. Selecting the appropriate nozzle type further enhances efficiency and reduces waste.
Measure Sprinkler Head Height Accurately
If you need a reliable height for a pop‑up sprinkler, start by measuring only the stem that rises above the canister. Place a ruler or tape measure on the edge of the stem at its widest part, then read the distance from the ground to the tip; this gives the accurate height verification you need for ordering. Use the SRT‑1000 or SRT‑2000 to confirm sprinkler head clearance matches the measured stem size, noting that the SRT‑1000 covers 1 5/8‑2 1/4 in. and the SRT‑2000 covers 2 1/2‑2 3/4 in. Record the height in inches or millimeters, then cross‑check with the engineer’s scale for scaled designs. Finally, position catch cups two feet from the head toward the zone center to validate performance under real‑world conditions. The SRT‑1000 is designed for smaller pop‑up sprinklers. Proper room dimension analysis helps ensure adequate water distribution across the entire space. When using a metal detector near irrigation lines, be aware of electromagnetic interference from nearby power cables. Understanding sprinkler flow rate is essential for matching head performance to fire protection requirements.

A-SHA ADAPTER: Underhill Adapter connection for female nozzles; ideal for connecting to a water pressure test gauge to measure dynamic pressure; gauges sold separately; from a trusted USA-based company

ADJUSTABLE ARC & SPRAY DISTANCE: Includes a preinstalled 3.0 GPM nozzle with an arc that adjusts from 40° to 360°, ideal for both full and part circle coverage. Delivers a spray distance of approximately 22 to 52 feet, with optional nozzles (sold separately) allowing further customization.

Lets user calculate average rainfall or sprinkler output in a given timeframe
The 7‑Foot Valve Rule in California and NFPA 13
Although many references cite a “7‑foot valve rule,” neither California irrigation statutes nor NFPA 13 actually impose a height requirement on irrigation or fire‑sprinkler valves; the regulations focus instead on clearance for sprinkler heads, anti‑siphon devices, and accessibility. In practice, you must satisfy required valve clearance for sprinkler heads—18 in. vertical space beneath fire heads—and guarantee valve accessibility requirements are met, meaning valves must be reachable without moving equipment or stepping on grass. California Title 23 CCR §493.2.2 mandates master shut‑off valves and anti‑drain devices but says nothing about elevation. NFPA 13 concentrates on head obstructions, not valve height. Consequently, you design valve locations based on accessibility and head clearance, not a prescribed 7‑foot rule. Proper backflow prevention is essential to protect potable water supplies from contamination. Installing a backflow preventer ensures that any reverse flow is blocked, safeguarding the drinking water system. A double‑check valve is commonly installed near the main supply to provide reliable protection against backflow.

#1 commercial-grade irrigation spray head brand in the world

【Choose Certified Products】ONDAQUA holds the UPC Certification issued by IAPMO, and our products are also compliant with the ASSE 1020-2020 standard

BACKFLOW PREVENTION: The Febco Bronze Pressure Vacuum Breaker Backflow Preventer Assembly provides the ultimate mechanical protection of potable water against cross-connection contamination hazards. It is used to protect against health hazard and non-hazard back-siphonage of toxic or non-toxic liquids and meets the specifications of the USC FCCCHR Manual.
Set Anti‑Siphon Valves at the Required Height
Because anti‑siphon valves must keep contaminated irrigation water from entering the potable system, you’ll install them at least six inches above ground and above the highest downstream sprinkler head, ensuring the required pressure break for backflow prevention. Measure from the valve base to the tallest outlet; most codes demand 6–12 inches (15–30 cm) clearance. Position the valve where standing water cannot rise six inches from its base, avoid indoor boxes, and keep it accessible for inspection. Use threaded adapters, PTFE tape, PVC primer, and glue; dry‑fit, align flow arrows, then cure for 30 minutes before pressurizing. Verify proper valve pressure stays below 70 psi, and add a regulator if necessary. Elevate the assembly to simplify winterizing valve systems and future maintenance. Ensure the valve is installed above the highest sprinkler to meet backflow prevention requirements. Local codes often require a minimum clearance to prevent backflow contamination. Properly sized sprinkler heads distribute water evenly and reduce pressure fluctuations. Regularly inspect the conduit for moisture damage to avoid corrosion and electrical hazards.

Professional grade 1" anti-siphon valve with flow control; compatible with any standard sprinkler timer
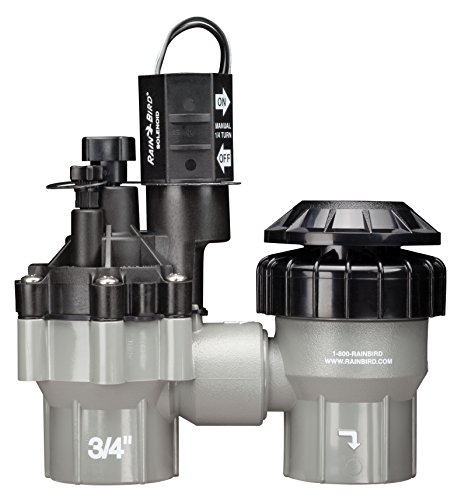
Professional grade 3/4" anti-siphon valve with flow control; compatible with any standard sprinkler timer

PREVENT WATER BACKFLOW - Our automatic anti-siphon valve with an atmospheric vacuum breaker protects your irrigation system and culinary system from water contamination.
Adjust Sprinkler Height When Ground Shifts
Ground shifts—whether from erosion, frost heave, compaction, or organic decay—can lower or raise pop‑up heads enough to disrupt the intended 1‑2‑inch nozzle clearance. You should run the system for 2–3 minutes, watch for heads that fail to pop up fully, then measure the clearance. If a head sits below the 1‑inch mark, attach the pull‑up tool, turn clockwise a quarter turn, and add compacted soil around the base to hold the new height. For heads pushed upward, loosen the radius screw counter‑clockwise until the nozzle returns to the 1‑2‑inch range. Record each adjustment in your seasonal maintenance schedule and verify that sprinkler activation sensors still register proper head movement after each correction. Adjusting the spray radius can also prevent water from spilling onto sidewalks. Using a metal detector can help confirm the exact location of underground sprinkler lines before making any adjustments. Before digging, always call 811 to have utility lines marked and avoid accidental damage. A metal detector can also locate sprinkler valve components because many valves contain brass or steel parts.

Handy tool makes working on pop-up sprinklers easy

The Rainbird Rotor Adjustment Tool is used to adjust and lift Rainbird rotors including 3500, 5000, 5000 Plus, 5500, Falcon 6504, 7005, 8005, EAGLE 351B, 32SA, 42SA and 52SA series

Rainbird Rotor Adjustment Tool
Pick the Right Valve Size and Box Height
Choosing the right valve size and box height starts with matching the valve to the mainline pipe and guaranteeing the box provides adequate clearance for installation, wiring, and future adjustments. You’ll select a ½‑inch, ¾‑inch, or 1‑inch valve for typical residential lines, then verify that the chosen size meets manufacturer pressure loss calculations—keeping loss under 6 PSI. For commercial zones, upgrade to 1‑inch, 1¼‑inch, or larger, and run the same loss check. Next, confirm valve box dimensions: a standard 12 × 17‑inch box holds two to four valves, while a 15 × 22‑inch jumbo box accommodates larger units and extra wiring. Verify the box height provides at least 6 inches clearance above the highest sprinkler head, preserving anti‑siphon performance and allowing future adjustments without compromising flow. Match pipe size to the valve size to ensure proper flow and prevent pressure issues. Understanding solenoid operation helps diagnose why a valve may not open when commanded. Some manufacturers integrate a built‑in pressure regulator to maintain consistent flow across varying system pressures. Low‑voltage power supplies are often used to energize solenoids, and adding a solar backup can improve system reliability during power outages.

Designed to Awe in Size and Material: the irrigation box lid boasts an impressive external size of about 12 x 17 inches, able to be twisted for a snug fit after installation, ensuring extended use; They're crafted from quality PP material, experiencing no ruins even under stress

Package Contents: you will receive 1 irrigation valve box cover with a plug. The fully assembled cover can easily match the valve box (valve box not included), making it a great helper for maintaining your yard. The valve cover is a good choice, please make sure to confirm the size to avoid unnecessary question

Designed to fit 17" x 12" (approx. 44 x 30 cm) sprinkler valve boxes. Please measure your existing valve box dimensions before purchase to ensure proper fit.


