Your sprinkler head leaks when low‑head drainage leaves residual pressure after shut‑off, clogged nozzles force water past the seal, broken pipes pool water, a faulty valve diaphragm drips, or corrosion and debris damage the seal. Install check valves or replace the head with a built‑in valve, clean or replace the nozzle and filter basket, repair any broken pipe, and swap out a worn diaphragm. Adjust head height if needed, and verify system pressure with a catch‑can test. Keep going to uncover detailed troubleshooting steps.
What Causes Low‑Head Drainage and How to Stop Sprinkler Head Leaks?
If your sprinkler system sits on a slope, gravity will pull the remaining water toward the lowest heads once the zone shuts off, causing a brief discharge known as low‑head drainage. This phenomenon creates unpredictable watering patterns because water appears at the low point after the cycle ends, and it signals a pressure regulation impact: residual pressure forces water downhill until air enters the pipe. Install check valves at each head or choose heads with built‑in valves to block reverse flow. Raise or replace low heads with integrated valve models to eliminate the exit point. Verify zone valve shutoff timing and guarantee no underground leaks compromise pressure. Properly sealing the system stops low‑head drainage, conserves water, and stabilizes irrigation performance. Adjustable deck height mowers can reduce the risk of damaging sprinkler heads while mowing. Adding a backflow prevention device can further protect the system from unwanted reverse flow.
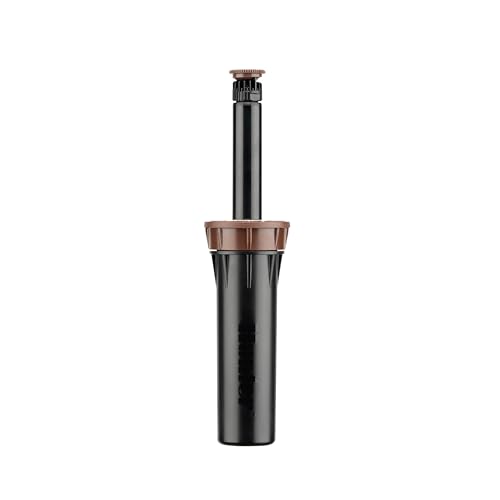
BUILT FOR LAWN & GARDEN IRRIGATION: Perfect for replacing old sprinkler bodies or expanding your system, ideal for yards, garden beds, and home irrigation zones, NOZZLE SOLD SEPARATELY.

VERY IMPORTANT: approved for sale/meets all pressure regulator legislation requirements in CA, CO, HI, VT, MA, ME, OR, RI, WA, and Washington DC
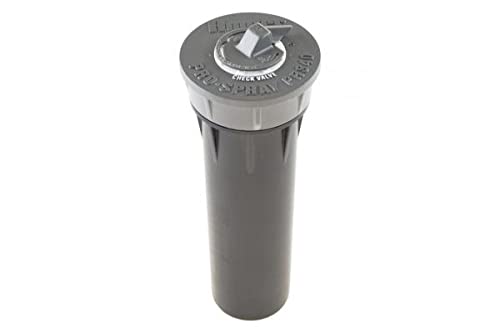
BUILT FOR LAWN & GARDEN IRRIGATION: Perfect for replacing old sprinkler bodies or expanding your system, ideal for yards, garden beds, and home irrigation zones, NOZZLE SOLD SEPARATELY.
Identify Clogged Nozzles That Cause Sprinkler Head Leaks
A clogged nozzle is often the hidden culprit behind a sprinkler head that leaks or drips, because the blockage forces water to escape through the head’s seal instead of the intended spray pattern. First, observe whether the head fails to pop up or releases only a trickle; that indicates debris buildup inside the nozzle. Check the spray pattern—odd mist‑like output or brown patches on the lawn point to clogged sprinkler ports. Feel for uneven pressure or puddles forming around the head, which signal partial obstruction. Examine the filter screen for sand, dirt, or tiny pebbles that may have accumulated. If you see crust‑like tubercules or stubborn deposits, note that they are reducing flow and mimicking leaks, requiring targeted cleaning before proceeding. Use a screwdriver to remove the sprinkler head before cleaning. Run the sprinkler at low pressure to observe the spray shape and listen for sputtering, which can reveal a clogged nozzle condition.
Clear Clogged Nozzles With a Wire – Step‑By‑Step
When the nozzle’s tiny ports stay blocked after soaking, a stiff wire or bent paperclip lets you scrape out the remaining debris quickly. First, turn off the irrigation system and lift the head to the operating position. Unscrew the nozzle and its filter basket, then place the nozzle in a bucket of hot water mixed with a splash of soaking vinegar for mineral buildup removal. Let it soak a few minutes while you rinse the filter under running tap. Retrieve the nozzle, insert the wire into each hole, and gently scrape until the flow is clear. Use a bent paperclip for stubborn spots, but avoid bending the metal walls. Reinstall the filter and nozzle, secure them, flush the system for 20‑30 seconds, then turn the water back on to verify an even spray pattern. Regularly checking for high water pressure can prevent future leaks. Remember to wear protective gloves while handling the hot water and cleaning tools. Understanding choked flow helps diagnose why pressure drops cause irregular spray patterns.
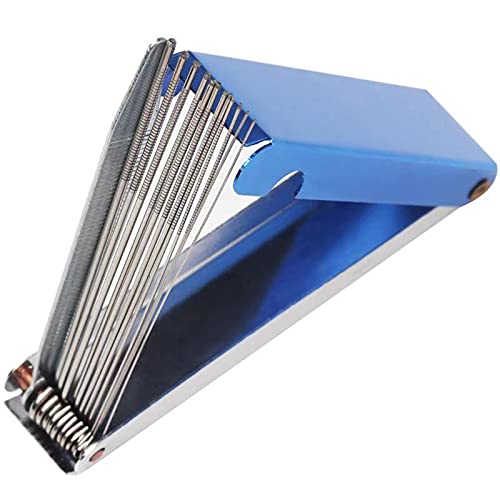
1.High-quality materials: The carbohydrate cleaning tool is made of high-quality stainless steel, and is equipped with a lightweight and stable high-quality aluminum box, it is a good tool to carry and use

The Water Rocket is quick and easy to use for at-home eavestrough cleaning. Its unique patented design blasts away leaves, dirt and clogs. The high pressure nozzle attaches to a standard garden hose and with little effort it will begin to work its way through the eaves. You can also use your Water Rocket to clean weeping tiles, drains and most stubborn clogs.

【Packege Include】: 2 boxes of aluminum case needle tools, each box containing 12 different diameters of cleaning lines and a small file, 1 box of plastic case aluminum case needle tools containing 10 different diameters of needles, and 1 nylon tube brush (5 brushes)
Detect Broken Pipes That Lead to Sprinkler Head Leaks
Even with a perfectly calibrated system, a hidden pipe break can turn a single sprinkler head into a constant leak. To detect underground water pipe cracks, walk the lawn after each zone runs and look for pooling or soggy spots that persist when the system is off. Turn zones on individually; wet paths between a working head and a faulty one pinpoint the break’s location. Monitor sprinkler pressure fluctuations—an unexpected drop or erratic cycling signals a crack before the zone. Check for low pressure in the affected zone, and compare it to other zones to distinguish a lateral line break from a main line failure. Spot dirty water or soil on heads; those are tell‑tale signs of pipe breaches. Promptly address high‑pressure sources and repair or replace the damaged pipe section. The diaphragm inside the valve is often the culprit when a head leaks continuously.

Kit contains twelve drip irrigation coupling fittings. Use these durable barbed 1/2 inch drip irrigation fittings to connect half inch drip irrigation tubing together to easily repair or extend your drip system.

Permanent seal: This Gorilla tape creates a permanent bond that instantly seals out air, water, and moisture
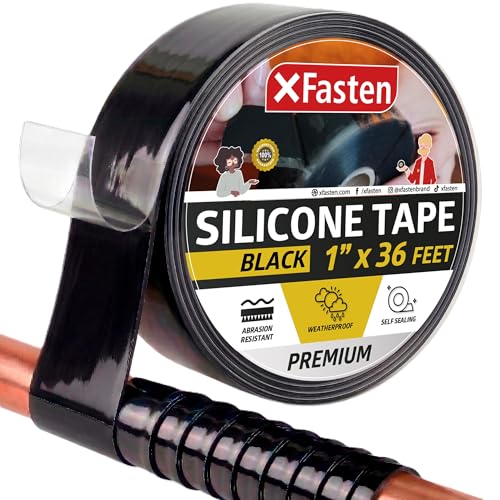
Self-fusing Silicone Tape that does not melt up to 260°C (500°F) making it ideal for emergency repairs for automotive, plumbing, marine, hose, electrical, indoor and outdoor applications.
Diagnose Faulty Valve Diaphragms That Mimic Sprinkler Head Leaks
Hidden pipe breaks often reveal themselves as persistent drips at the sprinkler head, but many of those leaks actually originate from a faulty valve diaphragm. You’ll notice a low‑volume drip on the lowest head in a zone, soggy spots around heads, and a water‑meter dial moving even when the controller is off. First, confirm the zone by observing which head drips continuously. Then perform solenoid valve diagnostics: shut off the backflow supply, open the valve box, listen for hissing, and feel for a warm, leaking valve. Disassemble the valve, rinse all components, and flush the line to remove debris that may be holding the diaphragm open. Inspect the diaphragm seat for pits or scratches. If cleaning doesn’t stop the leak, proceed with valve diaphragm replacement, ensuring the spring is correctly seated before testing. The compact housing can be reprogrammed if power is lost. Understanding pressure‑balanced valve operation helps prevent future leaks caused by pressure spikes. Some irrigation systems incorporate a built‑in pressure regulator within the valve to maintain consistent flow and protect the diaphragm.
Spot Damaged Sprinkler Heads Causing Leaks
If you notice a steady drip or puddle around the base of a sprinkler head, the most likely culprit is a damaged head itself. Spotting a cracked body, dented nozzle, or loose component tells you the head has suffered mechanical damage. Examine the rim for worn gaskets or O‑rings; these seals degrade under stress and let water escape at the riser connection. Improper installation height can expose the head to mower traffic or footfall, increasing crack risk. To fix it, shut off the zone, unscrew the head, and inspect the gasket. Replace any cracked or worn parts with a matching model, reinstall at the correct height, and tighten to the manufacturer’s torque. Verify the leak stops before restoring pressure. Underground pipe issues can also cause leaks if the line is damaged during relocation. Replacing a single sprinkler head is often feasible without swapping the whole system, but you must ensure the new head matches the existing flow rate and pressure specifications. Understanding the material composition of sprinkler heads helps identify the most vulnerable breakage points.
How to Test Your Sprinkler System for Low‑Head Drainage?
How can you quickly determine whether low‑head drainage is compromising your sprinkler system? Start by deploying the catch can testing method: position 36 catch cans uniformly across the zone before the first valve opens. Activate the system and watch for spitting or air bursts from the lowest heads, which signals drainage. Record the water collected in each can; uneven volumes reveal pressure variations. Next, perform a pressure testing procedure. Attach a T‑piece adapter to a sprinkler, install a pressure gauge, and let the needle stabilize. Capture readings at multiple outlets, noting values below 30 PSI (insufficient) or above 50 PSI (excessive). Compare these data points to baseline uniformity benchmarks to confirm low‑head drainage. Check flow uniformity by measuring the water volume from each catch can and ensuring consistent flow across the system. Understanding the gallon per minute requirements helps you size the system correctly for efficient irrigation. Properly zone the landscape based on plant type, sun exposure, and soil conditions maximizes water efficiency.
Corrosion, Mechanical Damage, and Other Sprinkler Head Leak Sources
Corrosion, mechanical damage, and debris buildup are the three most common sources of sprinkler‑head leaks, and each can be diagnosed and addressed with straightforward inspections. Inspect seals for cracks, brittleness, or mineral deposits; worn rubber or eroded plastic will let water seep even when the system is shut off, raising excessive moisture concerns. Check the head’s casing for impact cracks from mowers, foot traffic, or vehicle tires, because a broken shell misaligns the pop‑up mechanism and creates drips that affect aesthetic appearance. Remove sand, mulch, or old glue from the nozzle and diaphragm; debris prevents proper closure, causes pressure imbalances, and produces slow leaks that leave soggy patches. If you spot any of these faults, replace the compromised component or clean the obstruction to restore normal operation. Rotors can also develop leaks if the nozzle set screw is loose, allowing uncontrolled spray. A proper pop‑up alignment ensures the head seals correctly after each cycle. Consider installing a pressure regulator to keep water pressure within safe limits and reduce stress on the heads. Maintaining consistent water pressure helps prevent leaks caused by pressure fluctuations.
Decide: Replace the Head or Adjust Its Pop‑Up Height
When you notice water pooling after a cycle, the first step is to decide whether to replace the sprinkler head or simply adjust its pop‑up height. Examine the leak timing: if water drips during operation, the nozzle or internal seal is likely damaged, so you should replace sprinkler head. If pooling appears only after shutdown, the issue is usually elevation‑based drainage; you can adjust pop up height by turning the riser until the head sits 1‑2 inches above the grass. Measure the riser extension against turf and verify that the nozzle clears foliage. Test after adjustment by running the zone manually; if pooling persists, consider replacement. Prioritize adjustment for single‑head low‑drainage problems and reserve replacement for cracked bodies, clogged nozzles, or multiple failing heads. Use a screwdriver to fine‑tune the spray pattern after adjusting the height. Regularly inspect for debris buildup to prevent future leaks. Identifying the head type by its nozzle shape helps confirm the correct replacement model.

What you will get: you will receive 10 pieces variable arc nozzles, enough for your replacements or share with friends and neighbors.
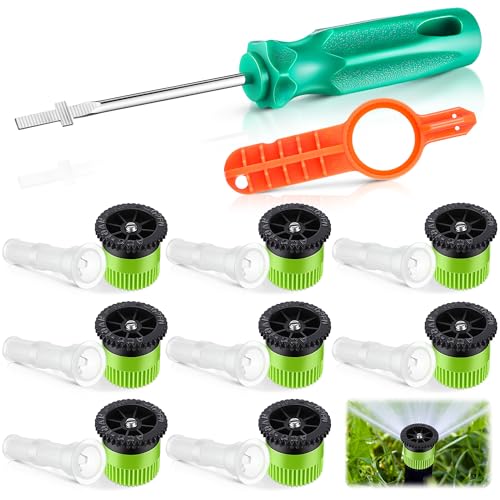
Sprinkler Tool Set: you will receive 8 green variable arc nozzles, 8 nozzle filters, 1 Spray Head Rotor Adjustment Tool and 1 rotor adjustment tool screwdriver. The complete sprinkler tool set provides you with more precise adjustment distance and arc of the lawn sprinkler system

Adjustable Nozzle: with adjustable patterns from 0 to 360 degrees, slightly twist the textured center collar, you can increase or decrease the pattern; Ideally, for example, at a pressure of 2.1 bar, the maximum spraying radius of a 10van nozzle is about 6.9ft/ 3meters, the maximum spraying radius of a 12van nozzle is about 9.8ft/ 3.7m, the spraying radius of a 15van nozzle is about 14.7ft/ 4.6m, and the spraying radius of a 17van nozzle is about 15.4ft/ 5.2m
When to Call a Professional for Sprinkler Head Leaks?
If you notice persistent leaks that go beyond a single head, it’s time to call a professional. System‑wide pressure drops, backflow preventer failures, or hidden underground pipe leaks signal problems a DIY fixes can’t resolve; certified technicians conduct professional sprinkler system inspections and extensive system audits to pinpoint root causes. When multiple heads crack, dent, or refuse to pop up, the issue often stems from valve mis‑adjustments or infrastructure damage that requires expert diagnosis. Backflow preventer malfunctions demand licensed intervention to meet regulatory compliance and protect drinking water. Ignoring these signs wastes water, inflates bills, and risks property damage. Schedule a qualified irrigation specialist promptly to safeguard efficiency and prevent costly repairs.

【Choose Certified Products】ONDAQUA holds the UPC Certification issued by IAPMO, and our products are also compliant with the ASSE 1020-2020 standard

Replacement for:This 720A Pressure Vacuum Breaker Repair Kit Replacement for RK1-720A Backflow Preventer the Model 1/2 3/4 and 1 inch.


