First, identify whether your head is a pop‑up, fixed spray, rotor, or gear‑driven rotor. Then set the spray arc by turning the left stop screw clockwise to widen or counter‑clockwise to narrow, and adjust the right stop the; each 90° turn adds or removes 90°. Next, tweak the distance with the radius‑adjustment screw—clockwise shortens, counter‑clockwise extends—checking for obstructions and soil type. Fine‑tune pop‑ups by pulling the stem, clearing debris, and aligning the indicator dot; use the top screw for precise throw. Finally, walk the lawn, verify coverage, clean filters, and lubricate moving parts; the next steps will show you deeper troubleshooting tricks.
Identify Your Sprinkler Head Type
Choosing the right sprinkler head starts with recognizing its type. You’ll first spot a pop‑up head if it springs up from the ground and retracts when off. Look for a 4‑inch model for lawns or a 12‑inch version for ground cover and shrub beds. Fixed spray heads stay stationary, delivering a fan‑shaped pattern; they require water pressure regulation between 20‑30 PSI and precise spray head alignment to avoid overlap. Rotor heads rotate mechanically, ideal for large lawns; they work best under 40 PSI and need alignment of the rotating nozzle. Gear‑driven rotors behave similarly but run quieter, while multiple‑stream or bubbler heads produce thin streams or flood zones for slopes and trees. Identify the mechanism, size, and pressure range before proceeding. Proper irrigation design also considers soil type to achieve uniform water distribution. The main line transports water from the source to all downstream components, ensuring consistent flow throughout the system. Installing heads at the correct height maximizes coverage efficiency and reduces water waste.
Set the Correct Spray Arc and Rotation Pattern for Sprinkler Head Adjustment
Now that you’ve identified the head type, set the spray arc and rotation pattern by first positioning the turret’s left stop. Rotate the nozzle turret counter‑clockwise until the left stop aligns with the edge of the intended pattern. Hold the turret at the right stop—often a fixed tab on models like the Hunter PGP‑ADJ—while you adjust. Insert a flat‑head screwdriver into the pattern‑adjustment slot; turn clockwise to broaden the arc up to 360°, counter‑clockwise to narrow it to the 40° minimum. Use pliers or vise grips to shift metal tabs for rotation direction, and raise or lower the deflector to fine‑tune the nozzle trajectory angle. Verify each 90° screwdriver turn adds or removes exactly 90° from the right stop, and respect the understanding sprinkler adjustment limits to avoid over‑travel. Test the pattern with water on, then repeat fine‑tuning until coverage is even and the rotation cycle is uninterrupted. The left edge should be set where the sprinkler needs to start watering. Selecting the appropriate nozzle size is essential for achieving the desired flow rate and pressure compatibility. Proper flow rate ensures the spray pattern remains consistent across varying water pressures. Understanding water pressure limits helps prevent under‑ or over‑spraying.

Hunter adjustment wrench for mp rotator nozzles
[Professional Sprinkler Adjustment Tool Set]This sprinkler head adjustment tool allows precise arc and radius tuning for lawn irrigation systems, helping improve watering accuracy and coverage

3 Pack of sprinkler adjustment wrenches consisting of a 3/32 allen key, two convenient finger loops for gripping and an opposite side arc adjustment key for your PGP, PGJ, I20, I25 and I40 heads. This tool is also compatible with some Toro & Rainbird Gear Drives.
Set Spray Distance & Radius for Even Coverage in Sprinkler Head Adjustment
When you’re ready to fine‑tune coverage, adjust the spray distance and radius by turning the radius‑adjustment screw on the rotor’s top with a flat‑head screwdriver: rotate clockwise to shorten the throw, counter‑clockwise to extend it. Keep the system pressurized so sprinkler water pressure remains stable while you make changes. Hold the head steady, turn the screw in small increments, then run the zone for a few minutes to verify even pattern. If you spot dry spots, repeat the adjustment; if you see overspray, tighten the screw further. Remove any sprinkler obstruction that blocks flow before final testing. Remember that most rotors cap reduction at 25 % and that larger increases may require nozzle replacement or pressure adjustment. The screw mechanism allows precise control of spray distance. Considering soil type helps ensure the adjusted spray radius matches the water absorption capacity of the ground. Overlapping spray patterns are essential because they create uniform water distribution across the lawn. Properly sizing the irrigation zone using flow rate calculations ensures each head receives adequate water without exceeding system pressure.

The Rainbird Rotor Adjustment Tool is used to adjust and lift Rainbird rotors including 3500, 5000, 5000 Plus, 5500, Falcon 6504, 7005, 8005, EAGLE 351B, 32SA, 42SA and 52SA series

[Precision Rotor Adjustment Tool]This Rotor adjustment tool allows precise arc and radius adjustment for sprinkler heads, ensuring accurate watering coverage and improved irrigation efficiency
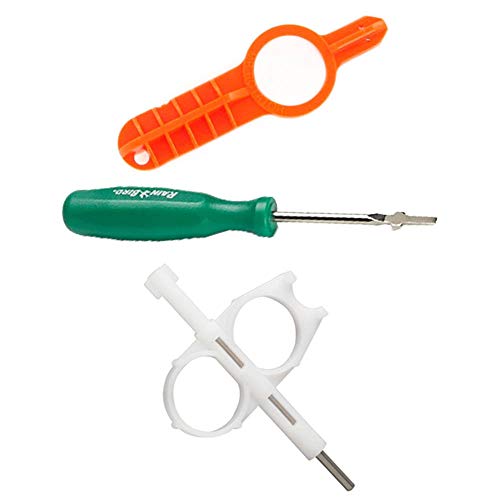
Hunter Key
Fine‑Tune Pop‑Up Sprinklers and Fixed‑Pattern Nozzles for Precise Adjustment
If you need precise coverage from pop‑up heads or fixed‑pattern nozzles, start by pulling the stem up, clamping it securely, and clearing any debris before you begin any adjustments. Rotate the stem until the indicator dot aligns with the right edge of the watering area, then set the left edge by twisting counter‑clockwise to match the desired start point. Use the top adjustment screw to fine‑tune distance: turn clockwise to shorten, counter‑clockwise to extend, making incremental turns while water runs. For fixed‑pattern nozzles, identify the pattern marking, then align the nozzle arc with the target zone using the plus/minus screw, adjusting from 40° up to 360°. Reduce radius up to 35% via the radius screw, optimizing water usage while maximizing landscape coverage. Arc adjustment is performed using the screw marked with a plus and minus. Understanding the valve mechanism helps ensure the spray pattern activates correctly when water pressure reaches the head. Proper ceiling height assessment is essential for achieving optimal coverage and compliance with fire safety standards.

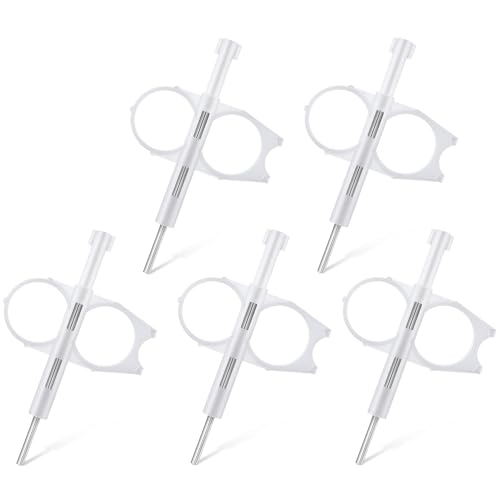
Handy pull-up tool makes easy work of lifting retracted geared rotor stems

The Hunter adjustment wrench consists of a 3/32 allen key, two convenient finger loops for gripping

Test, Verify, and Troubleshoot Your Sprinkler Head Adjustment
After you finish adjusting a head, turn the system on and walk the entire property, watching each sprinkler to confirm that the spray lands within its intended zone, that the turret rotates fully, and that no water lands on hard‑scape surfaces. Then inspect overall system performance: note any heads spraying pavement, house siding, or fences, and check for dry spots and oversaturated zones. If a nozzle fails to rotate, look for debris in the rotor or low pressure; clean the filter screen and lubricate the mechanism. For weak or spotty spray, remove the nozzle, clear clogs with a flat‑head screwdriver, and flush the internal filter. Replace any head with cracked bodies, loose fittings, or broken gears. Finally, re‑run the cycle to verify that all adjustments hold and that each component maintains proper alignment. Regularly test the system after repairs to ensure consistent water distribution across the lawn, and consult the sprinkler pressure chart to confirm that operating pressures remain within manufacturer specifications. Understanding your region’s soil moisture needs helps you fine‑tune irrigation for optimal plant health. Checking for mineral buildup can prevent clogs and uneven spray.

What you will get: you will receive 10 pieces variable arc nozzles, enough for your replacements or share with friends and neighbors.
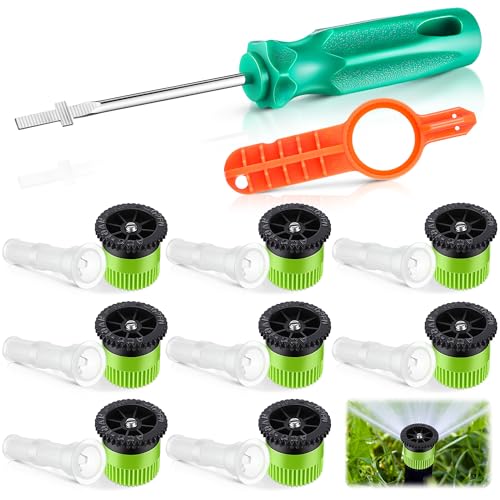
Sprinkler Tool Set: you will receive 8 green variable arc nozzles, 8 nozzle filters, 1 Spray Head Rotor Adjustment Tool and 1 rotor adjustment tool screwdriver. The complete sprinkler tool set provides you with more precise adjustment distance and arc of the lawn sprinkler system


