
Turn off the main valve, locate the backflow device, and rotate the quarter‑turn ball valve 90° so it’s perpendicular and stops flow. Assemble your Sprinkler SHIRT kit with pliers, wrenches, and the Easy Out rod. Use Channellock pliers to remove the cap, measure the fitting with a digital caliper, then fabricate a custom spline tool to lock and extract the old head. Inspect the fitting for cracks, clean it, and install the new head, tightening without over‑torquing. Turn the zone back on, watch for leaks, and adjust the nozzle for even coverage; the next steps will show you how to backfill and finish the job.
Turn Off the Water for a No‑Dig Sprinkler Head Replacement
One of the first steps is locating the proper shut‑off valve—typically the backflow device outside the house or the isolation valve on the sprinkler supply line in the basement. Check the blue tags or labeled markers for valve accessibility; the backflow device offers the most convenient access without cutting household water. Turn the quarter‑turn ball valve handle 90 degrees until it sits perpendicular to the pipe, confirming shutoff redundancy. If the isolation valve is nearer, rotate it the same way; this isolates the irrigation loop while keeping the main supply active. Verify the handle’s perpendicular position and watch the sprinkler heads stop flowing. Use minimal force to avoid damaging brass components, and note which valve you used for future reference. Turning off the backflow ensures the yard water source is completely isolated. Proper installation of a double‑check valve near the water main helps prevent back‑flow contamination. Backflow preventers are required by many local codes to protect potable water supplies from irrigation runoff. Backflow protection is essential to prevent contaminated irrigation water from entering the municipal supply.
Gather the Tools Needed for a No‑Dig Replacement
Before you start the no‑dig replacement, gather the Sprinkler SHIRT kit together with the essential pliers, wrenches, and guide‑rod accessories; the kit’s large body wrench, small nesting wrench, rotor‑cap and spray‑cap attachments, and multi‑position handle will let you remove caps and risers without digging, while the channel‑lock pliers, nipple extractor, and custom spline tool handle the internal splines and stubborn fittings. Choose tools that match your sprinkler materials selection—stainless steel rods for brass heads, hardened steel for PVC. Verify that the Easy Out threaded rod and guide rod are compatible with the irrigation system replacement specifications. Keep the Kut‑It grass‑cutting tool, hacksaw, and file handy for post‑extraction trimming and burr removal. This concise set guarantees a smooth, no‑dig swap. The Easy Out system is designed to prevent digging by allowing head removal of sprinkler heads without exposing the ground. When using a metal detector to locate hidden sprinkler heads, follow the detection technique guidelines for accurate positioning. Remember to call 811 before any digging to ensure underground utilities are marked and avoid accidental damage. Using a metal detector can help you confirm the exact location of underground lines before you begin.

Replacement sprinkler valve/controller diaphragm kit

ULTIMATE FLEXIBILITY FOR ANY GARDEN SHAPE – Place sprinklers exactly where you need them- Perfect for lawns, flower beds, raised gardens, and more.

What you will get: you will receive 10 pieces variable arc nozzles, enough for your replacements or share with friends and neighbors.
Remove the Old Sprinkler Head Using the Spline Tool
Although the sprinkler head cap and riser are still in place, you can remove the old head quickly by first using large Channellock pliers to pull off the cap, exposing the cavity and internal splines. Measure the internal diameter with a digital caliper, then mark the tool outline on aluminum and drill a 3/8‑inch hole ½ inch from the top. Burnish edges and round corners for safety. Push the custom spline tool into the head by hand, avoiding excessive force to protect the fitting. Position the flared end of the SRT‑1000/2000 so the bevel engages the head, then press down until it locks. Place the EasyOut over the rod, rotate counter‑clockwise with a torque wrench, and extract the head in under three minutes, minimizing surface disturbance and avoiding sprinkler damage. This method Eliminates the need for digging, preserving your lawn’s turf. Replacing a single head is often more cost‑effective than a full system overhaul. Properly checking soil moisture levels before removal can prevent unnecessary damage to underground pipes. Faulty wiring can also cause a zone not to pop up, so verify the electrical connections before starting the replacement.

---US Patent Pending---

Keyfit Tools NOZZLE JACK Pushes & Locks The Sprinkler Head Riser Up For Replacing New Head Nozzles Right Out Of The Box Hold Up Tool Fits All Rotor Heads With 3/4" & 1" Inlet Hands Free Nozzle Installation Removal & Replacement

Efficient Sprinkler Pull Tool: This sprinkler pull tool is designed to quickly lift and hold the pop up sprinkler stem, making nozzle replacement and sprinkler adjustments simple and efficient. As you squeeze the sprinkler tool, little barbs will hook on spray head and you can easily pull sprinkler nozzle into full open position; Put sprinkler removal tool around pop up shaft to eliminate accidental retraction, letting you work freely with both hands to adjust spray
Inspect and Clean the Existing Fitting for Reuse
After you’ve cleared the surrounding turf and removed the cap, inspect the exposed fitting for cracks, leaks, or worn threads, then rinse it with water and brush away any soil or debris. Next, consider visually evaluating riser alignment; the riser should sit straight and sit flush against the fitting without gaps. Examine filter basket for gradual wear—look for corroded wires bent wires or buildup that could impede flow. Use a soft brush and mild detergent on stubborn dirt, then flush the riser with a cap for 15‑20 seconds to clear internal residues. Clear any clogs with a thin wire or compressed air, and wipe the threads with a clean cloth. Finally, guarantee the fitting is completely dry, matches tubing size, and shows no severe damage before reusing it. Reusing push-on fittings can also money by avoiding the purchase of new components. The valve housing often features a transparent cover that lets you see the internal diaphragm for quick visual inspection. Ensure the valve’s water resistance rating meets the requirements for outdoor exposure to prevent moisture damage.
Install the New Sprinkler Head Without Digging
You can install the new sprinkler head without digging by using a simple plastic tool that fits the head’s internal splines. First, remove the old cap and riser with Channellock pliers, then insert the fabricated tool fully into the embedded head’s splines. Secure a screwdriver in the tool’s hole, apply hand pressure, and rotate counter‑clockwise to extract the old head intact. Inspect the nipple; if it’s sound, clean it and thread it onto the new head before ground insertion. Push the new head’s splines onto the tool, hand‑push the assembly into the existing hole, and twist clockwise with the screwdriver to lock onto the T‑fitting. Reinstall the riser, then perform a tip precise adjustment and calibrate trajectory to achieve the desired spray pattern.
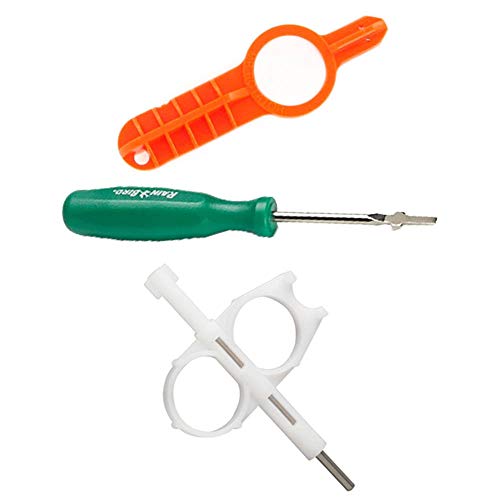
Hunter Key

Rainbird Rotor Adjustment Tool

For installation and maintenance of spray head sprinklers, nozzles, and risers
Test for Leaks and Fine‑Tune the Spray After Installation
When you finish installing the new sprinkler head, immediately test for leaks and fine‑tune the spray pattern: turn on the zone, wait two minutes for pipes to refill, then walk the lawn. Look for puddles, bubbling, or water trickling after shutdown; any of these signs a leak. Verify proper water pressure by checking the meter flow indicator with the main valve closed and then with the zone open—no continuous motion means pressure is stable. Adjust the head’s nozzle and angle until you see an even spray pattern coverage, eliminating dry brown spots and overlap. Tighten any loose fittings that drip, and repeat the cycle for several minutes to confirm the leak is gone and the spray remains uniform. Shut off the main sprinkler system valve and observe the low‑flow indicator to confirm the leak is not in the main pipe. Low water pressure can also cause a sprinkler to pop up only partially, so ensure the system’s pressure meets the manufacturer’s specifications. Check for clogs before installation to prevent future spray inconsistencies. Ensure the water supply can meet the demand of the entire system to avoid pressure loss during operation.
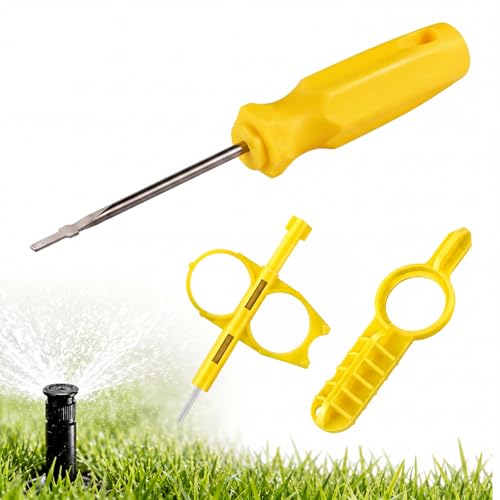
[COMPATIBLE WITH POPULAR SPRINKLER SYSTEMS] This sprinkler head tool is compatible with Hunter MP Rotator, PGP, PGH, PGM, I-20, I-25, I-40, I-60 rotors and PS series spray heads, as well as compatible with Rain Bird 3500, 5000, 5000 Plus, 5500, Falcon 6504, 7005, 8005, EAGLE 351B, 32SA, 42SA and 52SA series. Designed for common lawn irrigation repair, nozzle replacement, spray adjustment and routine sprinkler maintenance
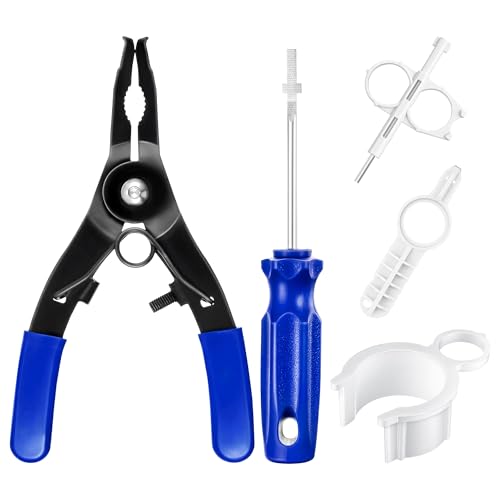
✅ [ALL IN ONE 5 PACK SPRINKLER TOOL KIT]This 5 pack sprinkler head tool set includes everything you need for lawn irrigation maintenance: rotor adjustment screwdriver, spray head pull up tool, hold up collar, rotor adjustment tool, and sprinkler key tool. Designed compatible with Rain Bird and compatible with Hunter, this complete kit helps you easily adjust rotor heads, replace nozzles, and maintain your sprinkler system with one convenient set

⭐【8 PACK SPRINKLER TOOL KIT】This 8 pack sprinkler head tool set includes everything you need for lawn irrigation maintenance: 1 pc rotor adjustment screwdriver, 1 pc spray head pull up tool, 3 pcs rotor nozzles tool, 3 pcs PGP adjustment tool. Designed compatible with Rain Bird and compatible with Hunter, this sprinkler head adjustment tool kit helps you easily adjust rotor heads, replace nozzles, and maintain your sprinkler system with one convenient set
Backfill the Hole, Pack the Soil, and Clean Up
Having verified the head is leak‑free and the spray pattern is even, backfill the hole with the original soil, adding it in layers and compacting each one with the back of a trowel or shovel. Use the soil you set aside or the material from the container, spreading it evenly around the sprinkler base. Press each layer firmly to create compressed soil that eliminates air pockets and maintains the original ground elevation. Continue until the surface matches the surrounding lawn, then tamp the final layer to lock the head in place. Replace any displaced sod, aligning edges and pressing gently for root contact. Finally, water the area to settle the packed soil and to the grass recover quickly. Proper sealing ensures the system remains leak‑free and maintains water pressure. Adjust the sprinkler head to achieve an even spray pattern and avoid water waste.

GARDENING ESSENTIAL: Ergonomic hand trowel with oversized head ideal for a variety of gardening tasks like digging in tough soil, maintaining your herb garden, digging all holes, turning soil, and more to encourage overall plant health and appearance

DIG, CUT & SCOOP >> The unique design of this potting scoop features a serrated tip, enabling you to break up clumps of soil and cut through roots while you clear out beds for planting. The large scoop with tall sides also lets you transfer soil with less spillage.
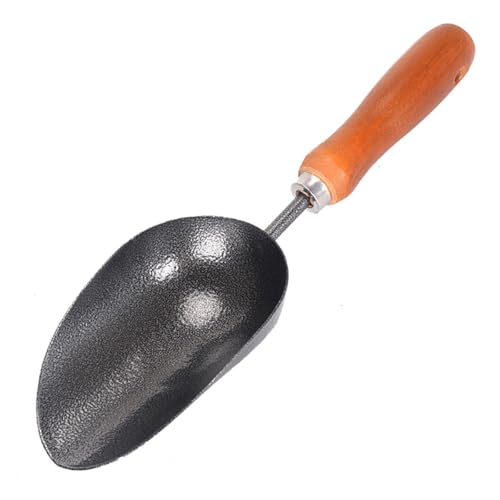
🌱 Suitable size: measuring approximately 32*9cm/12.6*3.5inch, small and light, can be used to grow home plants and garden flowers.


