Sprinkler heads leak when low‑head drainage creates unwanted pressure, a cracked or dented head lets water escape, a clogged pipe starves the head of proper flow, or a faulty valve diaphragm drips continuously. First, flatten extreme slopes or add terracing to stop low‑head drainage, then replace any cracked or broken heads with matching models. Clean or clear clogged lines by removing nozzles, flushing with water, and soaking in vinegar for mineral buildup. Inspect valves for diaphragm tears, replace or clean them, and tighten all connections. Follow the checklist below for a full diagnosis and repair guide.
Low‑Head Drainage: How It Causes Sprinkler Head Leaks and How to Stop It
When water drains from the lowest sprinkler heads on a slope after a zone shuts off, you’re seeing low‑head drainage—a gravity‑driven flow that empties residual water from the lateral line. To stop it, first evaluate slope gradient adjustments; flattening extreme grades or adding terracing reduces the hydraulic head that drives water downhill. Next, enforce system pressure regulation by installing anti‑drain check valves at each low point. Choose valves that seal when the head retracts, preventing backflow. Verify that pipe elevations create minimal differential, and confirm that pressure transients stay within manufacturer limits. After installation, test each zone: watch for sputtering or puddling, and fine‑tune pressure settings until drainage ceases. This prescriptive approach eliminates low‑head drainage and protects heads from leak‑inducing air spews. Spray heads can also experience leaks due to low‑head drainage. Properly relieve excess pressure before adjustments prevents water damage and maintains a healthy lawn. Check valves can also be used to prevent backflow in irrigation systems. Understanding water resistance is crucial for selecting durable valve components.
Broken Sprinkler Heads: Why They Leak and the Quick‑Fix Method
If a sprinkler head is cracked, stepped on, or hit by a mower, it will leak regardless of system pressure. Inspect each head for visible cracks, dents, or broken internal parts; puddles around a single head confirm localized damage. Turn off the water supply, unscrew the broken head, and verify the riser for additional wear. Replace the head with a matching model, adjusting height to prevent future impact. Tighten securely, restore pressure, and observe for residual seepage. Consider weather impact—freeze‑thaw cycles can exacerbate cracks—and animal damage, such as gnawing, which may require a more robust head. This quick‑fix method restores proper flow, minimizes water waste, and avoids costly system‑wide repairs. The solenoid valve can be reprogrammed if power is lost, ensuring zone timing remains accurate. High water pressure often accelerates wear and can cause premature failure of sprinkler components. Regularly check for debris buildup to prevent blockages that could also cause leaks. Faulty valve issues can cause leaks even when the system is turned off.

ADJUSTABLE ARC & SPRAY DISTANCE: Includes a preinstalled 3.0 GPM nozzle with an arc that adjusts from 40° to 360°, ideal for both full and part circle coverage. Delivers a spray distance of approximately 22 to 52 feet, with optional nozzles (sold separately) allowing further customization.
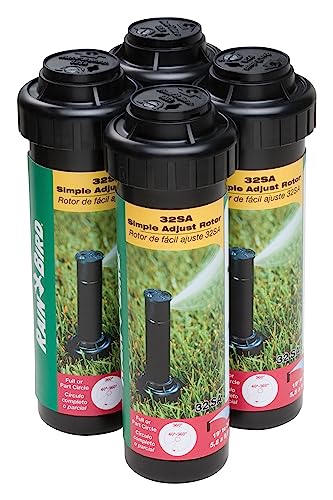
Economical 4-pack of water-lubricated, durable gear-driven rotors designed for reliable operation and long life

What you will get: you will receive 10 pieces variable arc nozzles, enough for your replacements or share with friends and neighbors.
Clogged Pipes: Symptoms, Diagnosis, and Simple Cleaning Tips
Cracked or damaged heads often mask a deeper issue: clogged pipes that disrupt flow across the entire zone. You’ll notice irregular spray patterns, reduced flow, dry patches, or heads that won’t pop up. Diagnose by inspecting each nozzle for sand, dirt, or mineral buildup, then run the zone to spot sputtering or weak streams. Measure pressure drops; excessive water pressure can force debris deeper, while winter frost damage may have cracked pipe walls, allowing particles in. To clean, remove the nozzle, rinse under running water, and use a toothpick or thin wire to dislodge blockages. Soak stubborn mineral deposits in a vinegar solution, then flush the line with water before reinstalling the nozzle. Test the spray for even coverage. Visual inspection can also reveal any buildup before disassembly. A stuck motor may indicate a low water pressure issue that also contributes to pipe blockages. Understanding the sprinkler valve operation helps prevent future clogs.
Broken Pipes: When to Repair, When to Replace, and How to Do It
A burst pipe in your irrigation zone signals a decision point: repair the isolated damage or replace the affected section. If the pipe is under 30 years old, the break is a single puncture, or corrosion is confined to one joint, you should patch it with a clamp or epoxy liner after confirming isolation with moisture testing. Adjust water pressure and reinforce nearby supports to counter weather impact and foundation shifting. Replace when pipes exceed 30 years, exhibit recurring leaks, multiple failures, or widespread rust, as these indicate systemic deterioration. Use trenchless technology for section swaps, or excavate for full‑line replacement with copper or PEX. Prioritize durable materials and proper sealing to prevent future pressure shifts and structural damage. A valve that closes too quickly can generate water hammer and cause additional stress on pipe joints.

EASY INSTALLATION: Designed for quick and simple setup, this pipe repair clamp allows for hassle-free installation on various pipe sizes. No special tools required for secure placement.

Upgraded Quality: package includes 50 pcs 1/2" irrigation hose clamps for 1/2" irrigation pipes; These stainless steel clamps are thicker and heavier than plastic clamps, their good fit and surface provide a secure, leak-proof connection, avoiding any deformation or burrs

Function: Perfect Plumbing GadGet to Repair any PinHoles, Punctures, or Splits in Piping System
Faulty Sprinkler Valve: How to Spot a Diaphragm Leak and Fix It
When a sprinkler valve’s diaphragm leaks, water seeps continuously even after the controller shuts off, leaving soggy grass, a wet driveway, and an unexpected jump in your water bill. First, shut off the main supply and remove the solenoid and bonnet. Perform a valve inspection: lift the diaphragm cap, check the gasket, plunger, and seat for tears, brittleness, or debris. If water accumulates in the chamber or the valve body feels cold on a warm day, the diaphragm is compromised. Conduct diaphragm cleaning by rinsing the diaphragm, seat, and filter screen; remove any sediment or nicked particles. Replace the diaphragm if any damage is evident, then reassemble, restore pressure, and verify that the system stops leaking after shutdown. Check for a rattling noise by tapping the side of the valve to confirm a faulty diaphragm. Understanding the solenoid’s role helps diagnose why the valve may not close properly. Standard vs proprietary solenoids differ in thread size and voltage requirements, so ensure compatibility before replacement.

COMPATIBLE WITH POPULAR HUNTER VALVES: Designed for use with Hunter PGV, SRV, ASV, PRO-ASV, PGV Jar Top, PGV-100G, PGV-101G, PGV-100A, and PGV-101A plastic 3/4" and 1" valves. Ideal for quick replacements without digging or full valve swaps.

Replacement sprinkler valve/controller diaphragm kit

Better Compatibility: Compatible with DRKCP/CPF diaphragm repair kit, this 4 pack valve diaphragm replacement kit is compatible with Rain Bird CP, CPF, DV, DAS, ASVF and other series valves, providing a perfect fit
Damaged Seals or Risers: Identifying the Issue and Re‑Sealing Properly
After fixing a leaking diaphragm, the next common culprit is a worn or damaged seal or riser. Inspect each head by unscrewing it with a wrench, then examine the rubber seal for cracks, scratches, or brittleness. Look for water dripping from the base or stem when the system is off—these are additional damage indicators. Check the riser stem for dents, cracks, or misalignment caused by mowers, foot traffic, or freeze‑thaw cycles. Remove the head to verify the cap‑to‑riser interface for debris or sand that could jam the seal. Replace any compromised seal or wiper seal with the exact OEM part, clean the riser, and reinstall the head tightly. Finally, perform routine performance testing to confirm the leak is resolved before re‑pressurizing the system. Mineral buildup can also cause seal wear and should be cleared during maintenance. Using Teflon tape on threaded connections helps prevent leaks by providing a reliable seal. O‑ring wear often accompanies seal damage and should be inspected during the same maintenance routine.
Step‑by‑Step DIY Leak‑Detection Checklist for Residential Sprinkler Systems
If you suspect a leak, start with the water‑meter test: locate the meter, shut off indoor use and irrigation, then watch the dial for movement. A moving dial confirms a leak; re‑read after a few minutes to verify. Next, perform a visual zone inspection. Activate one zone at a time, watching for unexpected low pressure, weak sprays, or geysering issues. Note wet or soggy patches between working heads, and listen for running water. Examine each sprinkler head for cracks, missing nozzles, or spurting bases. Mark any persistent wet spots. Then check valve boxes: look for damaged or clogged valves, backflow preventers, and rain sensors. Test pressure at 30‑50 PSI, flag trouble spots, and isolate zones to pinpoint the fault before calling a professional. Shut off the main sprinkler system valve and observe the low‑flow indicator to determine if the leak is within the system’s pipe network. Properly insulating pipe sections can also help reduce pressure fluctuations that mask leaks. Some sprinkler valves are equipped with built‑in pressure regulators that maintain consistent flow and can simplify troubleshooting.

【Choose certified products】ONDAQUA holds the UPC Certification issued by IAPMO, and our products are also compliant with the ASSE 1020-2020 standard

- Functionality: STMOUTUO RV water pressure regulator is designed to prevent damage to plumbing systems caused by high pressure, making it highly suitable for RV camper, yard irrigation systems, home , trailers. It effectively reduces water pressure, safeguarding the pipes from excessive pressure impact.

Maintains optimum 25 psi pressure and water flow to Drip lines and emitter devices
Preventive Maintenance to Keep Sprinkler Head Leaks at Bay
Detecting a leak is only half the battle; keeping it from happening again relies on a disciplined preventive‑maintenance routine. Begin each season with a full inspection: run the system, watch for pooling water, low pressure, or uneven spray, and verify sprinkler head angles are within manufacturer tolerances. Flush lines to clear sand and debris, then brush or pin‑clean each nozzle. Install pressure‑regulated heads and a regulator to avoid irrigation system overload, balancing zones to keep pressure even. Seasonal winterization—drain lines, use compressed air, and insulate exposed pipe—prevents freeze‑induced cracks. Replace worn heads with commercial‑grade units, add check valves at low points, and schedule a professional tune‑up annually. Follow these steps, and you’ll keep leaks at bay. Water can freeze below 20 °F (‑6 °C) and cause pipe damage. Proper drainage prevents water from pooling in low‑lying sections where it could freeze. Blowing out the system with compressed air removes residual water, reducing the risk of freeze damage.

Smart Irrigation Starts Here - The Rain Bird 1804APPRS 1800 Series pack of 4 includes a 4-inch pressure-regulated pop up sprinkler head with an adjustable 360 degree pattern dual spray nozzle and an integrated pressure regulator for consistent, efficient watering of corners, edges, lawns, beds, and landscaped areas.

Approved for sale/meets pressure regulation legislation requirements in: CA, CO, HI, VT, MA, ME, NY, OR, RI, WA, and Washington DC

Approved for sale/meets pressure regulation legislation requirements in: CA, CO, HI, VT, MA, ME, NY, OR, RI, WA, and Washington DC


