Insert the Hunter wrench’s plastic key into the lift socket, turn 90° to raise the riser, then pull the I‑60 assembly out after unscrewing the cap. Flush each sprinkler with its factory cap, open the valve briefly, and verify the pop‑up clears ground. Use the wrench to turn the arc‑adjustment screw clockwise for wider arcs (each full 360° adds 90°) and counter‑clockwise to narrow, staying between 40° and 360°. Adjust radius with the steel‑hex end: turn clockwise while water runs to shrink up to 25%, counter‑clockwise to enlarge. After these steps, you’ll be ready to fine‑tune coverage further.
Prepare the Nozzle Turret for Installation
Before you begin, insert the plastic‑key end of the Hunter wrench into the lifting socket and turn it 90° to raise the riser, then use the same key to pull the I‑60 riser assembly out of the body after unscrewing the cap. Next, turn the radius‑adjustment screw counter‑clockwise with a hex key until the nozzle socket clears. Verify the screw top sits flush or below the turret top, then back it out fully if a nozzle remains. Perform a pressure measurement at the head with a gauge; record the PSI to guide nozzle selection. Choose a nozzle whose coverage radius (8‑17 ft) matches the measured pressure per Hunter’s performance charts. Slip the selected nozzle into the cleared socket, then tighten clockwise using the adjustment screw, ensuring the screw rests just in front of the nozzle without overtightening. Select the appropriate nozzle based on the operating pressure. Consider the nozzle flow rate to ensure efficient, leak‑free operation and optimal water distribution. Investing in durable components can reduce long‑term repair costs and water waste. Understanding nozzle size impact helps achieve faster flow rates.
Flush Lines and Verify Ground Clearance
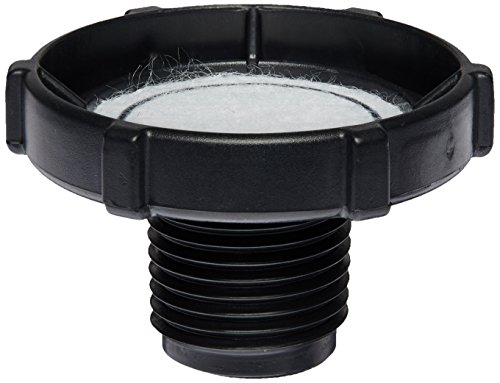
A clean line and proper ground clearance are essential for reliable spray patterns; first flush each newly installed sprinkler with its factory cap for a few seconds, then turn the valve on briefly to expel any debris that may have entered the pipe during installation. Use the Hunter ROAM remote to automate the flush, then remove the cap, inspect the filter, and maintain filter condition before reinstalling the nozzle. Verify that the pop‑up rises above ground level; pull the riser up during installation, confirm the head clears turf or mulch, and guarantee the spray pattern is unobstructed. After winterization, repeat the check to confirm proper drainage. Perform periodic system flushing on all zones, employing an Automatic Flush Valve where appropriate, to keep lines clear and preserve head performance. Adding a check valve prevents low head drainage after shutdown. When replacing a sprinkler head without digging, you can use a trenchless extraction tool to remove the old head while preserving the surrounding soil. Remember to call 811 before any digging to avoid damaging underground utilities.
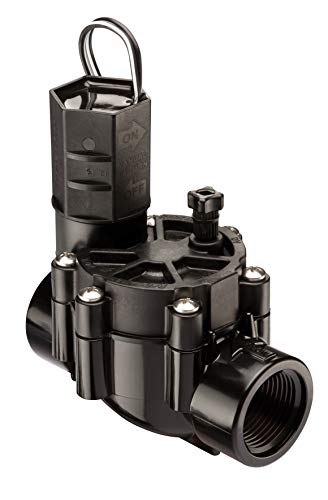
Residential / light commercial grade 1" female threaded inlet and outlet valve
Item Package Dimension: 1.64L x 1.53W x 1.21H inches

Package length :7.25"
Adjust the Turret Arc (180°–360°)
You’ll set the turret arc by holding the nozzle turret at the right stop and turning the Hunter wrench’s plastic key in the adjustment socket. Insert the key, keep the turret fixed, and rotate clockwise to Increase arc adjustment; each full 360° turn adds 90° to the spray. Continue until the wrench ratchets or you reach the desired maximum, never exceeding 360°. To Decrease arc adjustment, insert the key, keep the turret at the right stop, and turn counter‑clockwise; each full 360° turn subtracts 90°. Stop when the wrench ratchets or the arc hits the 40° minimum. Perform these moves before final installation for repeatable, precise coverage. The third socket allows fine‑tuning of the left stop point for additional arc control. Regular testing ensures the adjustments provide consistent water distribution across the lawn. Properly matching the soil type to your sprinkler settings helps prevent runoff and promotes healthy plant growth. Understanding how the solenoid controls valve opening can improve troubleshooting and system reliability.

Model Number: 751CH

✅【Value Sprinkler Head Adjustment Tool Set】Includes 5 pieces sprinkler adjustment wrench for accidentally lost and harm; This rotor adjustment tool makes easy work of pulling up sprinkler rotor stem and minimizes harm to the sprinkler head and provides a more precise distance and arc of lawn sprinkler system adjustment than using a flat screwdriver

2 Pack of Hunter MP Rotator Adjustment Tool - MPTOOL
Adjust the Turret Radius (0%–25% Change)
After setting the turret arc, you’ll focus on the radius adjustment to fine‑tune the spray distance. Use the steel‑hex end of the Hunter wrench to engage the radius‑adjustment screw; a slot screwdriver works on the nozzle‑retainer screw if needed. Turn the screw clockwise while the water stream is on to shrink the radius up to 25 %, keeping the nozzle turret at its right stop. Observe the deflected stream for instant verification; no more than five full turns prevents loss on PGP‑ADJ models. To enlarge the radius, rotate the screw counter‑clockwise, restoring the full throw without changing the nozzle size. Larger radius raises the precipitation rate, while a smaller nozzle can achieve reductions beyond the 25 % limit. Adjustments apply to PGP, PGJ, and I‑Series rotors and maintain even coverage without over‑spray. Water efficiency is a key factor that differentiates Rain Bird from many competitors. Modern systems often incorporate moisture sensors to further reduce waste. Turbulent flow through the nozzle can generate audible hydraulic noise that may be noticeable during operation.

Dimensions: 0.75 x 4.5 x 8 inches

Hunter adjustment wrench for mp rotator nozzles

OEM Hunter Replacement Part
Model‑Specific Adjustment Tools & Tips
Typically, you’ll reach for the dedicated Hunter Rotor Adjustment Tool when fine‑tuning a sprinkler, as its 3/32 Allen key, finger loops, and opposite‑side arc key let you modify radius and arc without removing the head. Use the Allen key to turn the radius screw clockwise for a 0–25 % reduction, counter‑clockwise to increase. The finger loops give firm grip, preventing slippage that could damage the slip clutch mechanism. For MP Rotators, the MPTOOL’s “MP Matchstick” design lets you adjust arc and radius from standing height; its slip clutch mechanism limits radius reduction, ensuring damage prevention. Insert the opposite‑side arc key to rotate the arc screw clockwise to narrow the spray angle, counter‑clockwise to widen it, watching the Left Edge Indicator for proper alignment. The left stop is set first by turning the stem/riser before any right‑stop adjustments. You can also compare prices at major retailers such as Home Depot to find the best deal. Proper installation and regular maintenance can significantly extend a sprinkler’s service life, often reaching up to 15 years when conditions are optimal. Their performance is comparable to Toro sprinkler heads in terms of durability and cost‑effectiveness.

The Hunter adjustment wrench consists of a 3/32 allen key, two convenient finger loops for gripping
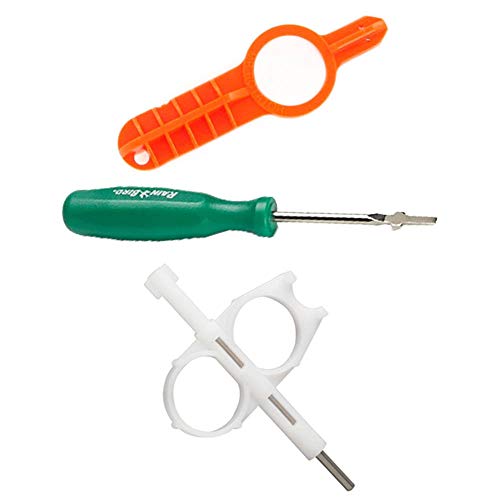
Hunter Key

Troubleshoot Common Arc and Radius Issues
Most common arc and radius problems stem from misaligned adjustment steps, so start by confirming that the right‑hand stop remains fixed while you turn the turret and that the sprinkler head sits level. Verify proper riser alignment by listening for the ratcheting click and ensuring the left‑arc side moves independently. If dry spots appear, rotate the turret counter‑clockwise with a flat‑head screw to widen the arc; if overspray occurs, turn clockwise to narrow it. For radius, turn the screw clockwise to shorten throw, counter‑clockwise to extend it—remember the change caps at roughly 25 % before nozzle replacement is required. In common radius overshoot scenarios, use a flat‑head screwdriver in the center nozzle screw to pull the radius back, then run the system and fine‑tune until wet zones match target distances. Use the plastic T‑piece to adjust the arc when finer control is needed. Regularly inspect for debris buildup to prevent obstruction and maintain consistent performance. The valve’s transparent cover lets you see the internal diaphragm for quick diagnostics. Check the power supply to ensure the controller receives consistent voltage before adjusting any hardware.

Handy pull-up tool makes easy work of lifting retracted geared rotor stems

3 Pack of Rain Bird Rotor Tool (Rotor Screwdriver / Pull-up Tool)
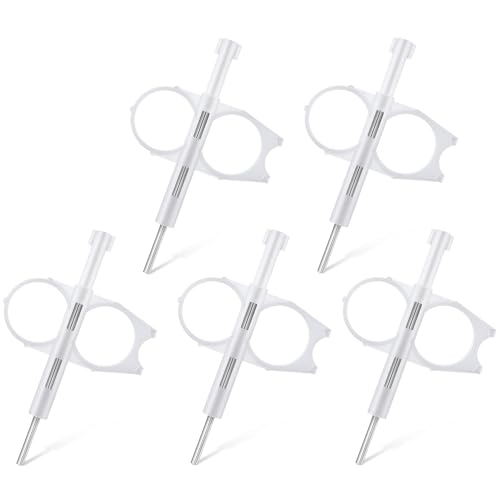
[Professional Sprinkler Adjustment Tool Set]This sprinkler head adjustment tool allows precise arc and radius tuning for lawn irrigation systems, helping improve watering accuracy and coverage
Perform a Quick Coverage Test
When you fire up the irrigation system for a quick coverage test, activate the desired zone or run all stations sequentially via the controller’s test program and let the sprinklers operate for several minutes. Observe the spray pattern for uniform wetting; flag any dry spots and note overspray onto sidewalks. Verify that each head completes a full rotation and that the arc reaches the intended perimeter. If a gap appears, adjust radius on the fly using the adjustment screw, then re‑secure the nozzle. Check head‑to‑head overlap, aiming for 50‑100 % coverage without puddling. Run the test again after each tweak, documenting improvements. Confirm that the final pattern maintains consistent radius reduction and full rotation across the entire zone. The left arc can be adjusted while the rotor is running to see the start and end of the stream. Proper water pressure is essential for maintaining the designed spray radius and flow rate will influence how quickly the zone reaches the desired moisture level. Low water pressure can cause incomplete coverage and reduced spray distance. A blocked sprinkler head can also prevent full rotation, so inspect and clear any debris before testing.
When to Call Professional Service
Ever notice a sprinkler head that won’t rotate despite cleaning, or a sudden drop in flow that persists after adjusting the nozzle? If cleaning the filter, reseating the nozzle, and tightening the threads still leave the head motionless or the flow uneven, the problem has moved beyond basic adjustments. Persistent mechanical failures—worn gears, broken suspension, or internal damage—signal a service call necessity. Complex wiring, riser pressure, or overtightening can also require specialist tools and knowledge. Check your model’s warranty coverage; many Hunter heads include 3‑5 years protection, but only authorized technicians can honor it. Contact a certified irrigation professional promptly to avoid costly DIY errors and to restore full system performance. The body and riser interchangeability of Hunter PGP allows flexible replacements when parts fail.


