
Turn off the water, unscrew the nozzle and pull the head from the riser, then rinse the filter basket and screen, soaking the filter in white vinegar for fifteen minutes. Dry everything, inspect O‑rings and seals, and apply a thin, even coat of silicone‑based spray to each O‑ring edge and a brief dip of the spring coil. Snap the head back, verify smooth pop‑up and rotation, and check pressure with the gauge. Continue to uncover how alignment tweaks and re‑lubrication schedules boost uniform coverage.
Why Proper Sprinkler Head Lubrication Matters
Proper sprinkler head lubrication is essential because it prevents sticking and guarantees safeguards smooth operation. You’ll notice a sticking head when you press down on it under water; the friction caused by dirt or debris hampers pop‑up and retraction. Applying a suitable lubricant creates a thin barrier that reduces friction, allowing gears and the gearbox to move freely without wear. This protection extends component life, which directly optimizes system longevity. The thixotropic nature of the lubricant seals parts when stationary, shielding them from rust and water ingress, thereby minimizing environmental impact by preventing leaks and excessive water use. Consistent lubrication also maintains accurate spray arcs, uniform coverage, and efficient water distribution, keeping the irrigation system reliable and effective. Mineral buildup can cause a head to become stiff, so regular cleaning and lubrication help mitigate this common issue. Proper maintenance also reduces the risk of algae growth that can clog sprinkler heads and impair performance. Regularly checking for corroded seals can prevent leaks before they become severe.
Select the Best Sprinkler Head Lubricant
When you choose a lubricant for sprinkler heads, prioritize silicone‑based products because they form a durable wax film, resist sand and debris, and remain effective for about a year. Apply the spray generously around the shaft, allowing the solvent to evaporate and create a uniform wax layer. This layer type protects moving parts without compromising plastic components. If silicone isn’t available, a Teflon‑based lubricant such as Tri‑Flow offers a comparable one‑year performance, but it continues to be a secondary option. Avoid oil‑based residues, WD‑40, and grease, as they introduce contaminant layers that attract grit and accelerate wear. Use a consistent lubrication technique: spray, soak, then verify movement by activating water flow. This methodical approach guarantees reliable operation and minimizes maintenance costs. Understanding how valve bodies work helps ensure the lubricant reaches the correct components. The valve’s transparent cover lets you inspect the diaphragm for wear before applying any lubricant. Selecting the correct sprinkler solenoid type ensures the valve opens and closes smoothly after lubrication.

ENHANCE PERFORMANCE - B'laster Silicone Lubricant contains a higher concentration of silicone than competitor brands, which provides longer-lasting lubrication.
![WD-40 Specialist Silicone Lubricant, New Bigger Can, 13.3 OZ [1-Pack]](https://m.media-amazon.com/images/I/41MHMrtuoWL._SL500_.jpg)
RELIABLE LUBRICATION: Provides smooth, reliable lubrication without attracting dirt or debris for a cleaner operation.

Disassemble and Clean Sprinkler Head Before Lubrication
After selecting a silicone‑based lubricant, you need to disassemble and clean the sprinkler head to ascertain the wax film adheres properly. First, turn off the water supply at the main valve or controller to eliminate pressure. Unscrew the nozzle by hand or with a wrench, then gently pull the head from the riser. Clamp the shaft with vice grips, lift the tip, and unscrew the threaded portion to expose internal parts. Remove the filter basket or screen using needle‑nose pliers if tight. Conduct sprinkler head debris removal by rinsing the nozzle, filter, and screen under tap water, wiping with a soft cloth, and brushing away mineral deposits. For stubborn crust, soak the filter in white vinegar for fifteen minutes, then rinse and dry before reassembly. This proper sprinkler disassembly verifies a clean surface for lubrication. Cracked seals can also cause leaks, so inspecting them during cleaning helps prevent future issues. Understanding the material composition of sprinkler heads can aid in selecting appropriate tools and avoiding accidental damage. Color coding provides a quick visual cue to identify head type and flow rating.

PREMIUM SILICONE FORMULA: The Original Performance Silicone Lube crafted with pure, high-quality silicone lasts as long as you do. Wet Platinum delivers a velvety-smooth glide that's perfect for adding a touch of luxury to your most intimate moments.
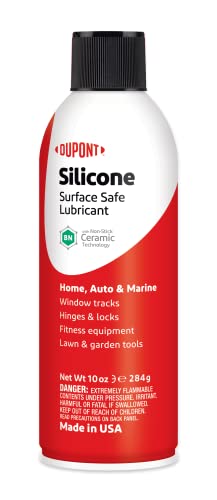
DuPont Silicone Lubricant with Teflon Fluoro Polymer

Lubricates, waterproofs and protects
Apply Sprinkler Head Lubricant Precisely to O‑Rings and Springs
If you’ve already cleaned the head, the next step is to apply a thin, uniform film of silicone‑based lubricant directly onto the O‑rings and springs. Use your thumb and index finger to spread the product evenly across each O‑ring edge, creating an even lubricant application without pooling. A light sheen indicates a consistent ring seal; wipe away any excess. For the spring, dip the coil briefly in a silicone‑based spray or use a small brush, then rotate the spring to coat every coil. Avoid over‑lubricating gears or metal contacts. After coating, press the head lightly to confirm smooth movement, then reassemble. This precise method preserves seal integrity and minimizes wear. Non‑petroleum lubricants are essential to prevent O‑ring expansion and leaks. Selecting the right washer can also improve overall system efficiency, especially when paired with a high‑quality spray pattern that matches your garden’s layout. Understanding sprinkler pressure helps you choose a nozzle that delivers the optimal flow rate for your irrigation needs. Modern garden hoses are typically lead‑free and meet EPA or NSF standards for safe water use.
Reassemble and Test Sprinkler Head While System Runs
Now that the O‑rings and springs are properly lubricated, snap the head back into its housing, ensuring the retaining clip clicks into place and the nozzle aligns with the flow path. Turn the irrigation controller back on and let the zone pressurize. While the system runs, evaluate pressure during testing by reading the gauge at the nearest pressure regulator; note any deviation from the rated 30‑50 psi range. Observe spray return and rotation by watching the nozzle’s arc and the head’s pivot; a steady, full‑circle rotation indicates proper function. If the spray puddles or the head stalls, shut off water, release pressure, and repeat the alignment check before retesting. Record all measurements for future maintenance logs. The performance of the sprinkler is also affected by pipe size and elevation changes. Proper water pressure ensures uniform coverage across different plant types. Assessing pump need helps determine if additional pressure is required for larger or elevated systems.
If the Head Still Sticks, Adjust Alignment and Rotation?
One practical step when the head still sticks is to verify its levelness and alignment before tweaking rotation. First, place a bubble level on the head and guarantee it sits flat to the horizon; a tilted head causes uneven torque on the gear turret. Next, Reposition the head so its fixed side of arc aligns with the starting point, using gloved hands or vice grips to avoid over‑tightening. Then, Check gear turret alignment by turning the head to the left stop, confirming the slot engages cleanly, and proceeding clockwise to the right stop. If the turret misfires, adjust the screw in the turret housing until the head rotates smoothly through the full 40°‑360° range. Finally, run three cycles and observe consistent pop‑up height and rotation without sticking. Adjust the left edge by rotating the body with water pump pliers until it aligns with the desired starting point. Identifying the nozzle shape helps ensure the correct spray pattern for efficient water use. Properly setting the sprinkler arc can further reduce water waste and improve coverage.
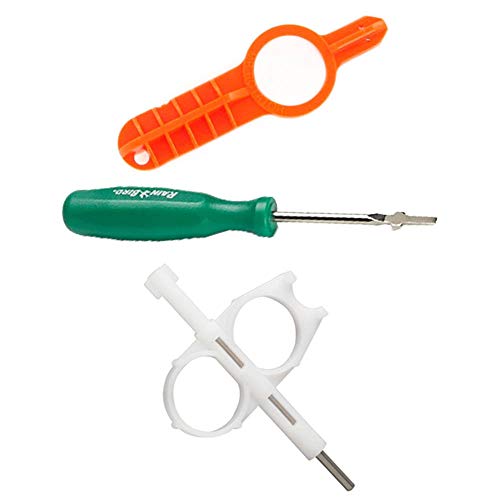
Hunter Key

---US Patent Pending---

Rainbird Rotor Adjustment Tool
How Often to Re‑lubricate Sprinkler Heads and Why?
After confirming the head’s alignment and rotation, the next step is to establish a lubrication schedule. You should re‑lubricate each sprinkler head at ideal lubrication intervals based on usage intensity, water quality, and seasonal demand. For residential lawns with moderate use, a quarterly re‑application suffices; high‑traffic commercial turf requires bi‑monthly treatment. Record each application in a maintenance log to enable proactive maintenance strategies and trend analysis. Inspect heads after each irrigation cycle: if you notice increased torque or audible squeak, shorten the interval immediately. Replace lubricant that shows discoloration or contamination, as degraded oil can accelerate wear. Consistently adhering to these intervals prevents sticking, maintains flow consistency, and extends head lifespan. Uneven watering often signals a clogged or failing valve, prompting a check of the irrigation system. Low‑pressure residential heads typically require less frequent lubrication due to their simpler design. Debris buildup can also cause excessive friction, so regular cleaning before lubrication is essential.

High-Performance Formula: Engineered for maximum efficiency, our Lubricating Penetrant Oil penetrates deeply to free stuck parts, lubricate, and prevent rust with ease. Ideal for both professional and DIY applications.

Unmatched Penetrating Power: Tackle rusted bolts and stubborn hinges effortlessly with Planet Safe AIM Extreme Duty Lubricant. This penetrating oil works deep within to break through corrosion, providing long-lasting relief from squeaks and resistance. Say goodbye to frustrating stuck parts and hello to smooth, quiet operation; perfect for industrial tasks or DIY projects, it saves time and reduces effort, keeping your tools and machinery at peak performance.

100% Synthetic oil that will reduce friction between any moving surface.
Performance Gains After Sprinkler Head Lubrication: Water Savings & Uniform Coverage
Lubricating sprinkler heads directly translates into measurable water savings and markedly improves coverage uniformity. When you level a tilted head, you eliminate “donut” over‑watering and reduce hand‑watering frequency, which cuts overall consumption by up to 15 %. The thixotropic lubricant maintains smooth gear motion, preventing lock‑up and preserving the designed spray arc. As a result, spray pattern improvements produce even distribution across greens, fairways, and tees, delivering turf moisture consistency within a 5 % variance. Visual inspections paired with nozzle replacement further tighten the delivery envelope, eradicating lush rings and enhancing aesthetics. By reallocating labor from manual watering to routine checks, you sustain system efficiency, extend component life, and keep the irrigation network operating at peak performance.


