Moving a sprinkler head is a DIY‑friendly task that usually takes under an hour and a few basic tools. You’ll cut a short ½‑inch PVC “funny pipe,” splice it into the existing lateral, and keep the new location within a 15‑foot radius to avoid moving the whole line. Dig a shallow 6‑inch trench, level the pipe, secure the fittings with primer, cement, and clamps, then adjust or replace the nozzle to maintain coverage. Follow the steps and you’ll master the process.
Decide If Moving a Sprinkler Head Is DIY‑Friendly
If you’re wondering whether moving a sprinkler head is a DIY‑friendly task, start by checking the distance: any relocation beyond 15 feet usually means you’ll have to move the lateral line, which adds complexity and may require professional plumbing skills. For moves under 15 feet, you can keep the existing funny pipe, which should stay under 15 feet long and be buried 6‑8 inches deep. Mark the head and its neighbors with flags, then dig a shallow trench, watching for tight bends that could kink the hose. Practice proper depth management to protect mower blades and guarantee adequate water pressure; avoiding excessive trench digging reduces the risk of line damage. By maintaining head‑to‑head spacing and leveling the head at ground level, you preserve coverage without needing advanced plumbing expertise. The sprinkler head should be positioned away from the house to prevent water damage and weed growth. Using a metal detector can help locate underground sprinkler lines before you start digging. Remember to call 811 before any excavation to have utilities marked and avoid accidental damage.
Gather Essential Tools & Materials to Move a Sprinkler Head
Gathering the right tools and materials before you start moving a sprinkler head saves time and prevents mistakes. First, assess cost to relocate and identify local permitting requirements, then pull a shovel or spade, trenching shovel, and trowel for sod removal. Contain soil in a bucket or tarp and call 811 to locate utilities. For pipe work, use a pipe cutter or small handsaw, matching PVC or Poly material, and bring 1/2″ male/female fittings, swing pipe, and barbed clamps. Apply PVC primer and cement or Teflon tape as needed, and secure connections with a pipe wrench or repair coupling. Use a level, marker flags, measuring tape, and leveling sand to position the head. Finally, test with water supply, zone control, leak detection, and flow verification. The dry season in Florida often exposes hot spots that require precise irrigation adjustments. Proper sprinkler spacing ensures uniform coverage and water conservation. Understanding sprinkler radius helps you calculate the ideal distance between heads for consistent water distribution. Selecting the correct sprinkler head flow is essential for matching water delivery to crop water requirements.
For PVC Pipe Only: Repairs broken or misaligned Schedule 40 PVC pipe in non-constant pressure irrigation lines; not for use with garden hoses, poly pipe, or flexible tubing

Comprehensive Type Selection:This 42-piece set includes six distinct fitting configurations: 12 pieces 1/2 pvc fittings of 3-way PVC fittings, 8 pieces of 3-way corner elbow fittings, 4 pieces of 90 degree angle PVC fittings, 6 pieces of 45 degree elbow PVC fittings, 4 pieces of 4-way PVC fittings, 8 pieces of 4-way corner elbow fittings. This diverse assortment of PVC pipe fittings provides adequate component variety for constructing both simple linear structures and complex three-dimensional frameworks without requiring supplemental purchases for connection points.

Versatile Package: Includes 10 pieces of 1/2 inch double female thread couplings, perfect for all your garden irrigation needs—ideal for replacement, sharing, or expansion.
Mark and Plan the New Sprinkler Head Location for Optimal Coverage
Start by sketching the lawn on graph paper, then use a compass to draw arcs that represent each sprinkler’s spray radius—typically 15 feet for standard heads. Plot quarter‑pattern heads at corner anchor points, using a small circle or square symbol to mark each location. Connect arcs to guarantee head‑to‑head coverage; spacing should not exceed the 15‑foot radius, and overlap eliminates dry patches. Adjust the layout plan for perimeter edges with half‑pattern heads, aligning arcs so they touch or overlap adjacent circles. Use irrigation flags or ground‑paint to mark the exact spots on the lawn, labeling head type and radius. Verify uniform distribution, add side or center heads if gaps appear, and finalize zone numbers for ideal sprinkler placement. Consider multiple acceptable layouts when determining head placement. Properly calculate flow demand using sprinkler flow rate to ensure each zone receives adequate water. Understanding water pressure helps you size the main line and select heads that deliver consistent flow across the system. Ensure the zone’s total flow does not exceed the pipe’s capacity, as outlined in the sizing sprinkler zones guidelines.
Dig the Trench and Lay Funny Pipe When Moving a Sprinkler Head
When you begin moving a sprinkler head, first mark the trench route with flags or spray paint, then dig a trench that stays 6 inches below the surface and meets the depth requirements—8–12 inches for typical climates, up to 18 inches in freezing zones. Use a shovel for short sections or a mechanical trencher for longer runs, keeping the trench width sufficient for the funny pipe diameter. Lay the pipe at the prescribed 6‑inch depth, ensuring a gradual descent from the existing lateral line. Apply weed prevention techniques, such as a thin layer of landscape fabric, before backfilling. Compact soil in layers, restore sod, and verify that the trench aligns with trenching depth requirements and avoids existing utilities. Turn on sprinklers to locate the existing head before you start digging. Proper soil type selection helps maintain consistent water pressure and protects the line from frost damage. If a zone fails to activate, check for faulty wiring in the controller to prevent troubleshooting. Understanding zone pressure is essential for balancing water distribution across the system.

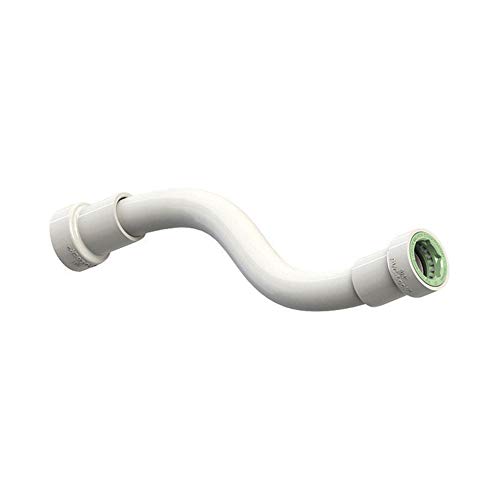
For connecting sprinkler lateral lines to spray heads, impacts, or gear-drive rotors

6pc 1/2 Inch Double Male Multifunctional Sprinkler Extensions 12 inches long .work great to raise up the sprinkler head.Don't worry about the sprinkler being surrounded by weeds or clogging the nozzle. suitable for your sprinkler system. If you shrubs and flowers are getting so tall that the sprinklers are covered by plants. This will allow your sprinklers to extend above the plants so that everything gets watered evenly.

Reliable HDPE Material: Crafted from high-quality HDPE, these sprinkler risers are designed for durability and long-term use, resisting cold, heat, and UV damage.
Cut, Couple, and Level Pipe and Sprinkler Head for Relocation
First, cut the funny pipe about two inches from the sprinkler head connector using a box knife or a ratcheting cutter, making a straight, perpendicular slice for easy reconnection. Then, slide a 1/2″ male fitting onto the cut end, twist the silly pipe clockwise, and press a matching female coupler onto the other side. Apply PVC cement, hold each joint for 30 seconds, and verify that all couplings are properly securing fittings. Next, measure the trench, pull the pipe to the new location, and trim any excess to keep the total length under 15 feet. Position the head so its top sits level with the ground, avoiding excessive height that could damage a mower. Finally, coordinate pipe segments so the flow path remains straight, then re‑thread the head counter‑clockwise, tighten, and confirm alignment before back‑filling. The swing joint can be left in place to simplify the relocation. Properly addressing sprinkler water damage prevents paint corrosion and rust. The valve’s cylindrical housing houses the internal diaphragm that regulates water flow.
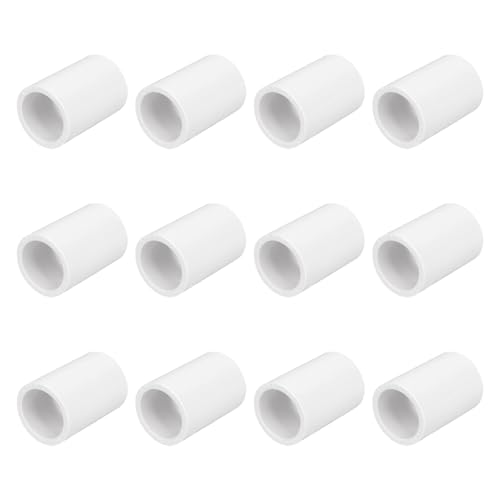
Package contains: 12pcs 0.5inch white PVC pipe slip socket fitting adapter connectors to meet your replacement needs

Package Contents: you will receive 5 pieces of 1/2 inch sprinkler fittings for garden lawn drip irrigation system and Irrigation pipes riser extension, enough to meet your use, replacement and sharing needs

FIX BROKEN PVC IRRIGATION AND PLUMBING PIPE FAST: Expandable repair coupling is engineered to effectively repair damaged 3/4 in. PVC pipe to stop leaks
Adjust or Replace the Nozzle After Moving Your Sprinkler Head
A few quick checks will tell you whether the nozzle on your relocated sprinkler head can be tweaked or needs swapping. Identify the nozzle type first: fixed spray nozzles demand replacement, variable arc models let you turn the small top screw with a flat‑headed screwdriver, and rotary heads adjust with inexpensive tools. If you have a variable arc, tighten or loosen the screw to shrink or expand the spray radius, then rotate the head to position the arc where your lawn layout requires it. For fixed or preset patterns, consider nozzle replacement considerations—unscrew the old nozzle, pull upward, install a fresh filter, then thread the new nozzle clockwise until tight. This simple adjustment supports spray pattern optimization without system shutdown. Run the sprinkler system for a few minutes to verify that the adjustments are correctly applied. Proper water pressure is essential to achieve the intended coverage area after moving the head. Selecting the appropriate nozzle size helps maintain consistent flow and prevents leaks. Understanding the impact of pipe diameter on flow rate can prevent under‑ or over‑watering after relocation.

Dimensions: 0.75 x 4.5 x 8 inches

✅ All in One Comprehensive Kit: This complete set includes 5 rotor nozzle trees, 1 rotor hold up tool, and 1 specialized adjustment screwdriver. You won't need to hunt for extra parts or tools; Everything required for immediate maintenance is right here, ready to service your irrigation zones
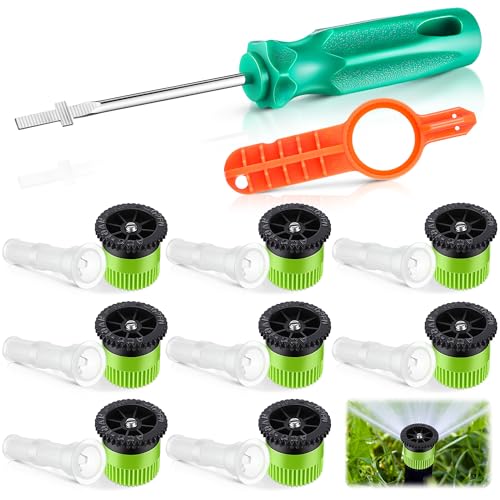
Sprinkler Tool Set: you will receive 8 green variable arc nozzles, 8 nozzle filters, 1 Spray Head Rotor Adjustment Tool and 1 rotor adjustment tool screwdriver. The complete sprinkler tool set provides you with more precise adjustment distance and arc of the lawn sprinkler system
Test the System and Fine‑Tune Coverage After Relocating a Sprinkler Head
After you’ve set the controller to manual mode and let the system pressurize for a couple of minutes, run the relocated head and watch its spray pattern. Observe head‑to‑head overlap, note gaps, and verify that water reaches only the intended lawn area. Listen for continuous flow after the two‑minute wait and watch for bubbling or pooling, which signal leaks or pressure loss. Adjust the head’s height, tilt, and arc until the pattern aligns uniformly with adjacent heads. Then, test seasonal adjustments by running the zone at different times of day to see how temperature affects coverage. Finally, assess pressure/volume changes by checking the meter and ensuring the zone maintains steady flow before returning the controller to automatic mode. Check for leaks inside the home by observing the low‑flow indicator after the system runs. Consistent moisture is essential for healthy tomatoes, so ensure the sprinkler provides even water distribution across the plant rows. Low water pressure can also reduce spray distance and cause uneven coverage. Proper soil moisture regulation supports deep root growth and reduces disease risk.

Able to adjust angle, direction, and range

DURABLE, LEAK-RESISTANT CONSTRUCTION: Heavy-duty body and cap provide reliable, long-term performance in both residential and commercial irrigation systems. Ribbed body design adds stability in loose soil and improves grip during installation.

ULTIMATE FLEXIBILITY FOR ANY GARDEN SHAPE – Place sprinklers exactly where you need them- Perfect for lawns, flower beds, raised gardens, and more.


