You’ll see a compact, rectangular or cylindrical housing—usually rigid plastic or metal—with a threaded inlet and outlet for the pipe connections. A small bleed screw sits on the top, and inside a flexible rubber diaphragm, a spring‑loaded rod, and an electromechanical solenoid control flow. The body may have a filter screen and sometimes a pressure regulator. Different brands and valve types have subtle shape cues, and the next sections will show you how to spot each.
What’s Inside a Sprinkler Valve? Body, Diaphragm, and Solenoid
A sprinkler valve is fundamentally a compact, three‑part assembly: a rigid plastic body, a flexible rubber diaphragm, and an electromechanical solenoid. The body houses the inlet and outlet pipes, a bonnet secured by screws, and a bleed screw for manual inspection. It’s made of valve materials that resist corrosion, yet cracks after ten years usually demand full replacement. The diaphragm, a rubber seal, blocks flow when the solenoid is idle and opens when pressure lifts the rod. It’s spring‑loaded, brand‑specific, and the most common leak source, so regular valve maintenance often replaces it with a matching solenoid. The solenoid, a 24 V coil, creates magnetic force to move the rod; you can unthread it, disconnect waterproof nuts, and reinstall a new unit when it fails. Globe valves are typically installed underground. Persistent uneven watering may indicate a faulty diaphragm that needs inspection. Selecting a solenoid that matches the voltage and pressure specifications of your irrigation controller ensures reliable operation. Understanding pressure‑balanced design helps prevent damage from fluctuating water pressure.
Globe, Angle, Inline, and Anti‑Siphon Valve Types – How to Spot Each
Where do you tell globe, angle, inline, and anti‑siphon valves apart? You spot a globe by its straight, opposing ports and lack of a bottom inlet; it sits underground and often offers manual override options and flow control adjustment capabilities. An angle valve shows a 90‑degree turn with an inlet at the base, same buried, and also relies on a separate backflow preventer. Inline valves are hidden, straight‑through units with no built‑in backflow protection, positioned near sprinkler heads to reduce pipe length; they too can include manual override options and flow control adjustment capabilities. Anti‑siphon valves differ by being above ground, at least six inches higher than the highest head, and they integrate a backflow preventer, eliminating the need for a separate device. Inline valves are typically protected by a valve box, making them less susceptible to freezing temperatures. Some systems may opt for manual or mechanical valves in zones where a solenoid valve is not required. Properly sized pressure regulator ensures consistent flow across all valve types. Regular inspection can reveal water quality issues that shorten valve lifespan.
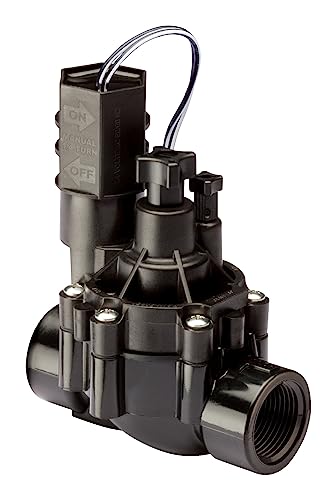
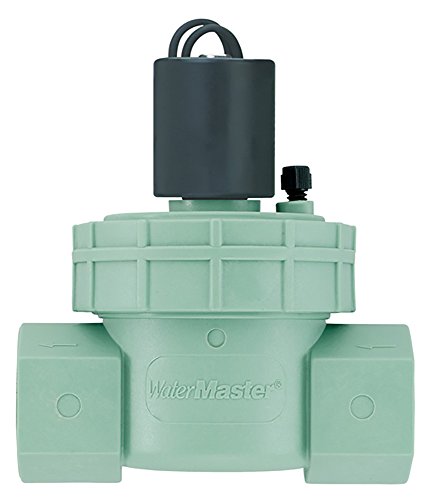
Residential / light commercial grade 1" female threaded inlet and outlet valve with flow control to avoid misting

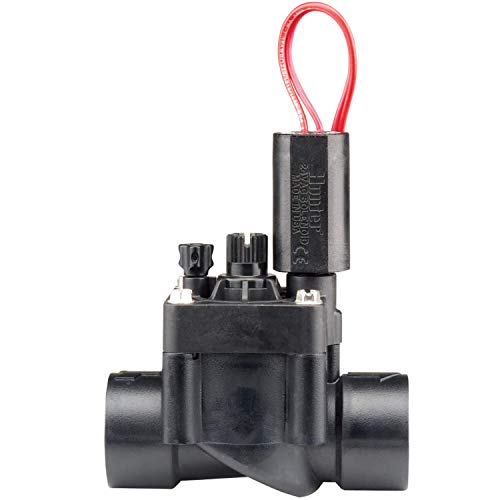
Residential / light commercial grade 3/4" female threaded inlet and outlet valve with flow control to avoid misting
BUILT-IN FLOW CONTROL FOR ZONE PRECISION: Control water flow to each irrigation zone and prevent overwatering. Helps improve system efficiency, reduce misting, and support healthier landscapes.
How to Recognize Hunter, Rain Bird, and Weathermatic Brand Cues
When you inspect a sprinkler valve, the brand’s visual cues let you identify it instantly. Hunter angle valves show a square top with four screws, a bottom‑open bonnet bolt pattern, and a label reading “Hunter PGV” or “Hunter PGV‑ASV.” Their unique identifying shapes include the square top and the reverse‑solenoid porting. Rain Bird units differ: EZ‑FLO Plus models are black, round, with a central solenoid, while P220 valves are black, round, and surrounded by eight silver/gold bolts; the inlet bears a “2” marking and the body spans roughly three inches. Identify diaphragm part numbers—138802 for EZ‑FLO and 934501 for P220—to confirm. Weathermatic lacks distinct shapes or labels; you recognize it by the absence of Hunter and Rain Bird markers. The ICV and IBV valves are rated at 220 PSI and can handle flow rates from 0.1 to 300 GPM. Understanding price ranges helps you budget effectively for residential or commercial irrigation projects. Consistent maintenance is key to preserving the durable performance praised in many reviews. Properly sealing the valve housing prevents soil intrusion and extends service life.

For repairing the valve and anti-siphon seals in manual anti-siphon valves
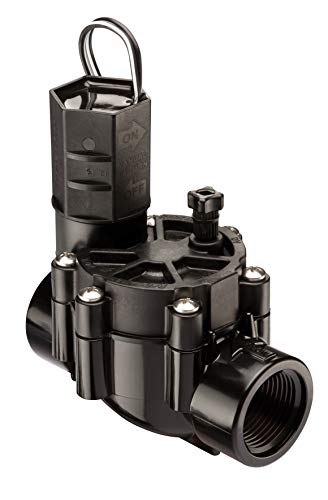
Residential / light commercial grade 1" female threaded inlet and outlet valve

For controlling the flow of water in sprinkler or drip irrigation zones; 24 VAC solenoid includes manual actuation with a twist of the solenoid
Typical Installation Locations and Required Box Sizes for Sprinkler Valves
Spotting the right placement for each valve type streamlines installation and maintenance. You’ll find inline valves buried near the water meter or in a valve box for zone control, using PVC branches from the main supply. Anti‑siphon valves sit above ground, at least six inches above the highest sprinkler head, and are ideal where backflow prevention is required. Isolation valves locate near the meter in in‑line systems or just inside the house for above‑ground setups, often at basement or garage exits for winterization. Choose valve box replacement material options that resist corrosion and fit the valve’s outer diameter—typically 1‑¾ inches. Required box sizes accommodate ¾‑inch to 1‑inch valves, supporting anti‑siphon, globe, angle, inline, and electric solenoid models, and allow space for pressure regulators and filters. Proper valve locations for efficiency reduce trenching and simplify future service. Rattling noise often indicates a worn plunger or gasket that needs inspection. Ensuring proper drainage around the valve box helps prevent water infiltration that can lead to corrosion and premature failure. Metal detectors can be used to locate buried metal components such as valve bodies, especially when the valve is constructed from brass or steel. Installing the valve at the recommended 12–18 inches above ground promotes optimal water distribution.
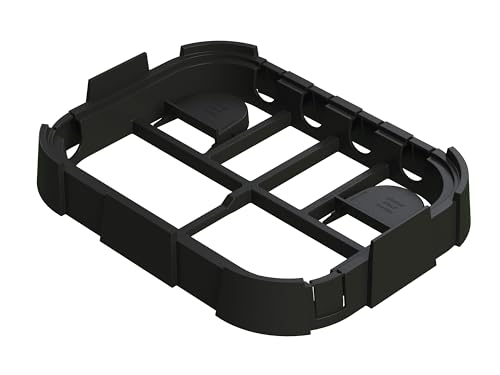
Quick Installation: Pre-made knockout slots eliminate cutting and sawing; remove by hand for easy pipe placement
For controlling the flow of water in sprinkler or drip irrigation zones; 24 VAC solenoid includes manual actuation with a twist of the solenoid
Common Leak, Corrosion, and Diaphragm Failure Signs – Quick Diagnosis?
Ever notice unusually wet grass or soggy spots around a valve box even when the system’s off? Those signs usually flag a leak, corrosion, or diaphragm failure. First, perform water meter monitoring to confirm flow when no zone is active. Next, inspect the valve box for moisture, rust on housing, and debris that could impair seals. Look for cracked housing or rusted solenoid wiring—electrical wiring inspection reveals corrosion that may short the coil. Test pressure by running each zone; weak or uneven spray points to a worn diaphragm or O‑ring. Finally, watch for post‑shutdown drips from heads, which indicate a valve that isn’t fully closing. Promptly replace seals, clean debris, or repair wiring to prevent waste and damage. If the valve continues to leak despite these checks, consider that worn O‑rings may need replacement. Regularly checking for high water pressure can also prevent premature seal wear. Understanding whether a valve includes a built‑in pressure regulator helps you choose the correct component for your system’s pressure needs.


