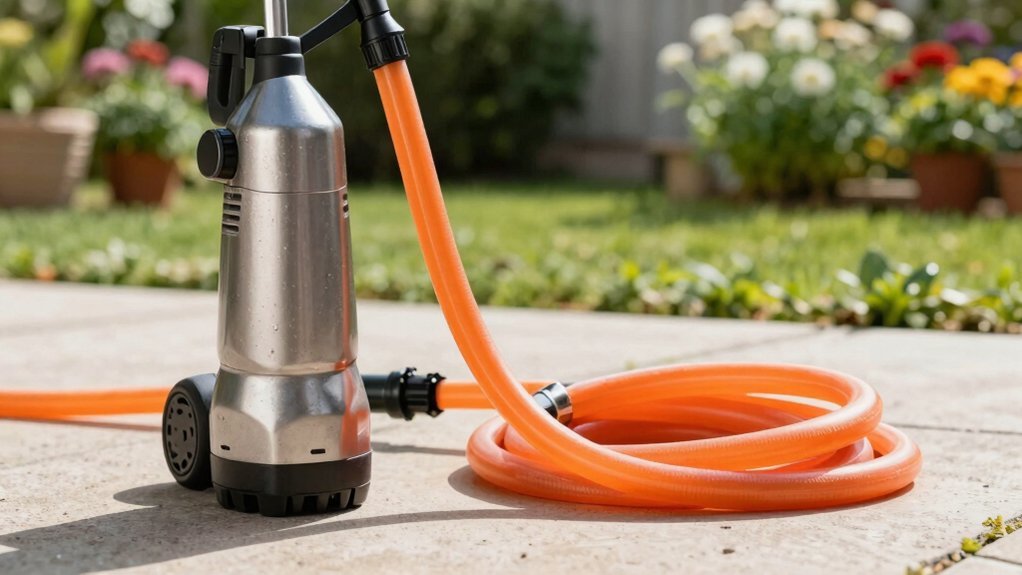
First, measure the pump’s discharge outlet with a caliper or tape and note the thread type or flange size—most sump pumps use a 1‑1/4″ FPT or 1‑1/2″ MIP. Next, pick a matching garden‑hose adapter (e.g., 1‑1/4″ FPT to ¾″ GHT) and verify it’s corrosion‑resistant. Clean the port, wrap plumber’s tape clockwise, and hand‑tighten the adapter. Secure the hose with a worm‑gear or T‑bolt clamp and an appropriately sized O‑ring. Finally, test for leaks and tighten as needed; the next steps will show you how to optimize hose length and troubleshoot common issues.
Identify Your Sump Pump Outlet Size for Garden Hose Adapter Selection
Because the pump’s discharge outlet dictates which hose adapter will work, you first need to determine its exact size. Begin by measuring the outlet with a caliper or tape, noting whether it reads 1‑1/4″, 1‑1/2″, 2″, 2‑1/2″, or 3″. Next, consult the manufacturer’s documentation to confirm the rated discharge tapping; this step is critical for determining discharge port size and verifying pump specifications. Compare the measured diameter to the listed minimum pipe size—typically 1.5″ for residential units, with regional minima such as 1‑1/4″ in Minnesota. Guarantee the outlet’s threads or flange match the intended garden hose adapter, and check that any existing pipe above the pit reflects the same diameter. This precise assessment prevents flow restriction and secures a firm fit. Garden hose thread standards also affect adapter compatibility. Understanding the tapered NPT seal helps avoid mismatched connections. Choosing a hose with a larger diameter can increase the gallons per minute flow rate, improving overall water delivery.
Pick the Right Garden Hose Adapter for a Secure Fit
Choosing the correct garden hose adapter starts with matching the pump’s discharge thread type and size to the hose’s connector. Verify that a top‑discharge pump uses a 1‑1/4 in. FPT to 3/4 in. hose adapter, while a sump pump with 1‑1/2 in. discharge needs a 1‑1/2 in. MIP‑to‑male hose adapter. For utility pumps, select a 1‑1/4 in. MIP adapter that threads onto the pump’s male threads and accepts a standard 3/4 in. hose. Prioritize adapter durability and material strength; high‑quality thermoplastic or polypropylene offers resistance to corrosion, whereas steel strainers provide extra reinforcement for high‑flow applications. Choose a product that threads easily without tools, ensuring a secure, leak‑free fit. Standard garden hose thread sizes such as ¾‑inch and ½‑inch are common and help ensure compatibility across connectors and sprinkler heads. 1/4‑inch hoses are ideal for light‑weight, short‑run watering tasks. Maintaining optimal water pressure helps prevent leaks and ensures consistent flow.

For use in connecting NPT pipe to schedule 40 PE flexible tubing in a straight run

3 Universal Replacement Adapters: Universal combo hose adapters with 1-1/2" threaded connections on one end and the other adapter end enables the connection of 1-1/4" or 1-1/2" pool hoses.
Collect Clips, Clamps, and O‑Rings Needed for a Leak‑Free Connection
When you gather the hardware for a leak‑free sump‑pump connection, start by matching each clamp type to the hose material and pressure rating. Choose worm‑gear clamps for soft rubber hoses up to 50 psi; their slotted band and screw allow fine‑tuned clamping force adjustment while the smooth ID protects the hose. For reinforced hoses or higher pressures, T‑bolt clamps deliver even distribution and resist vibration loosening. Opt for 304 stainless steel clamps when the pump sits in wet or outdoor environments, ensuring corrosion resistance and long‑term seal integrity. Quick‑release clamps serve temporary setups, offering tool‑free adjustments without over‑tightening. Include O‑rings sized for the hose inner diameter to prevent abrasion, and factor hose weight considerations when selecting band width to avoid sagging under load. Check hose diameters before cutting to ensure a proper fit. Properly sizing the hose ensures adequate flow rate for your irrigation needs. Longer hose runs can cause pressure loss that reduces cleaning efficiency.

Hose Clamps Stainless Steel: The buckle, band and screw of these metal clamps are all made of heavy duty 304 SS. Hose clamp kit has the features of corrosion-resistant, anti-rust, salt resistant, waterproof and oil proof. No longer worry about them rusting and breaking when used in indoor and outdoor places
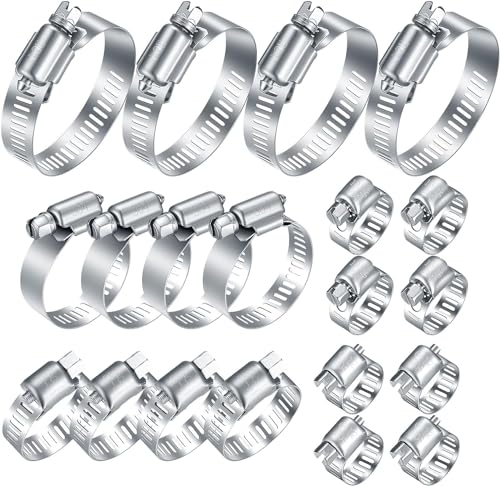
Superb Material: Our adjustable hose clips are made of outstanding stainless steel material, which is high hardness, durable, not easy to rust, and non-corrosion characteristics. Our pipe clips with solid construction and exquisite craft, rust-free. It will always look new after a long time of use.

HIGH QUALITY- The whole hose clamp (including the band, housing and screw) are all made of premium heavy duty 304 stainless steel material. Salt resistant, anti rust, anti-corrosion, waterproof, oil-proof. Clamps are sturdy, strong and reliable.
Install the Hose Tail on the Pump
If you’ve already gathered the right clamps and O‑rings, the next step is to install the hose tail on the pump. First, clean the pump’s discharge port, remove debris, and check the threading. Apply plumber’s tape clockwise, then hand‑tighten the threaded hose tail into the port. Use a male PVC adapter if the pump lacks threads, securing it with the internal threading. Tighten with a wrench, avoiding over‑torquing, and verify vertical alignment. Perform Tail compatibility testing by confirming the tail’s 3/4‑inch barbed fit matches the hose interior and that the material (plastic or brass) resists corrosion. Make any Tail alignment adjustments needed, then slide the clamp over the hose, position it behind the barb ridge, and tighten to the manufacturer’s torque. Finally, tug gently to ascertain a secure hold before proceeding. The pump’s maximum lift of 22 feet ensures adequate water pressure for the hose connection. Pressure rating limits must also be considered to avoid hose failure. When using a pressure washer with a garden hose, ensure the hose can handle the washer’s higher water pressure to prevent bursts. Incorporating an evaporative cooling roof sprinkler system can further reduce indoor temperature, complementing the pump’s water delivery.
Connect the Garden Hose Using a Tap Connector and Clamp
Now that the hose tail is securely clamped, you’ll attach a tap connector to the pump’s discharge port. First, perform discharge adapter selection: choose a brass or PVC adapter that matches the pump’s thread—typically 1.5‑inch NPT male to 3/4‑inch GHT male. Verify the adapter’s corrosion‑resistant material and guarantee the O-ring seals are intact. Next, address hose material considerations. Use kink‑free PVC hose for durability, or a reinforced rubber hose if higher pressure is expected. Thread the 3/4‑inch GHT male tap connector onto the adapter, then push the hose fitting onto the connector’s female end. Secure the joint with a corrosion‑resistant clamp, tightening until the gasket contacts the hose evenly, preventing slippage under pump operation. The pump’s universal discharge allows easy adaptation to various hose sizes. Selecting the proper thread compatibility ensures a leak‑free connection and maximizes system efficiency. Proper sealing also helps maintain consistent water pressure throughout the system. Schedule 40 PVC is generally not approved for high‑pressure sprinkler applications, so verify local code requirements before use.

Package Content: You will receive 1 piece of 3/4" GHT to 1" NPT double female thread brass garden hose swivel adapter and 1 gasket in the package. Please note that actual diameter ≠ thread size.

Lead-Free Brass: Litorange is a Better Choice that can ensure a clean, leak-free connection

【Size】Brass fire hydrant to garden hose adapter with 1-1/2" National Standard Thread (NST) female on one end for connecting to the hydrant and a 3/4" Garden Hose Thread (GHT) male on the other end for connecting to a hose. Perfect for attaching to fire hydrant.
Check for Leaks and Secure All Connections
Before you power the sump pump, place a catch‑container beneath every joint, then visually inspect each connection for cracks, debris, and proper hose‑ring alignment; Inspect connection thoroughly before tightening any clamp. Check pipe ends for damage, clear interior debris, and verify that flexible hose rings sit flush with connectors. Apply each hose clamp, then Confirm clamps are sufficiently tightened, ensuring they cover overlapping parts without gaps. Use a torque that secures the joint without crushing the hose. Run a short test by lifting the pump float and pouring water into the pit; watch the catch‑container for drips and observe joints while the pump runs. If any moisture appears, readjust or replace the faulty part before proceeding. New construction homes often seal the lid with caulk, making access difficult. For a reliable fix, consider using a metal hose repair epoxy that bonds well to metal surfaces. Properly sized distribution pipe can improve water flow and reduce pressure loss. Sprinkler valve designs often include seals that protect against moisture intrusion.
Choose the Ideal Hose Length and Placement for Optimal Flow
After securing all connections and confirming a leak‑free system, turn your attention to the hose’s length and placement to maximize flow. Aim for a discharge line of 10–20 ft, positioning the end on a sloping grassy area away from the foundation to aid soil erosion prevention. Measure the straight‑run distance, then add equivalent length for each elbow or valve; keep the total under 20 ft to avoid overworking the pump motor. Bury the hose below the frost line (≈40 in in Illinois) and include an air gap to block ice. Account for seasonal flow variations by selecting a 1½‑in. diameter or larger, matching the pump’s fitting, which sustains a minimum velocity of 2 ft/s and accommodates higher runoff in wet seasons. Longer hose lengths increase friction loss, reducing pressure at the outlet. Friction loss becomes more pronounced as hose length increases, further lowering the water pressure.
Troubleshoot Common Connection Issues and Extend Hose Length Safely
Three common culprits—worn hoses, loose clamps, and blocked discharge lines—can cripple a sump‑pump system. Inspect the hose for cracks, bulges, or stiffness; replace any compromised section immediately. Tighten every clamp, ensuring it matches the hose diameter and is free of corrosion. Perform span blockage detection by running water through the line and watching for pressure drops or irregular flow. Install a larger‑diameter corrugated drain hose for extensions, avoiding garden hoses that throttles flow. Pitch the exterior run upward then downward, add a check valve to prevent backflow, and cover the pipe to guard against freezing. Finally, set up flow performance monitoring with a simple flow meter; any deviation beyond 10 % signals a new obstruction or leak that needs prompt correction.