First check the current PSI with a gauge, then shut off all fixtures and turn on the farthest zone. Open the main valve and unscrew each head, rinse the filter, and soak it in a 50/50 vinegar‑water mix for 30 minutes. Flush the line by removing the last head and running water for 3‑5 minutes before re‑attaching it. Adjust rotor or impact heads using the appropriate key or collar to reach 30‑50 PSI, ensuring proper coverage and preventing dry patches—continue for further step‑by‑step guidance.
Lower Sprinkler Pressure in Just 5 Minutes
Even if you’ve never measured it before, you can lower sprinkler pressure in under five minutes by first confirming the current PSI with a gauge and pitot tube (or adapter tee for spray heads), shutting off all household fixtures, and activating the farthest zone. Next, open the main water valve and each sprinkler shut‑off counterclockwise until fully open, keeping the backflow preventer handles parallel to the pipe. Then, unscrew each head, rinse the filter screen, brush debris, and soak the head in a 50/50 vinegar‑water mix for 30 minutes before reinstalling. Finally, flush the line by removing the last head, running water for three to five minutes, and re‑attaching the head. This sequence evenly distributes water and helps minimize sprinkler noise while restoring ideal pressure. The garden’s well pump provides 4 gallons per minute, ensuring adequate flow after the restrictive devices are removed. Proper pump sizing depends on elevation change and system flow requirements. Understanding municipal water pressure can also guide adjustments for optimal performance. Installing a proper pressure regulator at the well outlet can further stabilize system pressure and protect downstream components.

Easily converts a 1/2" riser or existing shrub spray to low volume Drip watering system

Connects 1/2" Dip tubing to any 3/4" male pipe threaded faucet or garden hose
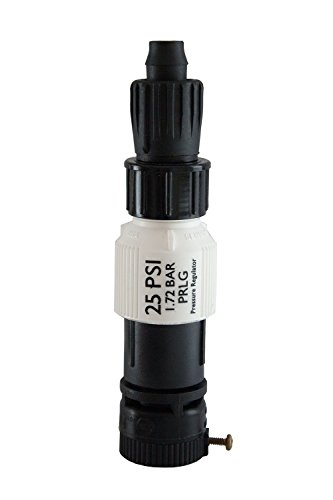
Ensure accurate and reliable drip system performance with this all-in-one faucet to drip irrigation connection kit. Connect your drip irrigation system to your water supply, keep out debris with a filter, maintain optimally low flow water pressure, and prevent backflow all with a single pre-assembled unit.
Why Proper Sprinkler Pressure Keeps Your Lawn Green
After lowering the pressure, you’ll notice how maintaining the correct PSI keeps the lawn uniformly green. Proper pressure (30–50 PSI) forces each head to emit larger droplets, reducing evaporation and wind drift. The resulting steady flow delivers water directly to root zones, encouraging deep root development and preventing stress‑induced browning. Consistent coverage eliminates dry patches and weed hotspots, which in turn lowers fertilizer and disease‑control needs. By keeping pressure within the ideal range, the system operates at peak efficiency, cutting runoff and overspray that waste water and raise utility costs. This disciplined approach supports long‑term maintenance, extending component life and preserving soil integrity while delivering a lush, resilient lawn. For most residential hoses, optimal performance is achieved between 40–80 psi and ensures even distribution across all sprinkler heads. Modern systems often incorporate soil moisture sensors to fine‑tune irrigation timing and further reduce water waste. Understanding sprinkler head spacing helps achieve uniform coverage and prevents overlapping spray zones.
Diagnose Over‑Pressure Symptoms Before Adjusting
Where do you see the tell‑tale signs of over‑pressure before even touching a wrench? First, scan the lawn for dry patches and misted edges; high pressure forces water into a fine spray that skips distant zones. Next, check for soggy spots or runoff near heads—excess flow overwhelms soil absorption. Listen for buzzing pumps or rattling valves, which indicate pressure spikes. Then, inspect each head for bending, corrosion, or misalignment; physical damage often stems from sustained over‑pressure. Finally, monitor water meter measurements while the system runs and compare them to design specifications. Any deviation suggests a flaw in pipe sizing or valve settings. By systematically analyzing system design flaws and correlating observed symptoms, you pinpoint over‑pressure before making adjustments. A well‑designed system typically loses about 15 lbs of pressure from the source to the head. Selecting the proper garden hose fitting ensures a secure connection that can withstand these pressures. Longer hoses increase friction loss which can further reduce pressure at the sprinkler heads. Use the correct standard hose thread to match your sprinkler’s connector size.

Maintains optimum 25 psi pressure and water flow to Drip lines and emitter devices
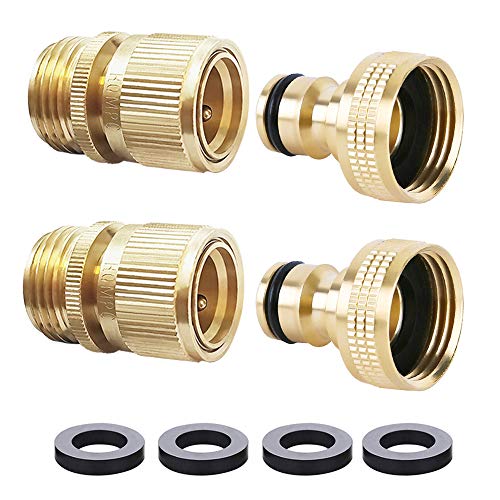
★【Standard 3/4 Inch GHT Garden Hose Quick Connect】-This garden hose quick connect sets including 2 brass female connectors + 2 brass male connectors+4 free washers.Use this hose quick connect fittings You can enjoy it work perfectly with any standard garden hose,faucets,hose bibs and watering devices.

Durable & Corrosion Resistant: Are you frustrated with plastic quick connect hose fittings that crack, rust, or fail over time? Our premium solid brass quick connect provide a robust, long-lasting solution. Built to resist corrosion and endure harsh weather conditions, these garden hose quick connect ensure reliable performance and maintenance-free use for your garden needs.
Reduce Pressure on Rotor Heads – Step‑by‑Step
When you notice the sprinkler head spraying beyond its intended arc, start by turning off the water and locating the adjustment screw or key specific to your rotor type; then follow these steps.
- Identify your rotor model (Hunter, Orbit, Rain Bird).
- Insert the appropriate plastic key or flat‑head screwdriver into the top adjustment socket or pattern slot.
- Turn clockwise to reduce pressure: for Hunter, a full 360° turn shortens the arc; for Orbit, a counter‑clockwise turn while holding the turret at its right stop narrows the pattern; for Rain Bird, tighten the radius screw.
- Verify that the nozzle remains seated; excess turns cause adjustable nozzle wear.
- Perform off season maintenance by cleaning the nozzle, checking the screw threads, and confirming the seal before re‑pressurizing.
Adjust the left stop to fine‑tune the arc without forcing the turret.
Understanding the spray pattern helps you select the correct nozzle size for optimal coverage.
Ensuring uniform coverage across the lawn prevents water waste and promotes healthy growth.
Consider the soil type when adjusting pressure, as sandy soils may require a finer mist to reduce runoff.

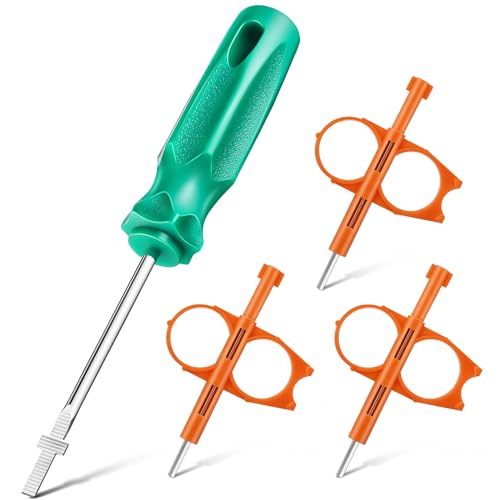
[All in One Sprinkler Tool Kit]This sprinkler tool kit combines a pull up rotor screwdriver and 3 rotor adjustment keys in one complete set. Designed to handle arc, radius, and spray distance adjustments for most lawn irrigation rotor systems

⭐【4 Pack Sprinkler Key Tool Set】This 4 pack sprinkler head tool set includes 1 pc rotor adjustment screwdriver and 3 pcs rotary sprinkler tool. Designed compatible with Rain Bird and compatible with Hunter, this sprinkler head adjustment tool kit helps you easily adjust rotor heads, replace nozzles, and maintain your sprinkler system with one convenient set
Adjust Impact Sprinkler Stops to Balance Pressure‑Based Coverage
One effective way to balance pressure‑based coverage is to adjust the impact sprinkler’s friction collars and trip lever so the spray arc matches your lawn’s layout. First, pinch the friction collars together to narrow the arc; each degree of closure reduces the spray pattern width and concentrates nozzle coverage where you need it. If you require a broader sweep, separate the collars to expand the arc up to 360°. Next, set the trip lever: flip it up for full‑circle operation, or push it down for partial circles, ensuring the lever sits outside the trip stops. Adjust the trip pin by screwing it in slightly to diffuse the stream into a fan spray pattern, which softens the spray and improves even nozzle coverage across the target area. Finally, fine‑tune the deflector shield clockwise to shorten radius and soften the mist, achieving a balanced pressure distribution without altering source flow. Impact heads require at least 15 psi to function properly.

LARGE-AREA COVERAGE: Sprays up to 85 ft. in diameter, covering 5,670 sq. ft. when set to a full circle.
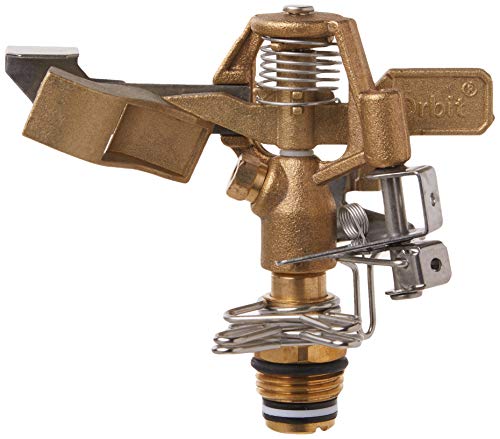
LARGE-AREA COVERAGE: Sprays up to 90 ft. in diameter, covering 6,360 sq. ft. when set to a full circle.

What you get: you will get 4 pieces 1/2 inch plastic impact sprinklers; Enough quality for you to use and replacement, you can share them to your friends and neighbors; And the working pressure is 150 to 250 kpa
Choose the Correct Nozzle Size for Flow Control
Choosing the right nozzle size is essential for controlling flow and preserving balanced pressure across your irrigation zone. Consult nozzle sizing charts to match the desired GPM with the system’s operating pressure. For a residential rotor set at 45 PSI, a full‑circle 8 GPM nozzle, a half‑circle 4 GPM, or a quarter‑circle 2 GPM will keep sprinkler head nozzle flow within limits. Sum the individual GPM values; if the total exceeds the 16‑18 GPM zone capacity, reduce nozzle size—e.g., replace an 8 GPM with a 6 GPM and a 4 GPM with a 3 GPM. Align arc coverage by pairing quarter‑circle nozzles (2 GPM) with half‑circle (4 GPM) and full‑circle (8 GPM) units. Maintain uniform spacing (30‑40 in) to preserve even pressure and prevent overspray. The nozzle shape also influences flow speed, with streamlined designs reducing turbulence and increasing efficiency. Proper spray pattern selection further optimizes water distribution and minimizes waste. Selecting the appropriate quick‑fill gas can nozzle ensures a leak‑free connection and consistent performance.

PRECISION ARC CONTROL FROM 0° TO 360°: Get pinpoint accuracy for any zone shape or edge. Whether you're watering a narrow walkway or full lawn circle, fine-tuned arc settings ensure no water is wasted.

Matched precipitation rates across sets and across patterns in 5 series, 8 series, 10 series, 12 series, and 15 series

For new installation or replacement of spray nozzles on pop-up sprinkler bodies; Precision-molded nozzle ensures consistent quality of spray pattern
Quick Field Checks to Verify Your Adjustments
A quick field check starts with a static pressure test: attach a gauge to the outdoor faucet, shut off all indoor water use, fully open the faucet, and record the psi reading—repeat at several locations and use the lowest value for calculations, since residential systems typically sit between 30 and 50 psi. Next, verify closed valves by walking the line from the gauge to each zone shut off valve, confirming none are unintentionally throttling flow. Perform a dynamic pressure test at the filter test port; compare the static reading to the dynamic one—significant drop flags a blockage or hidden sprinkler line diagnosis need. Observe each head for proper pop‑up and throw; misting indicates excess pressure, dry spots signal deficiency. Record findings, adjust zone shut off valves, and repeat tests until the system holds a stable 35 psi during operation. Understanding pipe size is essential because larger diameters reduce friction loss and help maintain desired pressure across the network. Proper sizing of the main line ensures consistent flow to all zones. Properly burying sprinkler lines at a depth of 6 to 12 inches helps protect them from frost damage and foot traffic.


