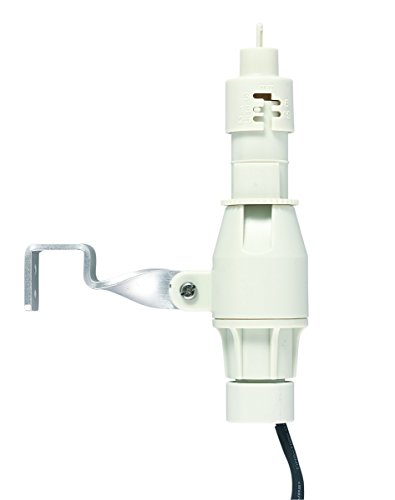
You’ll see a rain sensor spot a conductive pad or an infrared lens; when droplets bridge the pads or alter the lens’s refraction, the resistance drops or the light pattern shifts, and the sensor instantly sends a voltage pulse to the controller, which then pauses irrigation. Wired units like the Irritrol RS‑1000 use simple resistance changes, while wireless models such as Rain Bird WR2RFC rely on the same principle but transmit the signal wirelessly. Proper placement, calibration, and periodic cleaning keep false triggers at bay, and adjusting the rainfall threshold to local climate data guarantees the system reacts only to meaningful rain events. Keep the wiring secure, test the sensor with the controller’s manual‑all‑stations cycle, and you’ll avoid most common issues—continue exploring to uncover how to fine‑tune thresholds and troubleshoot deeper problems.
Which Rain Sensor Is Best for Your Yard?
Often the deciding factor is how your yard’s layout and budget align with the sensor’s wiring requirements. You evaluate wired versus wireless options by mapping control‑panel proximity, wiring feasibility, and visual impact. Wired models like the Irritrol RS‑1000 deliver low‑cost, maintenance‑free operation because they eliminate sensor battery life concerns, but they demand ideal sensor placement near the controller and expose cables. Wireless units—Rain Bird WR2RFC, WR2RFC‑48, Hunter Mini‑Clik—offer flexible positioning on roofs, fences, or mailboxes, preserving aesthetics and allowing true perfect sensor placement in open‑sky zones. Their battery life dictates maintenance intervals, yet the higher upfront cost can be offset by water savings and advanced features such as freeze detection and customizable rainfall thresholds. Choose the system that satisfies compatibility, climate sensitivity, and budget constraints. Rain sensor placement is typically near the controller or in a shaded part of the lawn, making it easy to inspect wiring connections. Proper sensor calibration helps prevent false triggers caused by dew or light rain. Understanding water pressure requirements is essential for ensuring reliable sensor operation.
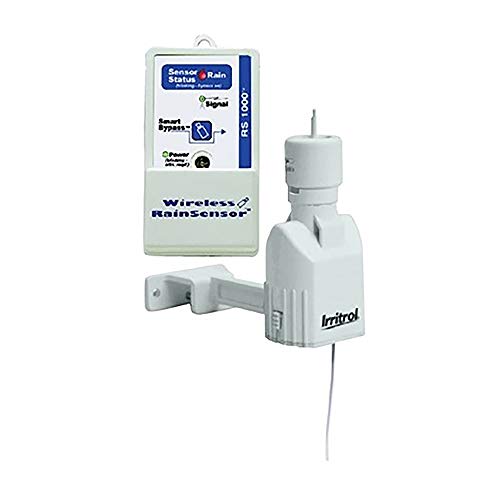
Constant communication between transmitter and receiver - Assures that even after a controller power outage, the controller is continually updated with the sensor's "wet" or "dry" status

Constant communication between transmitter and receiver - Assures that even after a controller power outage, the controller is continually updated with the sensor's "wet" or "dry" status

Automatically shuts off and restarts sprinkler system when it rains, saving both water and money
How Rain Sensors Detect Moisture
One common approach relies on conductive material resistance detection: a rain sensor’s exposed conductive pads change electrical resistance when water bridges them, and that resistance shift instantly triggers a voltage signal that the controller interprets as rainfall. You’ll notice the sensor’s circuitry measures the resistance drop, converting it into a digital flag via resistance based detection mechanisms. Parallel to that, infrared beam refraction offers an optical path: an infrared LED emits a 45‑degree beam into a glass lens, and dry glass reflects the beam fully. When droplets land, the refractive index rises to ~1.3, the critical angle shifts, and the beam refracts rather than reflecting, producing a measurable intensity dip. Your controller processes both electrical and optical cues, discriminates ambient noise, and confirms moisture presence before disabling the sprinkler. The vintage watering can nozzle’s classic garden tip design also inspires modern sensor housings for better water distribution. Properly tightening the nozzle prevents leaks and ensures consistent flow, and using a thread sealant can further improve the seal. Selecting the appropriate sprinkler bar size helps match water delivery to garden dimensions and plant water needs.
Adjust Rainfall Thresholds for Your Climate
How can you fine‑tune rainfall thresholds to match your local climate? Begin by gathering historical gauge data and flood records for your area. Compute the 90th, 95th, and 99th percentile accumulations over a 30‑year baseline (1961‑1990) and note event durations, such as a 2‑day total. Align these values with local drainage capacity, land subsidence, and expert risk assessments, then set the sensor’s magnitude, duration, and frequency parameters accordingly. For urban settings, prioritize Adjusting thresholds for urban inundation by comparing real‑time precipitation against the derived thresholds and using ensemble forecasts up to 72 hours ahead. Re‑evaluate annually after the rainy season, updating Customizing thresholds by local climate to reflect climate change trends and shifting precipitation patterns. Residents should also check the sprinkler ban schedule to avoid watering during prohibited hours. Stay informed about the regional ban timeline to ensure full compliance.
Install Your Rain Sensor and Wire It to the Controller
After setting climate‑specific thresholds, you’ll mount the sensor and connect it to the controller. First, determine ideal sensor placement: choose an unobstructed, wind‑sheltered spot away from trees, roofs, or sprinkler spray, and keep it shady if your landscape is mostly shaded. Install the sensor plumb and upright, routing the wires through the controller’s base or bottom access hole before securing them with clips every few feet. Next, utilize proper wiring techniques. Disconnect power, remove the jumper wire, then attach the common white wire and secondary yellow wire to the sensor terminals—polarity doesn’t matter. Connect two red wires to the 24‑VAC terminals, or use a transformer if those terminals are absent. Finally, tighten terminal screws, restore power, and verify the sensor’s dry‑state indicator. The receiver’s power light confirms a successful installation. You can also use a magnetic tracer to quickly locate the solenoid if you need to troubleshoot the valve wiring. Regularly inspect the system for clogged nozzles to maintain optimal pressure and sensor accuracy.

INSTANT RAIN AND FREEZE SHUTOFF: Quick Response technology stops your sprinkler system the moment rain begins or temperatures fall to 37°F, preventing water waste and protecting your lawn from freeze damage.

PRECISE AUTOMATIC TEMPERATURE CONTROL: Features a high-accuracy thermostat sensor switch that automatically activates the cooling fan at 185°F and deactivates it at 175°F to maintain optimal engine operating temperature and prevent overheating during heavy loads or idle times
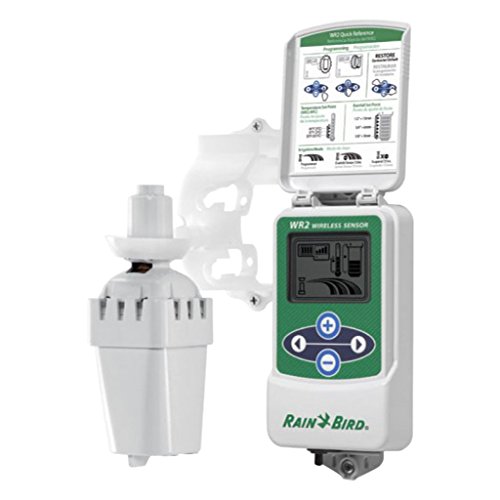
Wireless rain sensor shuts off irrigation when it rains - Freeze sensor shuts off irrigation when temperature drops below set point - Saves up to 35% on water usage
Troubleshoot Rain Sensor Issues and Decide When to Bypass
Why does your rain sensor keep triggering or staying silent? First, run the controller’s manual‑all‑stations cycle, press the sensor test button, and confirm the sensor’s activation status. If it never interrupts watering, you’re likely facing common failure modes: dirty gel pad, obstructed sky view, or a wiring break. Spray water on the sensor while the zone runs; a proper sensor shuts off within minutes. Inspect continuity, tighten connectors, and verify voltage. Clean the surface, remove debris, and replace the wafer if it shows bubbles or separation. Follow a proper maintenance schedule—annual cleaning, yearly wafer replacement, and seasonal blockage checks. When troubleshooting exhausts all fixes, bypass the sensor on the controller or replace the unit to avoid persistent false readings. Replace the battery if the sensor does not respond after cleaning. Locate the main water valve to quickly shut off the entire irrigation system if the sensor fails. A well‑maintained system can also prevent water pressure spikes that may falsely trigger the sensor. Regular system inspections help detect early malfunctions and extend the lifespan of your irrigation setup.

COMPATIBILITY: Designed to work with all RainBird RSD and WR2 wireless rain sensor systems for seamless integration and functionality
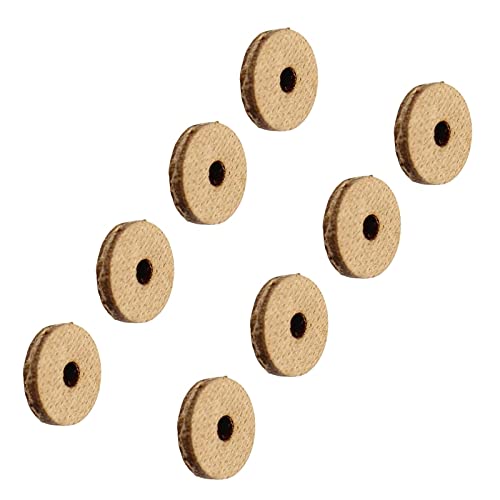
【PRODUCT FUNCTION】The rain sensor triggers the switch through the expansion of the moisture discs, and clears the alarm through the drying shrinkage. These rain sensor cork washers are compatible with Rain Bird RSD, WR2 Wireless, WR2-48 Wireless, WR2-RFC Wireless, WR2-RFC-868 Wireless.
For automatically detecting rainfall or low temperature conditions


