Place the can on a flat, grounded, non‑flammable surface at least five feet from the vehicle, then touch a metal part to discharge static. Unscrew the cap and set it on a stable, non‑slippery spot, keeping the can upright. Align the nozzle spout with the opening, insert it vertically, and screw the collar flush. Press the pump trigger slowly for a controlled drip, watching the automatic shut‑off and fill level. After the flow stops, pull the nozzle straight out, wipe it, snap the cap back on, and store the can in a cool, ventilated area—continue for deeper details.
Position Your Gas Can Safely Before Filling the Can
Before you start pumping, place the gas can on a flat, grounded surface at least five feet away from the vehicle; this dissipates static and keeps the can from igniting vapors. Choose a stable container location on concrete or packed earth, not on a vehicle seat, truck bed, or trunk. Assess spill risk before refueling by inspecting the area for debris, uneven ground, or nearby ignition sources. Position the can so its rim is level and the nozzle can maintain metal‑to‑metal contact throughout the fill. Keep the can upright, avoid angled placement, and guarantee the spout remains flexible for smooth flow. This setup minimizes static buildup, prevents spills, and protects both the fuel and surrounding environment. A diesel nozzle will not fit into a gasoline tank, highlighting the importance of using the correct fuel type and nozzle size. Selecting the proper nozzle spray pattern can optimize cleaning efficiency and reduce water waste. The spray pattern must match the irrigation system’s flow rate to achieve uniform coverage.

Gas Can Spout Replacement: The upgraded gas tank nozzle kit is more compatible. Gas can mouth sizes from 1.7in-1.82in both can be used, For most 1/2/5/6/10 gallon oil can (Please measure your oil cans mouth size before purchasing) The overall length of the nozzle tube is 8.1 in, which is more convenient and flexible to use

Easy Pouring Solution: This 5-pack of flexible pour nozzles fits most 1/2, 1, 5, and 10 gallon gas and oil cans.

Our Gas Can Spout Replacement, designed to fit most 1/2/5/10-gallon oil cans. Before purchasing, please ensure your oil can mouth size matches the internal thread size of (1-3/4 - 1.7 inches). This spout can be used for gas cans with a can mouth size of 1.75 inches. Measure your oil can mouth size to confirm compatibility.
Ground Yourself Before You Fill a Gasoline Can
If you touch a metal surface—such as the car door or a grounded pump nozzle—just before handling the can, you’ll discharge static electricity and prevent a spark that could ignite gasoline vapors. Grounding yourself eliminates the electron imbalance that builds up when you exit a vehicle or walk on dry pavement. The human body conducts charge to the metal, creating a low‑impedance path that neutralizes potential. Before you lift the can, make contact with the pump’s metal nozzle or a grounded metal part on the pump. This simple step reduces the risk of a static spark, especially with non‑conductive plastic containers that retain charge. Keep your engine off, avoid smoking, and stay at the pump to monitor for any abnormal behavior while you fill. A clogged fuel filter can cause the nozzle to click off repeatedly. low fuel pressure can also trigger the safety shut‑off mechanism. Regularly inspect and replace the fuel filter to maintain proper flow. Using the correct nozzle size is essential to prevent fuel inlet blockage during refueling.

【Ground Straps】There are 8 thicken car ground straps, 4 different sizes, 2 of each size. 2x10 inch(250mm), 2x13 inch(330mm), 2x15 inch(400mm), 2x20 inch(500mm). Different sizes can meet your different needs.

【Package Includes】:The automotive engine grounding busbar kit contains 3 pcs 10 "x 1/2" and 2 pcs 13.7 "x 1/2" braided ground cable straps with 5/16" ring terminals on both ends to meet your daily use needs.

Functions:This 16 pcs ground straps includes8 long and 8 short, with sufficient quantity and two different lengths to meet the needs of multi vehicle use or maintenance in households, without the need for additional purchase.
Remove and Secure the Cap Before Filling the Can
Unscrew the cap and set it on a stable surface before you touch the nozzle, ensuring the can stays grounded on the ground. Proper cap handling prevents the cap from rolling away, keeps it clean, and allows immediate recapping. Keep the can upright on the floor, at least five feet from the vehicle, to maintain grounding and avoid static buildup. Do not remove the cap while the can rests on carpet, plastic liners, or a truck bed, as those surfaces can generate static. Place the cap on a level, non‑slippery surface and secure it with your hand if needed. This approach guarantees regulated vapor release and eliminates premature vapor escape, reducing ignition risk before you insert the nozzle. Safety mechanisms in the nozzle can also trigger shut‑off if vapor pressure spikes unexpectedly. Selecting the proper hose diameter ensures optimal water pressure for different gardening tasks. A larger hose diameter can increase gallons per minute flow rates, especially when water pressure is sufficient.

Gas Can Spout Replacement: The upgraded gas tank nozzle kit is more compatible. Gas can mouth sizes from 1.7in-1.82in both can be used, For most 1/2/5/6/10 gallon oil can (Please measure your oil cans mouth size before purchasing) The overall length of the nozzle tube is 8.1 in, which is more convenient and flexible to use

Gas Can Spout Replacement: The upgraded gas can spout kit is more compatible and the length of the hose is longer, For most 1/2/5/10 gal oil cans. Oil jug mouth sizes from 1.7in-1.82in both can be used. The total length of the spout is 8.1in, which is more convenient and flexible to use. Please measure your oil cans mouth size before purchasing

Gas Can Spout Replacement: The upgraded gas tank nozzle kit is more compatible. Gas can mouth sizes from 1.7in-1.82in both can be used, For most 1/2/5/6/10 gallon oil can (Please measure your oil cans mouth size before purchasing) The overall length of the nozzle tube is 8.1 in, which is more convenient and flexible to use
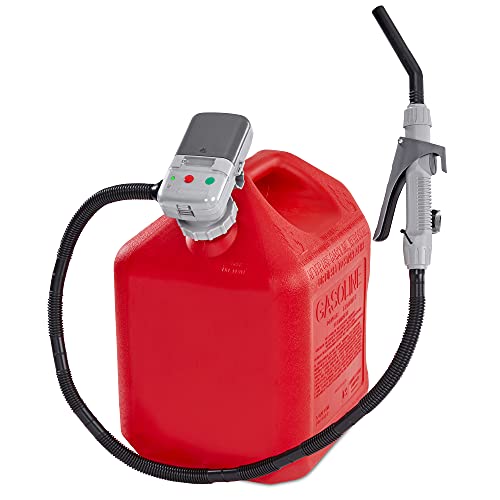
Insert the Nozzle Properly When Filling the Gas Can
After securing the cap, take the nozzle and align its spout with the can’s opening, making sure the tip points downward and the plastic strainer is removed. Insert the spout vertically, then screw the threaded collar over it until it seats flush with the neck. Check nozzle’s full insertion by feeling for a solid, gap‑free fit; any wobble signals misalignment. Verify vent functionality by confirming the vent hole near the handle is clean, unobstructed, and the plastic vent is pressed firmly into place. Guarantee the vent allows air entry to prevent vacuum lock during fueling. Finally, hold the can upright, inspect for debris, and confirm no seepage around the insertion point before proceeding. This process saves time by streamlining the fueling steps. Proper flow control can be achieved by adjusting the pressure setting on the nozzle to match the required delivery rate. Selecting the appropriate nozzle size based on flow rate ensures optimal spray performance.

ENHANCED COMPATIBILITY AND CONVENIENT LENGTH: Cyluer gas can spout replacement kit boasts superior compatibility, suitable for most 1/2/5/10 gallon gas cans, fitting oil jug mouths ranging from 1.7in to 1.82in. The length of the hose has been extended to 8.1in, ensuring greater convenience and flexibility.

【PERFECT FIT, EXTRA-LONG SPOUT FOR EASIER POURING】: The KILWANI upgraded gas can spout replacement is compatible with most 1/2/5/10-gallon plastic gas cans, fitting oil jug mouth sizes ranging from 1.7 to 1.82 inches. The extended 8.1-inch gas can nozzle length ensures greater convenience and pouring flexibility.
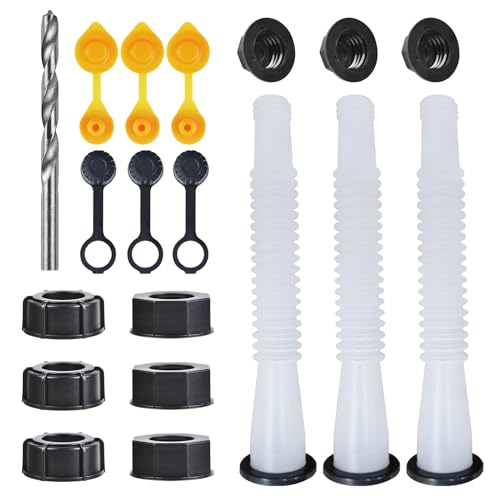
Gas Can Spout Replacement: The upgraded gas tank nozzle kit is more compatible. Gas can mouth sizes from 1.7in-1.82in both can be used, For most 1/2/5/6/10 gallon oil can (Please measure your oil cans mouth size before purchasing) The overall length of the nozzle tube is 8.1 in, which is more convenient and flexible to use
Start Fuel Flow With a Slow, Controlled Trigger Press
When you press the pump nozzle’s trigger, do it gradually so gasoline drips into the can rather than splashing. A slow, controlled press gives you vapor control and splash minimization, preventing the pump’s vapor‑recovery sensor from misreading a splash as a full can. Before you start, place the can on a stable, grounded surface and guarantee the nozzle is fully seated. Discharge static by touching a grounded metal object, then press the trigger just enough to start a steady drip. This gentle initiation keeps pressure low, avoids tipping, and maintains sensor accuracy. Keep the can’s cap and spout clear, and watch for the automatic shut‑off as the flow stabilizes. This method reduces spills, sensor false‑triggers, and overfill risk. A quick soak and scrape using warm water and a soft cloth can also help clear any residue that might obstruct the nozzle. The nozzle’s narrowing converts static pressure into kinetic energy, illustrating how pressure is transformed into speed. This process follows the continuity equation which ensures mass flow is conserved as the fluid accelerates through the nozzle.
Monitor Fill Level While Filling the Gas Can
A steady drip from the nozzle lets you keep an eye on the can’s level as it rises. Use continuous level monitoring by watching the liquid line and noting when the drip slows to a steady stream, indicating you’re near the target. For precision fill determination, combine visual cues with a digital gauge or weight‑based system; place the can on a calibrated scale and watch the percentage readout as you fill. Keep the nozzle in constant contact with the can’s side to maintain accurate visual reference. Stop at roughly 95 % capacity to preserve headspace for expansion, then pull the nozzle back to prevent drips. Ground the can, avoid distractions, and tighten the cap immediately after filling to contain vapors. Consistent monitoring prevents unexpected run‑outs. Understanding flow rate helps you select the right nozzle size for efficient filling. Selecting the appropriate nozzle type ensures optimal fluid direction for the task.
Use Automatic Shut‑Off When Filling the Gas Can
Turn on the automatic shut‑off feature before you start pouring, and the system will halt flow the moment the fuel reaches the spout’s internal valve. The automatic shut off capability works with real time fill level monitoring, so you never need to eyeball the can. As the fuel rises, the internal vent or float valve detects the level and closes the valve instantly, preventing overflow. Align the black ventilation tubing with the jug handle, screw the cap snugly, and insert the nozzle two inches into the tank. The angled tip gives you clear visibility while the self‑venting design stops fumes as soon as flow ends. This concise mechanism eliminates guesswork, safeguards against spills, and guarantees a perfect, mess‑free fill every time. The spout’s 1‑inch NPT threading provides a faster flow rate compared to standard models. Understanding flow restriction helps explain how the nozzle reduces pressure while maintaining safe fill speed. Properly sized nozzles can also improve sprinkler efficiency by delivering consistent coverage with minimal waste. The momentum‑change principle shows that the thrust generated by the nozzle equals the mass flow rate multiplied by the velocity difference between outlet and inlet.

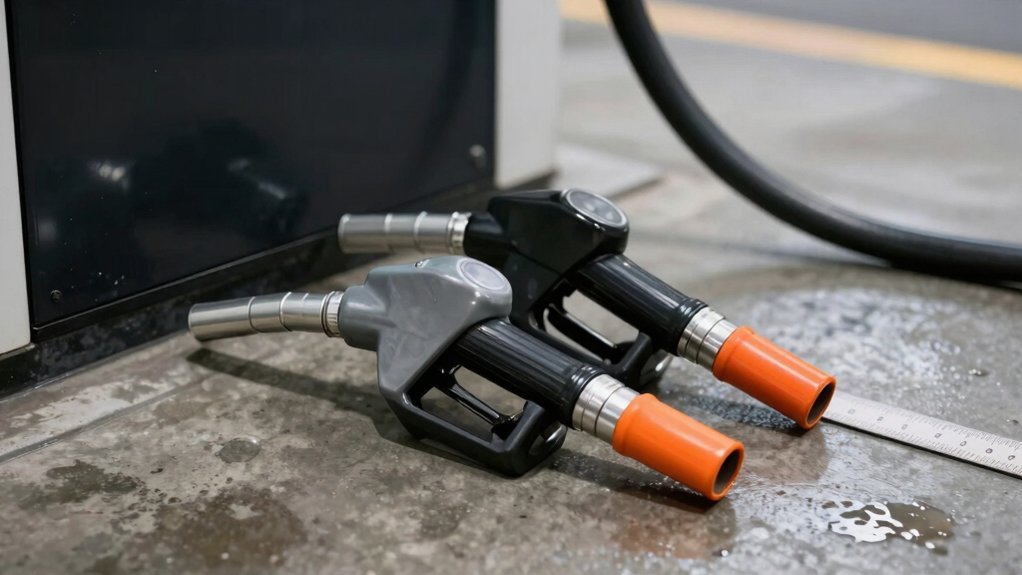
The nozzle with NPT threads, 3-notch hold open clip, full grip guard

Auto Shut-Off : The 3/4"-13/16" automatic fuel nozzle can automatically stop refueling when the tank is full. It prevents leakage and avoids oil waste
SIPHON ANYTHING IN SECONDS - Electric transfer pump fills and empties liquid at top speed without heavy lifting - built-in adapter screws directly onto most standard gas cans - useful across automotive, lawn, aquarium, and generator jobs
Remove the Nozzle and Re‑Cap After Filling the Can
After the tank’s level hits the automatic shut‑off, pull the nozzle straight out, wipe the spout with a lint‑free cloth, and snap the cap securely back on. Immediately inspect the cap’s seal for cracks; a compromised seal can leak vapors. Store the nozzle in a dedicated, dry compartment to guarantee proper nozzle storage and prevent damage. If the nozzle shows wear, corrosion, or a loose fit, replace it promptly—replacing worn nozzles maintains flow integrity and reduces fire risk. Keep the cap tight enough to engage the locking tabs but avoid over‑tightening, which can strip threads. Document the replacement date in a maintenance log; this simple record supports compliance with safety standards and extends the can’s service life. The full warranty ensures that any defective nozzle can be replaced at no cost. Use a rubber mallet to gently tap the nozzle if it feels stuck, helping to loosen it without damaging the threads. Choose the appropriate gas‑powered nozzle based on the task to optimize performance and safety.
Store the Filled Gas Can Safely for Up to Six Months
Storing a filled gas can for up to six months requires a cool, dry, and well‑ventilated location away from direct sunlight and ignition sources. Choose an EPA‑approved plastic or metal container with a tight seal, and keep it off concrete to prevent condensation. Maintain consistent temperature; fluctuations cause expansion, contraction, and vapor loss. Place the can in a garage or shed where humidity stays low, and avoid proximity to heaters or direct sunlight. If you use ethanol‑blended fuel, add a compatible stabilizer per manufacturer instructions to prevent degradation and varnish buildup. Inspect the seal and container every two months for cracks, and rotate stock by using the oldest fuel first. This routine maximizes safety and preserves fuel quality for six months. Steel jerry cans are more durable for long-term storage.