Pick a nozzle that matches your clear‑coat’s viscosity: thin‑viscosity clears need 0.5‑0.8 mm, medium clears 1.0‑1.3 mm, and standard or universal formulas work best with 1.2‑1.4 mm. High‑solids require 1.3‑1.5 mm to avoid clogging, while fine‑finish nozzles under 1.0 mm give extra atomization for high‑solids. Pair HVLP guns with 1.0‑1.3 mm nozzles and 29 psi, conventional guns with 1.2‑1.4 mm, and airless systems with 0.45‑0.64 mm. Adjust pressure and choke to fine‑tune flow, and you’ll see better transfer efficiency and gloss. Keep reading to uncover detailed matching tables and troubleshooting tips.
Which Nozzle Size Is Best for Your Clear‑Coat Viscosity?
Choosing the right nozzle size hinges on matching the clear‑coat’s viscosity to the gun’s flow capacity. You start with material selection and run viscosity testing to classify the coating as thin, medium, or thick. Thin‑viscosity clear‑coats demand 0.5 mm–0.8 mm nozzles for fine atomization; medium‑viscosity formulations pair best with 1.0 mm–1.3 mm nozzles, balancing flow and control. For most standard clear‑coats, a 1.2 mm–1.4 mm nozzle serves as the workhorse, as confirmed by 3M and Eastwood guidelines. If the TDS lists a universal clear, a 1.3 mm nozzle is a safe starting point, with a 1.5 mm option if flow proves low. Adjust up or down only after confirming flow rates, avoiding undersized nozzles that cause poor atomization. Fine Finish nozzles provide finer atomization and are especially suited for high‑solids clear coats. Selecting the appropriate nozzle also influences spray pattern consistency across varying surface textures. For high‑temperature spray applications, consider using a nozzle made from Inconel to ensure durability under extreme heat. Proper nozzle selection also impacts spray uniformity by controlling droplet size and distribution.
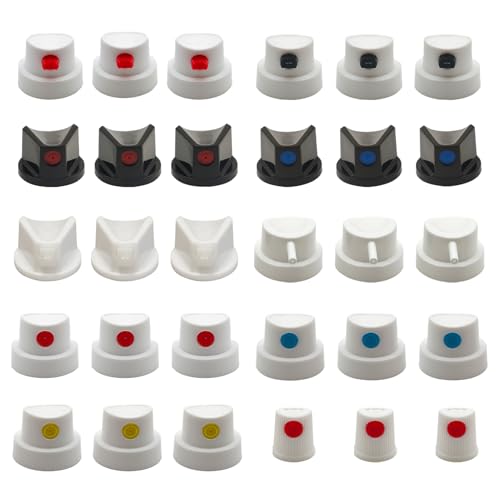
Package Included: You will receive 30pcs Female Spray Can Nozzle. 10 kind different of spray paint nozzles of different sizes and shapes can depict various spray patterns and coverage ranges, meeting your various daily creative needs.

Material: The fine mist spray nozzle cover is made of tough plastic with a plastic cap that is leak-proof, heat-resistant, and wear-resistant. And the spray bottle top will not clog or break even with frequent daily use, ensuring reliable performance.

Cleaning Solutions-Quality Sprayer: You will receive a 6pcs of mist & stream sprayer replacement tops (hose and spray heads are separate and require self-assembly). Fits standard 28/400 neck bottles and most 8, 16, and 32 oz spray bottles. Plastic hose length can be cut.
How to Match Your Spray Gun Type to the Recommended Nozzle Range?
After you’ve identified the correct nozzle size for your clear‑coat’s viscosity, the next step is aligning that size with the spray gun you’ll use. For HVLP guns, select a 1.0‑1.3 mm nozzle and pair it with the matching fluid tip, needle, and air cap; set pressure near 29 PSI to achieve fine atomization and identifying ideal spray patterns while maximizing transfer efficiency. Conventional guns require disc‑core nozzles; a 1.2‑1.4 mm opening yields even coverage on automotive panels, and you must fine‑tune air pressure to maintain droplet size. Airless systems use smaller disc‑core (0.45‑0.64 mm) nozzles for high‑volume work, but they’re unsuitable for detailed clear coats. Performance spray guns start at 1.6 mm for clear coats; adjust pressure to 2 bar (≈29 PSI) for preferred pattern and efficiency. Always consult technical data sheets for pressure‑size matrices.

ADJUSTABLE: Three adjustments including: circle/ellipse pattern adjustment, volume of material adjustment, and air volume adjustment to match your project needs.

· Specialized HVLP technology:HVLP provides Low overspray effect.Gravity feeding design effectively reduces waste of residual material in color cups and provides accurate results for maximum efficiency.

Compact Size: This mini HVLP & LVMP spray gun features a 250ml cup capacity, perfect for small to medium-sized projects.
When to Choose a Smaller (0.8 mm‑1.0 mm) Nozzle for Thin Clear Coats?
If you’re applying a thin clear coat, a 0.8 mm–1.0 mm nozzle gives you the fine atomization needed to avoid runs, sags, and orange‑peil defects. You’ll achieve a wet edge application with a spray that stays tacky enough to blend seamlessly, preventing hard lines between passes. The smaller tip produces consistent spray patterns that match low‑viscosity clear coats, delivering droplets that evaporate quickly and reduce solvent trapping. Use this size for touch‑up work, curved surfaces, or intricate parts where precision matters; the fine mist maintains uniform thickness without dry spray. Data show that 0.8 mm–1.0 mm nozzles cut orange‑peil risk by up to 30 % and improve gloss uniformity on thin, fast‑flashing clear coats. For sanding sealers and primer layers, a larger 1.8 mm nozzle is often preferred. The conversion of pressure energy into kinetic energy in the nozzle follows Bernoulli’s principle, ensuring the high‑velocity spray needed for fine atomization. This process exemplifies how thermal‑to‑kinetic conversion drives efficient atomization in spray applications. Understanding sprinkler flow dynamics helps explain how nozzle design influences spray pattern and distance.

This tips is well suited for uses demanding precise control of spray.

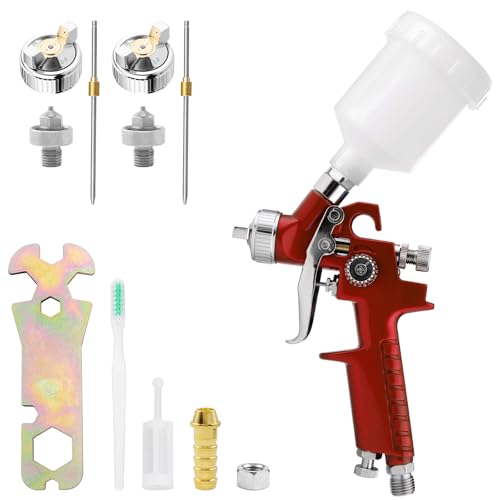
Miniature "Pistol Grip" Spray Gun Includes 3 Fluid Atomizing Nozzle Sets in Sizes 0.5mm, 0.8mm & 1.0
INTEGRATED CONTROLS: Three precise adjustments: circular/elliptical spray pattern control, material flow control, and air flow control to perfectly match any project.
Why 1.3 mm Is the Go‑to Nozzle for Devilbiss Finishline 4?
Because the FinishLine 4 is engineered for high‑transfer HVLP performance, the 1.3 mm fluid nozzle becomes the default choice for clear‑coat work. Its precision‑machined tip delivers tight atomization control, producing a fine mist that adheres uniformly to metallic and basecoat layers. The stainless‑steel needle and external‑mix air cap maintain spray consistency, enabling uniformity enhancement across a 10‑inch fan or round pattern. Operating at 12 cfm and 26 psi, the nozzle achieves the‑5 % higher transfer efficiency than larger tips, reducing overspray and waste. Compatibility with solvent, 2K, acrylic, and water‑borne clears lets you switch between paint systems without recalibrating. The lightweight forged‑aluminum gun and smooth trigger further simplify handling, making the 1.3 mm nozzle the most reliable option for top‑quality clear‑coat finishes. The FLG4’s regulator and three separate air caps provide versatile airflow for fine‑tuning spray patterns. Understanding the fluid flow control differences between nozzles and valves helps you select the right component for each application.
Adjusting Nozzle Size for High‑Solids vs. Low‑Viscosity Clear‑Coats
Choosing the right nozzle size hinges on matching the clear‑coat’s viscosity to the spray‑gun’s flow capacity. For high‑solids clears, apply the 1.3 mm‑1.5 mm range; larger apertures prevent clogging, maintain consistent flow, and meet viscosity matching principles that avoid orange‑peel defects. If you see sputtering or uneven buildup, troubleshoot nozzle issues by checking pressure and cleaning the tip. Low‑viscosity clears require 1.0 mm‑1.3 mm nozzles; the finer opening yields smooth atomization, reduces dry spray, and keeps streaks at bay. When you switch between high‑solids and low‑viscosity formulations, adjust the nozzle size accordingly, verify flow rates, and re‑evaluate spray pattern to achieve ideal coverage. A nozzle converts static pressure into dynamic pressure, so momentum change must be considered when selecting size. Understanding choked flow helps prevent performance loss when the downstream pressure drops too low.

Universal Durable Clear, Medium Speed, 65 - 80 deg. F

Blends easily with existing 2K clear coats
PREMIUM CLEAR FINISH: Professional-grade polyurethane clear matte spray paint designed for automotive refinishing, small damage repair, and full panel coating.
Why Clear‑Coat Nozzles Are Smaller Than Primer Nozzles
When you compare primers and clear coats, the key difference lies in viscosity: primers are thicker, so they need larger nozzles (1.5 mm–2.0 mm) to achieve proper atomization, while clear coats are thinner and work best with smaller nozzles (1.3 mm–1.4 mm) that generate fine droplets for a smooth, glossy finish. The smaller tip raises the atomization rate impact, producing a mist that spreads uniformly and reduces overspray. This finer spray creates a thinner, more controlled film, directly influencing impact on film thickness and preventing orange‑peel texture. Conversely, larger primer nozzles generate coarser droplets, increasing film thickness quickly for high‑build coverage but lowering atomization efficiency. Matching tip size to viscosity facilitates ideal flow, minimizes clogging, and delivers the intended finish quality. Selecting the appropriate nozzle size also improves overall spray efficiency, leading to faster application times and reduced material waste, especially when using a high‑flow nozzle designed for low‑viscosity coatings. Understanding the pressure‑velocity relationship helps explain why smaller nozzles produce higher‑velocity streams that enhance atomization. This design leverages steady, uniform flow to maintain consistent pressure and reduce turbulence throughout the spray process.
Fine‑Finish Nozzle Settings That Eliminate Orange Peel (Pressure & Choking)
Fine‑tuning the nozzle’s pressure and choke settings is the quickest way to curb orange‑peel in clear‑coat work. Start with a conventional air cap configuration selection that delivers the highest air volume; set the inlet pressure around 20 PSI and increase by 3‑5 PSI increments until the spray pattern shows fine, uniform droplets. Fully open the fluid control valve adjustment to maximize atomization, then back off 1‑2 PSI if you notice excessive paint buildup. Pair a 1.2 mm tip with a thinned coating (10‑15 % reduction) to keep paint volume low and particle size fine. Maintain 75‑80 % overlap and a consistent gun‑to‑surface distance; this balance of air pressure and choke prevents the coarse texture that causes orange peel. The sealer also eliminates the need for sanding before applying the clear coat. Understanding nozzle inches per hour helps you match flow rate to pressure for optimal coverage. Evaluating the Nozzle X can reveal additional water‑efficiency benefits for homeowners. Properly designed coupling mechanisms ensure reliable nozzle attachment and consistent performance.
How to Run a Simple Flow‑Rate Test and Verify Your Nozzle Size?
A quick flow‑rate test lets you confirm that a nozzle’s actual output matches its rated capacity. First, attach a digital manometer between the hose and nozzle, set the pressure to the standard 40 psi, and prime the line with room‑temperature water. Use a handheld electronic meter, such as the SpotOn Sprayer Calibrator, to capture flow for 10 seconds; its ±2.5 % accuracy yields reliable data for measuring nozzle flow accuracy. Record the gpm reading, then compare it to the manufacturer’s spec, allowing a ±10 % tolerance. Repeat the test after each cleaning cycle to track any deviation, which helps you in monitoring nozzle wear impact. If the measured flow falls outside the tolerance, adjust pressure or replace the nozzle before proceeding. The meter’s factory calibration lasts for the lifetime of the device. Understanding nozzle friction helps explain why wear can reduce flow and increase pressure loss. Choosing the correct spray pattern ensures efficient cleaning while protecting delicate surfaces. Proper spray angle selection also prevents over‑concentration of pressure on curved panels.

GREAT FOR WATERING DELICATE FLOWERS AND PLANTS: Perfect for Orchids, Air Plants, Seedlings and other delicate plants.

【Size】Our flat fan spray tip is designed with the perfect size. It has a thread size of 1/4"NPT, an hex width of 0.55"/14mm, a height of 1"/26mm.

For use with all Vaper 32oz non-aerosol spot sprayers
Troubleshooting Common Nozzle Issues in Clear‑Coat Application
Your flow‑rate test will tell you whether the nozzle is delivering its rated performance, but the next step is to diagnose why it might be deviating. Check for internal erosion: high pressure or continuous use can warp the spray cone, causing under‑coverage and larger droplets that waste material. Inspect for corrosion; acidic clear‑coat components pit the metal, altering droplet size and pressure. If you see buildup, apply effective cleaning solutions—solvent washes or ultrasonic baths—to dissolve limescale and cured lacquer. Verify assembly integrity; loose tips, seats, or inlet nipples create leaks and uneven feed. Follow periodic maintenance schedules, filter the feed, and replace worn parts. A cap‑rotation test pinpoints pattern pressure defects, while a 600‑grit burr removal restores uniform atomization. A cold pull can also clear residual debris that blocks filament flow.