You’ll need a permit for any new, modified, or relocated fire‑sprinkler system unless your local authority specifically exempts minor upgrades, and the requirement depends on jurisdictional codes, system size, and whether a backflow preventer is required. Check your city or county’s rules, gather the necessary plans, hydraulic calculations, and RPZ installation details, and submit a complete application with the proper fee. Follow the inspection schedule and use licensed professionals to avoid fines—continue to uncover the exact steps and documents you’ll need.
Determine If You Need a Sprinkler Permit
Do you need a permit for your sprinkler system? First, check your jurisdiction. In Wyckoff, NJ you must file a survey showing sprinkler head locations; Minnesota demands a plumbing permit and manufacturers’ specs; Fargo, ND requires plans with measurements and cost estimates; West Fargo, ND separates irrigation piping permits from other plumbing work. Your homeowner responsibilities include gathering these documents, posting any required permit card visibly, and ensuring a qualified adult is present for inspections. Local utility regulations may dictate backflow device placement—12 inches above the highest outlet in Minnesota—and prohibit downstream control valves. Confirm whether your project falls under exemptions, such as small structures in West Fargo, before you submit. This precise check determines if a permit is mandatory. Local zoning ordinances often impose additional setbacks for irrigation equipment near property lines. Proper zone sizing is essential to maintain sprinkler flow and efficient water usage.
Identify Required Sprinkler Permit Types
Now that you’ve confirmed whether a permit is required, you need to know which specific permits apply to your sprinkler project. Most jurisdictions require a fire suppression system permit for any piping, heads, standpipes, pumps, or valves you install or modify. If your work is part of new construction, an addition, or a major renovation, you’ll also need a building permit, which validates code compliance before occupancy. High‑risk occupancies—hospitals, retail, multi‑family residences—often demand a fire safety permit with detailed plans and functional inspections. For minor relocations or kitchen hood upgrades, an EZ permit may suffice, while rough‑in permits let you install piping before the full permit is approved. Submit a permit application, pay the associated permit fees, and schedule required inspections. Sprinkler systems are typically required when a building exceeds square‑footage thresholds set by the International Building Code. Low‑voltage control circuits can be used for monitoring and alarm integration in fire‑sprinkler installations. Proper welding techniques ensure secure pipe joints in high‑pressure sections.
How Jurisdictions Define Sprinkler Systems & Permit Triggers
Jurisdictions typically define a sprinkler system as an overhead piping network that supplies water from a reliable source—such as a gravity tank, fire pump, or municipal main—to a series of sprinklers activated by heat, with a controlling valve and alarm device. You’ll find that each authority having jurisdiction (AHJ) enforces sprinkler system specifications derived from NFPA 13, NFPA 13D, or local adaptations of the International Building Code. Permit triggers arise when you install a wet‑pipe, dry‑pipe, pre‑action, or deluge system that meets prescriptive code requirements, or when you modify an existing network, close valves, or replace heads. Significant remodels, new construction, or elevated hazard classifications also compel a permit. Licensing rules differ by state and city, so you must confirm the exact AHJ’s expectations before proceeding. Properly designed systems can reduce fire‑damage costs by up to 70 % and significantly improve occupant safety.

Waters your lawn automatically the whole season
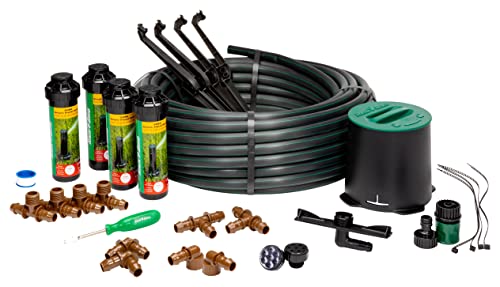
Eliminates hassle of removing and setting up garden hoses and sprinklers each time you mow
Install RPZ Backflow Preventers When Mandatory
One of the most common triggers for a backflow preventer is a high‑hazard irrigation system, and in those cases a Reduced‑Pressure Zone (RPZ) assembly is mandatory. You must install the RPZ at least 12 inches above floor or grade and no more than 5 feet high for serviceability, keeping a 5‑foot clearance from the water meter. Position the unit horizontally, above ground, and provide an air‑gap drain line for the relief valve if the assembly sits inside a building. Follow backflow prevention guidelines: register the RPZ with the local water authority, obtain a permit, and guarantee a licensed plumber performs the work. Incorporate RP maintenance schedules—annual testing by a certified tester, post‑repair checks, and prompt reporting of results—to avoid fines or service interruption. Backflow prevention is essential to protect potable water from contamination caused by garden hose connections. Properly designed systems also prevent cross‑connection hazards that could introduce chemicals or fertilizers into the drinking water supply.

Febco 860 1313 quarter turn shutoff 1 inch reduced pressure zone assembly

Bronze body with NPT end connection.
Febco 860 1312 quarter turn shutoff 3/4 inch reduced pressure zone assembly
File Your Sprinkler Permit Application: Step‑by‑Step
If you’re ready to get your sprinkler system approved, start by filling out the permit application completely—date it, sign it, and include the full scope of work and current owner details. Review applicable building codes and note Understanding residential vs commercial requirements to choose the right fee schedule and documentation. Complete every red‑asterisk field in eCLIPSE, attach the Roof Addendum if needed, and upload two signed, sealed sets of hydraulic calculations, specifications, and material data sheets. Submit the form online for fastest review, or use OnBase, in‑person filing, or mail as your department prefers. Pay the filing fee through the portal, then monitor your unique application number for status updates and plan approvals. Check local regulations before proceeding to ensure compliance with water usage and zoning rules. Be aware of the sprinkler ban schedule in your area to avoid timing conflicts with seasonal restrictions. Remember to call 811 before any excavation to have underground utilities marked and prevent accidental damage.
Gather Required Supporting Documents
Gathering the required supporting documents is the next critical step before you can submit your irrigation permit. First, record and display the Notice of Commencement if the project exceeds $5,000. Complete the permit application form and attach two sets of scaled plans showing site location, piping size, pump configuration, and installation details. Provide your current contractor license, city registration, and any subcontractor licenses, especially for plumbing work. Include plumbing application forms, back‑flow device specs, and piping material documentation. Submit a site plan with setbacks, drainage grading, and landscape layout. Obtain property owner authorization and, if needed, meet with HOA to secure approval. Finally, review municipal regulations, attach plan‑review approvals, and add fee payment receipts. Properly assess water pressure to ensure the system operates efficiently. Determine the required GPM based on sprinkler head flow rates and coverage area to verify that the system can meet demand. Understanding the source of sprinkler water, such as municipal supply or well water, helps you size pumps and select appropriate back‑flow protection.
Follow the Sprinkler Permit Inspection Timeline
After you’ve assembled all required documents, the next step is to follow the sprinkler‑permit inspection timeline. First, understand the permit approval process: residential lawn systems take 7‑10 business days, larger renovations or new builds require 20 days, and commercial projects may extend to 4‑12 weeks. Schedule your inspection at least 24 hours in advance, providing the permit number, address, and callback phone. Requests are booked online or by phone during office hours, and summer requests are limited to Fridays before noon. Inspections occur within three business days of request; fire inspections run Tuesday‑Thursday, while plumbing, mechanical, and electrical inspections are daily. Remember to request each stage—footings, rough‑in, insulation, fire alarm, sprinkler—before covering work, and adhere to timeline expectations to avoid delays. Regular monitoring helps detect early leaks and ensures the system remains reliable. Cracked seals can also cause leaks, so inspect heads regularly. It is also wise to perform a bi‑annual inspection after heavy storms or frost events to catch clogged heads and pressure issues early.
Avoid Common Pitfalls and Fines
Skipping permits, ignoring backflow‑preventer rules, and neglecting associated approvals can quickly land you in costly fines or forced rework. You must verify every permit requirement before buying equipment; missing a single form can trigger compliance risks that force a full system reinstall. In Illinois, municipalities such as Mundelein impose heavy penalties for unpermitted installations, while California demands certified backflow preventers and annual testing. Failure to secure the water agency permit before installing or repairing a backflow device risks contamination charges and water‑district enforcement. San Francisco requires a plumbing or mechanical permit before a fire‑sprinkler permit, plus a C‑16 licensed contractor and approved architectural plans. Keep hydraulic data, flow calculations, and test records organized to avoid denial, delays, and costly rework. A properly installed sprinkler backflow preventer is essential for protecting the potable water supply from contamination. The backflow preventer is typically installed near the water main or at the point where the irrigation line connects to the household supply, ensuring that contaminated water cannot flow back into the municipal system. Anti‑siphon valves also play a critical role in preventing reverse flow and maintaining water quality.
Hire Qualified Licensed Professionals: Plumbers vs. Irrigation Contractors
If you’re installing a sprinkler system, hiring the right licensed professional makes all the difference. Compare contractor licensing before you sign: plumbers hold general plumbing permits, while irrigation specialists carry Texas‑approved LIC# 17058 and BPAT# BP0018846. Irrigation contractors understand the Commission on Environmental Quality rules that govern outdoor water use, so they can design custom drainage and lawn‑specific layouts. Plumbers excel at indoor pipe work, water‑heater hookups, and emergency pressure fixes. Choose an irrigation contractor for a dedicated sprinkler install and verify their state certification; pick a plumber when the system ties into existing plumbing. Both can estimate project costs accurately, but the specialist’s expertise usually yields a smoother, code‑compliant finish.