
Sprinkler water leaves mineral‑rich droplets that dry onto your clear coat, forming two spot types. Type I appears as white specks that you can wipe away with a spray detailer and microfiber; Type II shows as sunken, rough etchings caused by corrosive ions dissolving paint. The water’s calcium, magnesium, and iron create a brine that accelerates degradation, especially on ceramic coatings. Quick fixes include a waterless wash, vinegar, or a diluted citric‑acid solution, followed by a soft polish. Stay tuned for deeper treatment steps.
How Sprinkler Water Paint Spots Form and Etch
How do sprinkler droplets turn a clean finish into a permanent blemish? When droplets land on your paint, they evaporate within minutes, concentrating calcium, magnesium, and iron into a brine that adheres to the clear coat. This mineral deposit formation begins as a faint gray spot, but the aggressive beading of ceramic coatings accelerates evaporation, forcing the salts to bond and etch the surface. Within an hour, the salts react with oxygen, especially iron‑rich water, producing rust that penetrates below the top layer. The resulting etch creates a rough, crescent‑shaped mark that resists simple washing. If you leave it untreated, the deposits persist, and repeated exposure drives long term paint degradation, fading the finish and forming microscopic scratches that compromise durability. The white vehicle has suffered water spots for weeks, requiring a heavy‑duty remover and detail spray to restore its appearance. Using a low‑pressure nozzle can help prevent these mineral deposits from forming in the first place. Selecting the appropriate spray pattern ensures even coverage and reduces the likelihood of concentrated mineral buildup. Choosing the correct nozzle tip angle is essential for controlling pressure and flow when washing delicate surfaces.
Identify Sprinkler Water Paint Spots: Type I vs. Type II
Two distinct spot categories appear when sprinkler water meets a vehicle’s finish: Type I deposits, which sit harmlessly on the surface, and Type II etchings, which actually remove paint material. You’ll spot Type I as raised, white specks that wipe away with a spray detailer and microfiber pad; they arise from the water mineral composition—primarily calcium, magnesium, and dissolved salts—left after evaporation. Type II manifests as sunken craters or depressions that resist wiping and feel rough; corrosive ions in the water dissolve paint, creating permanent etchings. To differentiate, test a suspect area: if a gentle wipe clears it, you have Type I; if the spot persists and feels indented, it’s Type II. Remember that sprinkler frequency impact amplifies exposure risk, especially when hard‑water minerals dominate the spray. Choosing the correct nozzle pressure is essential to prevent over‑aggressive cleaning that could turn Type I spots into Type II damage. Unpainted black pipes are used for easy identification and to avoid accidental painting near sprinkler heads. Proper color‑coding ensures compliance with fire‑code requirements and helps distinguish fire‑suppression components from other systems. For a quick fix, you can apply a protective sealant to the affected area after cleaning.
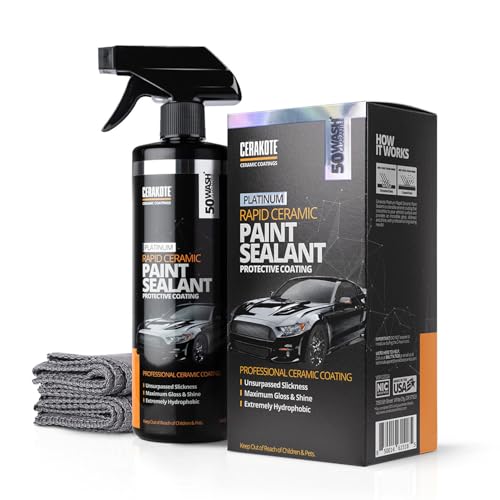
CERAMIC COATING FOR CARS: Delivers an extremely glossy, mirror-like finish on clean paint. Use as a standalone paint sealant or as a quick ceramic topper that deepens color and adds slickness. Not a one-step miracle coating and not a paint corrector
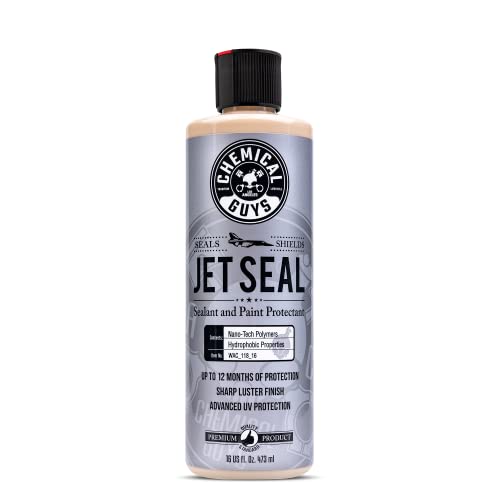
Advanced Sealant (WAC_118_16SW) - The Chemical Guys sealant creates a durable shield that protects paintwork against road embedded dirt, water spots, and environmental fallout while enhancing gloss and depth of color

[Gift for Detail-Oriented Car Lovers]: Nu Finish Once a Year Polish and Sealant - advanced ceramic technology that repairs, seals, and protects car's paint for an entire year with just one application
Quick‑Fix Methods for Sprinkler Water Paint Spots
Ever noticed a stubborn white speck that refuses to wipe away after a sprinkler shower? Start with a waterless wash: saturate a microfiber towel with a detail spray, then wipe the spot in straight lines. If the speck persists, soak a plush microfiber in white vinegar and gently rub the area, avoiding direct sunlight. Follow with a protective coating like CS3 because vinegar can degrade it. For more embedded mineral deposits, apply a diluted acid treatment—typically a 5 % citric acid solution—allow it to dwell for 30 seconds, then rinse with a waterless wash. Finish with a quick fix maintenance routine: use a soft polishing pad to buff the treated zone, restoring uniform gloss without introducing swirls. This sequence targets fresh and light‑to‑moderate sprinkler water spots efficiently. Proper removal is essential to prevent permanent paint damage. Understanding sprinkler timer basics can help you schedule watering to reduce mineral buildup. Regularly inspecting the main water valve can also prevent unexpected over‑watering. The main valve should be checked for leaks before any cleaning.
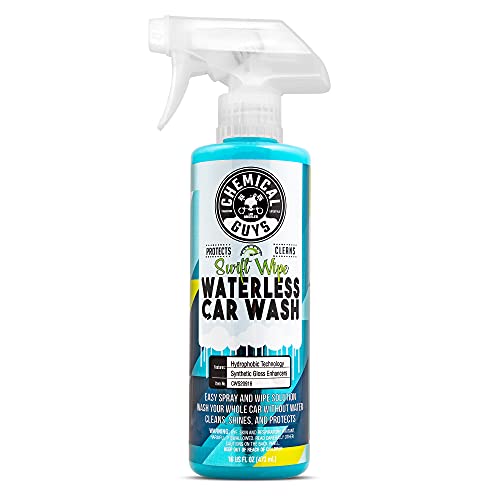
SWIFT WIPE WATERLESS WASH SPRAY (CWS20916) – Clean and shine your vehicle without water; just spray this car cleaner spray and wipe for a spotless finish anywhere.

✅ ADAM’S DETAIL SPRAY: THE AUTO DETAILER’S SWISS ARMY KNIFE - Our versatile Detail Spray is a fan favorite, known as "magic spray" or "the shiny stuff". It's a clay lubricant, quick polishing booster, gloss enhancer, wax booster, and much more. Add it to your car cleaning kit for a breathtaking shine.
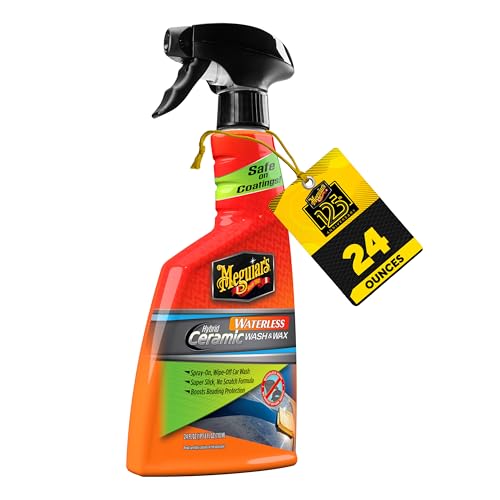
WATERLESS CAR WASH WITH CERAMIC: Easy-to-use formula, just spray on and gently wipe off with a premium microfiber towel; Gentle cleaning with ceramic chemistry works great on glossy paint, ceramic coatings, glass, polished metal, and plastic trim
Dealing With Baked‑In Sprinkler Water Spots
When hard‑water minerals from a sprinkler dry on the paint, they bond to the clear coat and become baked‑in Type II spots that can’t be wiped away. To address these spots, first wash the area with a pH‑neutral shampoo, then apply a gel‑based water‑spot remover in straight, linear motions. Let it dwell for no more than 30 seconds, allowing the active chelators to dissolve calcium bonds. Rinse with a detailer spray to neutralize residual chemistry, then lubricate a clay bar and glide it across the treated zone to lift any remaining residue. Choose a soft polishing pad for a final polish, integrating the step into broader surface refinishing methods. If the spots persist, enlist professional detailing services for machine‑polish extraction and warranty‑backed protection. Hard‑water minerals can also cause imprint rings that require multiple polishing passes. Regularly flushing the irrigation system can reduce mineral buildup in the water source. Using a pressure regulator can prevent excessive water pressure that contributes to hose damage. Proper drainage around a building’s foundation helps to excess moisture buildup that can otherwise accelerate mineral accumulation on exterior surfaces.

HEAVY DUTY WATER STAIN REMOVER FOR CARS(SPI10816) – Trusted by detailers for years, this gel formula targets stubborn mineral stains and water spots on paint, glass, and metal surfaces

Powerful Acidic Gel Formula That Clings: Forget runny cleaners; 3D’s thick gel formula clings to surfaces, allowing longer dwell time for deeper penetration. It dissolves tough water spots and mineral deposits without damaging paint, glass, chrome, or plastic trim

HEAVY DUTY WATER STAIN REMOVER FOR CARS(SPI1081602) – Trusted by detailers for years, this gel formula targets stubborn mineral stains and water spots on paint, glass, and metal surfaces
Abrasive Polish for Deep Sprinkler Water Paint Etching
If the sprinkler‑induced water etching has penetrated beyond surface spots, you’ll need an abrasive polish that can cut through the clear coat without sacrificing underlying paint. Begin with a thorough paint damage assessment; inspect under bright light, note Type 3 or Type 4 etch patterns, and verify paint hardness. Apply surface preparation techniques: clean the area with IPA, remove residual oils, and dry with a waterless towel. Choose a cutting compound matching hardness—start with a medium foam pad for moderate clear coats, then progress to a three‑inch wool pad on a rotary polisher for aggressive removal. Use heavy pressure, moderate arm speed, and two to three drops of compound per 30‑45‑second pass. Work multiple angles, re‑inspect, and repeat until the etching levels. Finish with a final polish to restore clarity. The 2007 Mercedes E‑Class paint is on the harder side, requiring heavy cutting compounds for effective correction. Selecting the proper nozzle size can optimize spray pattern and protect delicate paint surfaces.

Unique Non-Abrasive Formula Cleans And Polishes Out Haze And Minor Surface Damage.

HEAVY SCRATCH REMOVER: Helps reduce the look of heavier surface scratches, fine scuffs, abrasion marks, oxidation haze, and dullness on compatible clear plastics. Designed to improve visual clarity and gloss instead of simply masking surface damage, making it a practical watch scratch remover for acrylic and plastic watch crystals.

BUFF OUT IMPERFECTIONS: Meguiar's Ultimate Compound removes scratches, swirls & oxidation for a clear, perfect finish
Prevent Sprinkler Water Paint Spots With Rinsing, Wax & Ceramic Coatings
After you’ve removed deep etches with an abrasive polish, the next priority is stopping new spots from forming; immediate rinsing, followed by a protective wax or ceramic coating, creates a barrier that keeps mineral deposits from drying onto the clear coat. Rinse the car right after sprinkler exposure, using a 50‑50 vinegar‑water mix to soften spots, then wipe each section and rinse with fresh water before the vinegar can etch. Apply a cleaner wax promptly; it seals the surface and makes any remaining spots easier to lift. For maximum defense, install a ceramic coating—its hydrophobic layer repels water and prevents mineral adhesion on gloss, matte, or PPF finishes. Integrate water quality management and sprinkler system upgrades, such as rust‑control filters and drip irrigation, to reduce mineral load and overspray, thereby minimizing spot formation. Use deionized water for the final rinse to eliminate mineral residues.

Paint Protection That Holds - Your car faces UV rays, salt, acid rain, and scratches every single day. This ceramic coating bonds an 80% SiO2 layer to your paint that fights all of it, giving you nano ceramic coating protection professional detailers rely on.

HYDROSLICK CERAMIC HYPERWAX (WAC22916) – This ceramic wax for cars combines the ease of a wax with the durability and protection of a ceramic coating for intense gloss and hydrophobic protection in one step

HYDROVIEW CERAMIC CAR GLASS CLEANER (CLD30116) – Cleans and protects automotive and household glass, windows, and mirrors with SiO₂ ceramic technology for improved clarity, water beading, and visibility in wet weather
Long‑Term Care: Maintenance & Protection Choices
Keeping your car’s paint in top condition over years hinges on a disciplined maintenance routine and the right protective layers. Conduct a paint maintenance cost analysis that factors bi‑weekly washes, pH‑neutral shampoos, and seasonal wax reapplications; these low‑cost actions prevent mineral penetration and reduce long‑term repair expenses. Prioritize the importance of ceramic coatings because they form a UV‑blocking liquid polymer that resists water spots for months, while booster sprays refresh the barrier quarterly. Schedule inspections every two months to verify coating integrity and address chips before oxidation spreads. Park in a garage or under a pop‑up carport to eliminate rain and sprinkler exposure, and use shaded‑time washes to slow evaporation. This systematic approach preserves showroom finish and minimizes costly restoration. You can also hide garden hoses by using decorative hose reels that blend with your landscape design. Understanding spring‑loaded reels can further protect your vehicle by ensuring smooth hose retraction and preventing accidental spray.


