You gain access to Basic Sprinklers at Farming 2 (1 copper + 1 iron), Quality at Farming 6 (1 iron + 1 gold + 1 refined quartz) and Iridium at Farming 9 (1 gold + 1 iridium + 1 refined quartz). Place Basics in a 2‑tile offset grid, Quality in 3‑tile rows, and Iridium in a 5×5 centered pattern with 5‑tile spacing, adding scarecrows for overlap protection. They water any tilled tile holding a crop at 6 AM, including immature, multi‑harvest, winter seeds and giant‑crop tiles, but stop on single‑harvest mature crops. Upgrade each sprinkler with a Pressure Nozzle or Enricher for 20 walnuts, doubling radius or adding fertilizer respectively; the upgrade occupies the single slot and can be removed for reuse. Pair Iridium sprinklers with Pressure Nozzles for maximal coverage, and your farm will automate efficiently from early to late game.
How to Unlock and Craft Each Stardew Valley Sprinkler
A sprinkler’s functionality hinges on two prerequisites: the Farming skill level and the required crafting materials. You gain access to the Basic Sprinkler at Farming level 2, then craft it with one copper bar and one iron bar; its sprinkler crafting costs are low, and its sprinkler early game utility waters four cardinal tiles each morning. At Farming level 6, the Quality Sprinkler becomes available; you need one iron bar, one gold bar, and one refined quartz, and it waters eight tiles in a 3×3 grid. Finally, the Iridium Sprinkler becomes accessible at Farming level 9, requiring one gold bar, one iridium bar, and one refined quartz, delivering the largest coverage. Each type waters only tilled tiles, excludes garden pots, and cannot be placed on sand. Upgrades such as Pressure Nozzle and Enricher cost 20 Walnut gems each and attach to a single sprinkler. Higher-level sprinklers can be unlocked by further leveling up farming. The Deluxe Sprinkler offers a balanced cost‑to‑coverage ratio, making it a popular choice for mid‑game farms. Using a greenhouse layout ensures optimal sprinkler placement for year‑round crops.
Placement Rules for Maximum Sprinkler Coverage
When you layer sprinklers diagonally, you maximize coverage while minimizing units. Follow the diagonal grid: place a sprinkler, skip one tilled tile, then place the next, creating a staggered line that produces overlapping sprinkler patterns. For Basic Sprinklers, this yields a 2‑tile offset horizontally and vertically, covering all orthogonal tiles without gaps. With Quality Sprinklers, align them three tiles apart in straight rows; the diagonal reach fills the intervening spaces, ensuring continuous watering. Iridium Sprinklers demand a 5×5 centered layout; position each at the center of a 5‑tile block, then repeat the block across the farm. Integrate scarecrows to protect the overlapping patterns, and avoid sand or non‑tilled tiles. This systematic placement maximizes farmable area coverage with the fewest sprinklers. The Pressure Nozzle Upgrade expands the watering radius to three tiles in every direction, further increasing efficiency. Proper sprinkler spacing ensures uniform water distribution and helps conserve water. Understanding water distribution methods is essential for achieving optimal irrigation efficiency.

FULL-SIZE COVERAGE IN A COMPACT DESIGN: Get the power of a full-sized oscillating sprinkler in a space-saving form—covering up to 4,000 sq. ft. to easily water large lawns, gardens, and newly seeded areas.
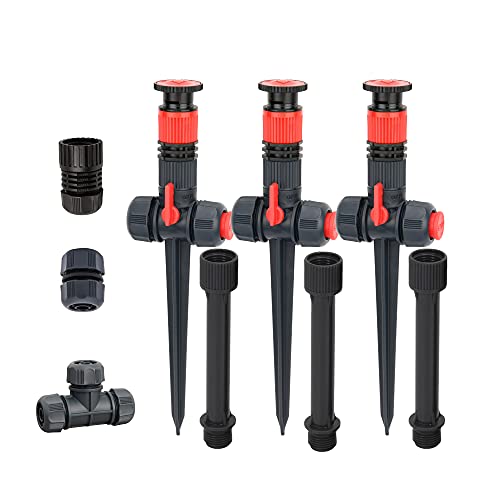
ULTIMATE FLEXIBILITY FOR ANY GARDEN SHAPE – Place sprinklers exactly where you need them- perfect for lawns, flower beds, raised gardens, and more.

PORTABILITY - Portable, easy-to-move sprinkler system suitable for various yard areas
What Gets Watered Each Morning (and What Doesn’t)
With your sprinklers set in the diagonal grid, each morning at 6 AM the game checks every tile within a sprinkler’s radius and waters any tilled soil that holds a crop. You receive daily water on all immature crops, on multi‑harvest mature crops, and on winter seeds even when snow falls. Giant‑crop tiles also get water regardless of maturity. Sprinkler range limitations mean that any tile outside the 4‑tile, 8‑tile, or 24‑tile radius (basic, quality, iridium) stays dry and must be watered manually or by rain. Single‑harvest mature crops cease receiving water once they finish growth. Untilled soil, non‑crop plants, and tea saplings are ignored. Indoor pots and greenhouse beds still require sprinklers because rain does not affect them. The field is cleared of weeds to maximize sprinkler efficiency field clearing. Automated watering also conserves water by delivering moisture only where it is needed. Sprinklers placed on the island function identically to those on the farm, but Ginger Island offers a unique layout that can affect placement strategy.
How to Upgrade Sprinklers With Enricher and Pressure Nozzle
If you’ve already set up a sprinkler grid, attaching a Pressure Nozzle or an Enricher is a straightforward three‑step process: purchase the upgrade for 20 gems from Qi’s Walnut Room, place it directly onto the already‑placed sprinkler, and then configure the upgrade (load fertilizer into an Enricher or simply enjoy the doubled radius of a Pressure Nozzle). The attachment occupies the sprinkler’s upgrade slot, so sprinkler upgrade limitations restrict you to one upgrade per device. When upgrading sprinklers manually, verify the sprinkler type—iridium, quality, or basic—then confirm the upgrade matches your goal: a Pressure Nozzle expands coverage from 24 to 48 tiles, while an Enricher applies fertilizer to every tile within the existing radius, requiring 24 units of the chosen fertilizer. Removal preserves the upgrade for reuse, and you can swap between upgrades as needed, but never stack them. This systematic approach maintains effective water distribution and fertilization without exceeding the single‑upgrade constraint. The Pressure Nozzle can double the watering radius of any sprinkler. Choosing the right sprinkler ensures optimal irrigation for your garden. Pop‑up sprinklers offer seasonal performance advantages that can offset upfront costs over time. Proper installation height helps maximize coverage and comply with fire safety standards.

PRECISION ARC CONTROL FROM 0° TO 360°: Get pinpoint accuracy for any zone shape or edge. Whether you're watering a narrow walkway or full lawn circle, fine-tuned arc settings ensure no water is wasted.
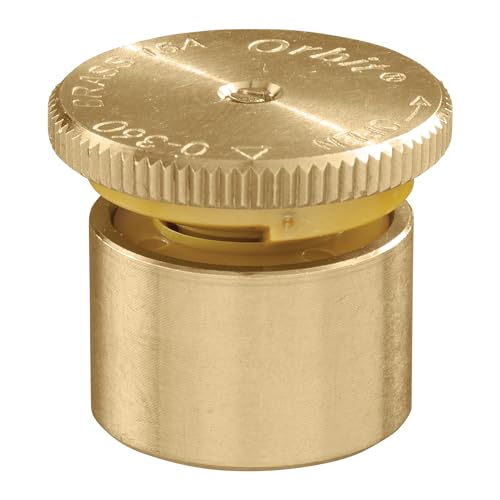
UNIVERSAL COMPATIBILITY: Designed to fit all major brands of pop-up spray heads, making it easy to replace existing nozzles and maintain your irrigation system. Delivers up to a 15-foot spray distance for efficient landscape watering (distance may vary based on PSI and other factors).

ADJUSTABLE SPRAY PATTERN FROM 0–360°: Quickly set the arc to match any area — from narrow strips to full circles. No tools needed, just twist and go.
Best Sprinkler Setup for Early, Mid, and Late‑Game Farming
Three distinct sprinkler configurations dominate efficient farming across Stardew Valley’s progression: a dense Basic Sprinkler grid for early season, a staggered Quality Sprinkler layout for mid‑game, and a spaced Iridium Sprinkler pattern for late‑game. In early play you skip Basic Sprinklers; instead upgrade your watering can and reserve copper for other tools. When you hit Farming 6, deploy 20 Quality Sprinklers on a 3‑tile‑spaced lattice, each covering eight tiles, to hit 160 crops hands‑free—this is core sprinkler optimization strategies for mid‑game. For late‑game, craft as many Iridium Sprinklers as possible, place them 5 tiles apart in 5×5 squares, and pair with scarecrows to protect 249 tiles. This systematic layout drives automated farm expansion while eliminating overlap. The Pressure Nozzle upgrade can double the radius of an Iridium Sprinkler, further increasing coverage. Proper system design ensures consistent water pressure throughout the field, preventing uneven watering and maximizing efficiency. Adding a water‑saving nozzle can reduce overall consumption while maintaining crop health. Understanding in‑line pressure regulation helps maintain steady flow across all sprinkler types.


