First, wrap 2‑3 layers of Teflon tape clockwise on the faucet threads, then screw the female coupling onto the faucet and hand‑tighten it. Next, cut both hose ends square, remove burrs, and lubricate the O‑rings. Push each hose onto a barbed fitting until it hits the stop ring, then secure with a hose clamp tightened with a screwdriver. Finally, open the water fully, check for leaks, and tighten any loose connections—continue for more detailed maintenance tips.
Quick Overview: What a Dual‑Hose Connection Looks Like
What does a dual‑hose setup actually look like? You’ll see a single inlet thread that matches the faucet GHT standard, feeding into a splitter that branches into two outlets. Each outlet holds a hose‑female connector with a rotating collar, an O‑ring seal, and a shut‑off valve for independent flow control. The male end of the first hose plugs into the female of the second, using a barb insert that locks when you push until it clicks. This design versatility lets you choose Y‑shaped or straight‑through modular configurations, extending reach without compromising integrity. Hand‑tighten all connections clockwise; the snug fit prevents cracks. When water runs, the continuous line appears as a single, leak‑free conduit from faucet to both hoses. The crimp ring with screws ensures a secure fit to the hose. It’s important to verify that both hoses use the same ¾‑inch GHT size to avoid mismatched threads. Adding more hoses can reduce water pressure and flow, so consider a booster pump for longer distances. Selecting the appropriate hose diameter, such as a ½‑inch hose for moderate flow, helps maintain optimal pressure across the dual‑hose system.
Collect the Tools You’ll Need for a Dual‑Hose Setup
You’ll need just a handful of items to assemble a reliable dual‑hose system: a set of quick‑connect fittings (brass, plastic, or aluminum), matching hose couplers, an adjustable spray nozzle, and a few household hacks such as Vaseline, cable ties, or metal wire for sealing and securing joints. Choose quick‑connect brands like Eley for durable, leak‑free connections, and pick brass, plastic, or aluminum couplers based on corrosion resistance, weight, or strength needs. Keep a small screwdriver handy for tightening any threaded ends, and a utility knife for trimming excess tie material. Store the assembled components on a hose reel storage rack to prevent kinks and protect the fittings until you’re ready to install the dual‑hose configuration. The quick‑connect fittings also provide full water flow without a restricted entrance. For optimal performance, ensure the water pressure stays within the recommended 40‑80 psi range. Using a hose rated for the washer’s maximum pressure prevents the hose rupture. A hose‑connected pressure washer can still be useful for light cleaning when the psi is sufficient for the task.

FLOW CONTROL / SHUTOFF VALVE- Quickly adjust water flow or shut off the water at the connector to swap tools without returning to the faucet.

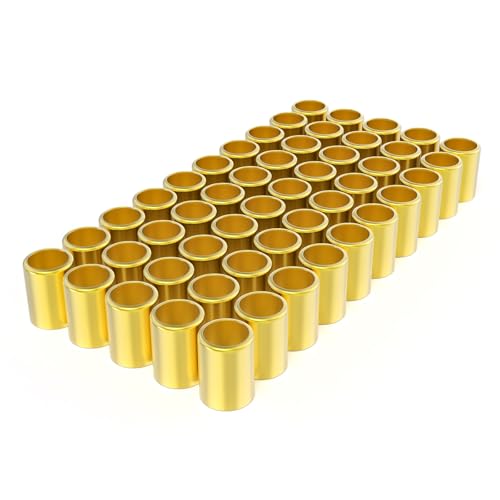
PACKAGE INCLUDING: Female quick connectors*6, male quick connectors*6, and extra garden hose rubber washers*6.
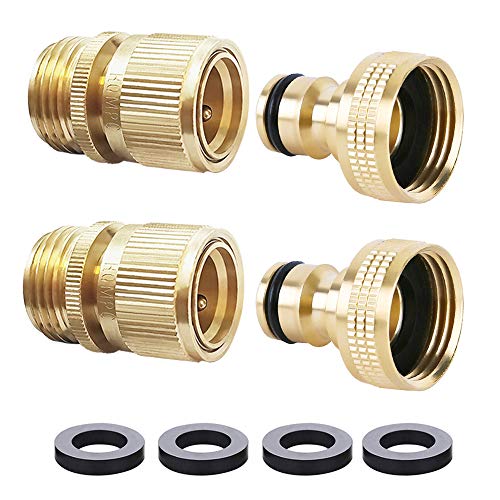
★【Standard 3/4 Inch GHT Garden Hose Quick Connect】-This garden hose quick connect sets including 2 brass female connectors + 2 brass male connectors+4 free washers.Use this hose quick connect fittings You can enjoy it work perfectly with any standard garden hose,faucets,hose bibs and watering devices.
Clean, Trim, and Inspect Hose Ends for a Secure Fit
After gathering the quick‑connect fittings and hose couplers, focus on cleaning, trimming, and inspecting the hose ends to guarantee a leak‑free connection. First, soak the fittings and nozzle in warm, soapy water for 30 minutes, then scrub with a non‑abrasive sponge and a needle to dislodge debris. Apply lubricant to the O‑ring before re‑inserting. Next, flush the hose interior with a bleach‑water solution (1 part bleach to 10 parts water) for a few minutes, then rinse thoroughly with clean water. Inspect the end for cracks or calcium buildup; if you find a leak within three feet, perform damaged hose replacement by cutting back with a utility knife or PEX cutter for a smooth edge. Finally, re‑attach the fittings, tighten clamps, and test for leaks to confirm proper fittings maintenance. The hose may need to be cut back a few inches after being driven over to remove the damaged section. Driving over sprinkler heads can cause vehicle under‑carriage damage that may also affect hose integrity. Using a metal hose repair kit can reinforce the repaired area and prevent future leaks.
Attach the Female Coupling to Your Faucet Correctly
Ever wonder how to secure the female coupling to your faucet without leaks? First, turn off the main water supply and wipe the spout area clean. Identify the thread type: M22 male or M24 female. For an M24 faucet, perform compatible adapter selection by choosing an M22×M24 brass female adapter; the M22 male faucet takes the quick coupler directly. Wrap 2‑3 clockwise layers of Teflon tape around the faucet threads, then hand‑tighten the adapter or coupler. Use an adjustable wrench wrapped in cloth for a light additional turn—never over‑tighten. Guarantee the tape direction matches the tightening rotation to maintain proper thread sealing. Finally, hand‑turn the female hose coupling onto the prepared threads, confirming a snug, wobble‑free fit before slowly restoring water pressure. Check for leaks after turning the water back on. Remember that using the correct GHT standard size prevents cross‑threading and ensures a leak‑free connection. Understanding the tapered NPT seal method helps avoid mismatched fittings. Properly applying Teflon tape ensures a watertight seal and reduces the risk of future leaks.

Size & Package: Size: M24 Male to M22 Male; Length: 10mm/0.39 inch; Thread Length: 4.8mm/0.19 inch; Package: 2Pcs x Faucet Aerator Adapter, 4Pcs x Washers;

This adapter features M24 male and M22 female threads easily converting to a standard 1/2-inch male thread

★Material: Durable Chrome Plated Brass made body
Connect the Two Hoses Using Barbed Fittings
Now that the faucet is sealed with the female coupling, you can join the two hoses by slipping each hose onto a barbed fitting. Cut each hose square, remove burrs, and apply a thin coat of non‑toxic lubricant. Push the hose onto the fitting until it bottoms out on the hex stop ring, wiggling to seat the barbs fully. Use the recommended barbed fitting material—brass for durability, steel for high‑temperature use, or PVC for lightweight applications. Verify that the fitting’s pressure rating considerations match your system, typically up to 150 psi for garden hoses. After insertion, place a hose clamp on each side of the barb and tighten by hand, then finish with a screwdriver or wrench to prevent slippage under pressure. The fittings are designed for low‑to‑medium pressure systems.

These brass hose splicers are well made, barb design so the hose won't come off once on, watertight, quickly extend garden sprayers and repair leaking flexible hoses.

Packaging Includes:3 PCS Two-Ways Brass Hose Mender, 6 PCS Stainless steel pipe clamps.

UNIVERSAL COMPATIBILITY: Connects 3/4 inch inside diameter hose to standard 3/4 inch GHT (Garden Hose Thread) fittings, perfect for garden hose repairs and extensions
How to Crimp Ferrules for a Leak‑Free Seal
A solid, leak‑proof seal starts with selecting the right ferrule—match its internal diameter to the hose or wire size, choose an appropriate material (aluminum for light duty, copper for durability), and guarantee the ferrule length fully covers the stripped section. Cut the hose cleanly, strip insulation to the barrel depth without nicking strands, and slide the ferrule onto the end. Position the ferrule in the crimping tool’s cavity, ensuring the ratchet mechanism engages. Apply firm pressure until the ratchet releases, then repeat the crimp along the ferrule length for uniform compression. Use a go/no‑go gauge to verify dimensions, and perform a pull test. These Ferrule compression techniques and Hose crimping procedures give you a consistent, leak‑free connection. Ferrules are required for certain electrical applications in Europe to pass inspection. Metal garden hoses offer long‑term durability that can offset their higher initial cost. Many municipal programs now accept recycled rubber from garden hoses, reducing landfill waste. Properly matching the ferrule size to the hose ensures optimal water pressure and prevents premature wear.

3/4" hose outside diameter
Material: Manufactured from premium brass, featuring high strength, high hardness, and excellent wear resistance

Size Coverage: 7 precisely machined jaws fit 19/32", 5/8", 21/32", 11/16", 23/32", 3/4" & 25/32" ID ferrules, covering a wide range of crimping needs without extra tools
Tighten Securely, Avoid Over‑Tightening the Washer
How do you guarantee a leak‑free hose connection without crushing the washer? First, hand‑tighten the coupling until it feels snug; this distributes pressure evenly and prevents early distortion. Then, using a 1/2‑inch hex key, turn the fitting an additional 1/4 turn—no more. This tightening technique creates a firm seal while preserving washer integrity. Before you start, inspect the washer for cracks or debris; if it’s damaged, perform a washer replacement immediately after the snug turn. Avoid overtightening, which can strip threads and compress the washer beyond its design limits. By limiting torque to the prescribed quarter‑turn, you maintain hose durability and reduce future maintenance. Use high‑quality brass couplings to ensure a reliable seal. Selecting a hose with an appropriate pressure rating further protects the connection from over‑pressurization. Longer hoses increase pressure loss, so keep hose length as short as practical to maintain performance. Understanding flow rate helps you match hose diameter to your watering needs.

Packaging Includes: 3 PCS 1/2" (12.5mm) Two-Ways brass hose mender, 6 PCS Stainless steel pipe clamps.

CONNECTION: 1/2" x 1/2" female NPT threads equal diameter hex nipple for connecting two female threaded pipes with same diameters.

Connections: 1/2” to 1/2”. Our hose barb fitting is long enough,which make sure it can insert hose but not easy to be apart. Our barb union will provide good seal when you use it to connect hose.
Test for Leaks, Then Adjust the Connection
Typically, you’ll attach the hoses to the sprinkler or nozzle, open the water fully, and watch the joint for any signs of leakage. Turn the faucet on high, then observe the dual‑hose coupling while water streams out. If droplets appear, pause, turn off the supply, and release pressure at the nozzle end. Disconnect the hoses, remove the rubber washer, and inspect gasket integrity; replace a worn gasket with pliers or a screwdriver, ensuring it seats fully inside the coupling. Re‑connect, tighten the fittings just enough to eliminate leaks, and verify connection security by retesting under full pressure. Repeat the cycle until no water escapes, confirming a reliable seal before final installation. Check for worn O‑rings that can cause leaks and replace them if necessary. Ensure the hose diameter matches the required flow rate for optimal irrigation performance. Selecting the proper hose length helps maintain adequate water pressure for extended garden zones.
Maintenance Tips for Long‑Term Dual‑Hose Performance
If you keep a regular inspection schedule—daily for high‑use setups, weekly or monthly for occasional use—you’ll spot cracks, bulges, leaks, or abrasions before they become costly failures. Follow component inspection schedules that include visual checks of the hose body, couplings, and fittings, tightening any loose connections and noting corrosion. Rotate hoses using FIFO in a controlled hose storage environment: keep them indoors, cool, dry, and out of direct sunlight. Cap ends, avoid heavy stacking, and never drag hoses over sharp edges. Flush with compatible agents, dry thoroughly, and store stretched to prevent kinks. Monitor pressure and temperature, staying below 90 % of the service rating, and open valves slowly to limit surges. These practices extend dual‑hose performance and prevent downtime.