You’ll want the Iridium Sprinkler for peak efficiency, especially when you add a Pressure Nozzle to double its range to 48 tiles. Early on, stagger Basic Sprinklers diagonally to cover 156 crops with 39 units, then switch to tightly packed Quality Sprinklers in 3×3 blocks for seamless 5‑row strips. Upgrade with Enricher for automatic fertilizer, and finish with a staggered 5×5 Iridium layout that aligns with scarecrows and greenhouse design. Keep going for deeper placement strategies.
Which Sprinkler Fits Your Farm at Each Stage?
At each farming milestone you’ll want a sprinkler that matches your plot size and crop density, so start with the Basic Sprinkler when you hit Farming Level 2, then graduate to the Quality Sprinkler at Level 6, and finally upgrade to the Iridium Sprinkler at Level 9 for maximum efficiency. The sprinkler acquisition sequence begins with the Basic, crafted from one copper and one iron bar, watering four tiles in a diagonal pattern that fits early‑game plots. When you reach Level 6, prioritize the Quality upgrade—one iron, one gold, and one refined quartz—expanding coverage to eight tiles and enabling 160 crops with twenty units. At Level 9, the Iridium Sprinkler, made from gold, iridium, and a battery pack, dominates large farms, covering twenty‑four tiles and allowing seamless, overlap‑free placement for ideal yield. The basic sprinkler pattern maximizes 200 tillable spots using 56 sprinklers, offering a cost‑effective solution for early‑game farms. Understanding the water radius of each sprinkler type is crucial for planning efficient irrigation layouts. Using greenhouse sprinkler placement ensures year‑round crops stay hydrated without manual effort.
Early‑Game Sprinkler Layout: Maximizing Basic Coverage
Kick off your early farm by staggering Basic Sprinklers in a diagonal pattern, which lets each unit water four tiles while minimizing overlap. This arrangement boosts tile connectivity, letting every sprayer cover a unique set of squares and eliminating wasted watering. Position the first sprinkler on a corner tile, then place the next two tiles down and right, continuing the diagonal line. By spacing sprinklers one tile apart, you fill gaps that a side‑by‑side line would miss, achieving resource optimization with just a handful of copper and iron bars. Test the layout on a small, dense plot—39 sprinklers can sustain 156 crops, far more than a linear setup. Pair the pattern with scarecrows for protection, and remember the early focus on tilled soil only. The basic sprinkler costs only 1 copper bar and 1 iron bar, making it affordable for early expansion. Understanding water conservation helps you make the most of every drop. Adjust the spray radius to match soil water retention rates for optimal efficiency. Properly balancing flow rate across zones ensures each sprinkler receives adequate pressure.
Mid‑Game Sprinkler Layout: Quality Placement Tips
Set your Quality Sprinklers in tight, side‑by‑side rows so each unit waters its 3×3 patch without overlap, maximizing tile efficiency as your farm expands. You’ll notice that a linear block of five sprinklers creates a seamless strip of watered tiles, while the third row trims to four, leaving a central gap for a scarecrow. This strategic sprinkler positioning respects sprinkler overlap considerations: adjacent units share borders but never double‑water a tile. Diagonal patterns break this balance, so keep everything side‑by‑side. Insert scarecrows in the middle gaps to protect crops without blocking harvest paths. Avoid sand, garden pots, or pet bowls beneath sprinklers, and remember torches can light the rows without affecting water flow. This layout scales cleanly as you add more rows and upgrades. Sprinklers function on Ginger Island, but only after you unlock the island’s farm plot with the Island Farm quest. You can also use a metal detector to confirm the exact location of underground water lines before installing new sprinklers. Always call 811 before digging to ensure safety and avoid damaging hidden utilities.
Upgrade Options to Boost Sprinkler Layout Efficiency
The Pressure Nozzle and Enricher upgrades are game‑changers for any sprinkler layout, instantly expanding range and automating fertilizer application. You attach the Pressure Nozzle to an iridium sprinkler and double its coverage from 24 to 48 tiles, watering three tiles in every direction. Pair it with the Enricher, which spreads fertilizer across the same radius, and you’ll see denser crop packing and zero manual spreading. Upgrade durability considerations matter: each sprinkler holds only one upgrade, and picking it up preserves the attachment, so plan placement carefully. Post‑upgrade maintenance is minimal—just reload fertilizer for the Enricher before each season and verify the nozzle’s range isn’t obstructed by new structures. This combo maximizes efficiency without extra labor. The Iridium Sprinkler can be layered vertically and horizontally for even larger coverage. Proper pipe sizing ensures the system maintains optimal pressure for full range. Schedule 40 PVC is commonly used in irrigation for its pressure rating and code compliance. Ensure you follow the grounding guidelines to prevent electrical hazards.
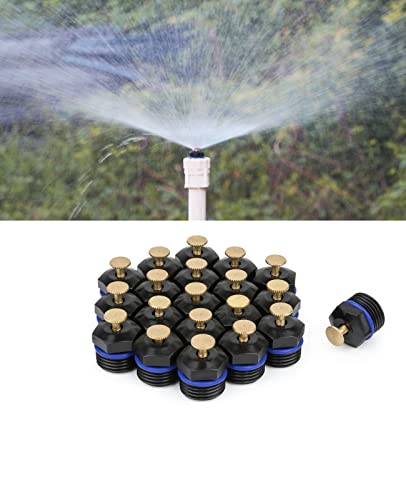
Copper Needle Fogging Nozzle: Features 360-degree spraying fogging capability with a wide coverage range for comprehensive irrigation

ZINC ALLOY IMPACT SPRINKLER HEAD: Heavy duty lawn impact sprinkler head for yard, lawn and grass Irrigation. The sprinkler head can be adjusted from full circles of 360 degrees to partial circle patterns that turn 20 degrees to 340 degrees. Adjust the spray range and radian of water to make the irrigation in the garden fun
Late‑Game Sprinkler Layout: Iridium & Pressure Nozzle Mastery
When you’ve opened the Iridium Sprinkler and equipped it with the Pressure Nozzle, the farm’s watering network transforms into a high‑efficiency grid that can cover the entire late‑game acreage with minimal overlap. You’ll arrange sprinklers in a staggered 5×5 pattern, placing each on the edge of a tillable block to avoid duplicate tiles. The Pressure Nozzle nudges the range just enough to squeeze extra columns, letting six sprinklers fully irrigate a greenhouse while preserving space for crops. Integrate scarecrow coverage, so the 249 tile protection zone aligns with your sprinkler matrix, eliminating wasted soil. This layout maximizes greenhouse layout optimization, streamlines watering, and guarantees every seed receives morning moisture without manual effort. Remember to schedule watering on the first day of fall to align with seasonal growth cycles. Selecting the appropriate sprinkler type based on soil type can further improve water distribution and reduce runoff. Properly assessing ceiling height ensures optimal sprinkler placement and compliance with fire safety standards. Understanding maximum ceiling height helps designers conform to fire protection engineering guidelines.
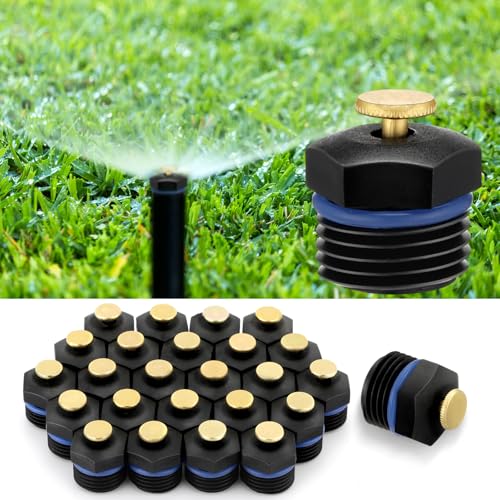
Comprehensive Pack: the package includes 30 pcs 1/2 sprinkler heads, enabling wide area coverage; The bulk pack ensures you have enough misting nozzles even for extensive irrigation schemes, delivering sustained, uniform, and effective coverage across your fields or gardens

What you will get: you will receive 10 pieces variable arc nozzles, enough for your replacements or share with friends and neighbors.


